 Baldur's Gate 3
Baldur's Gate 3 best monk build
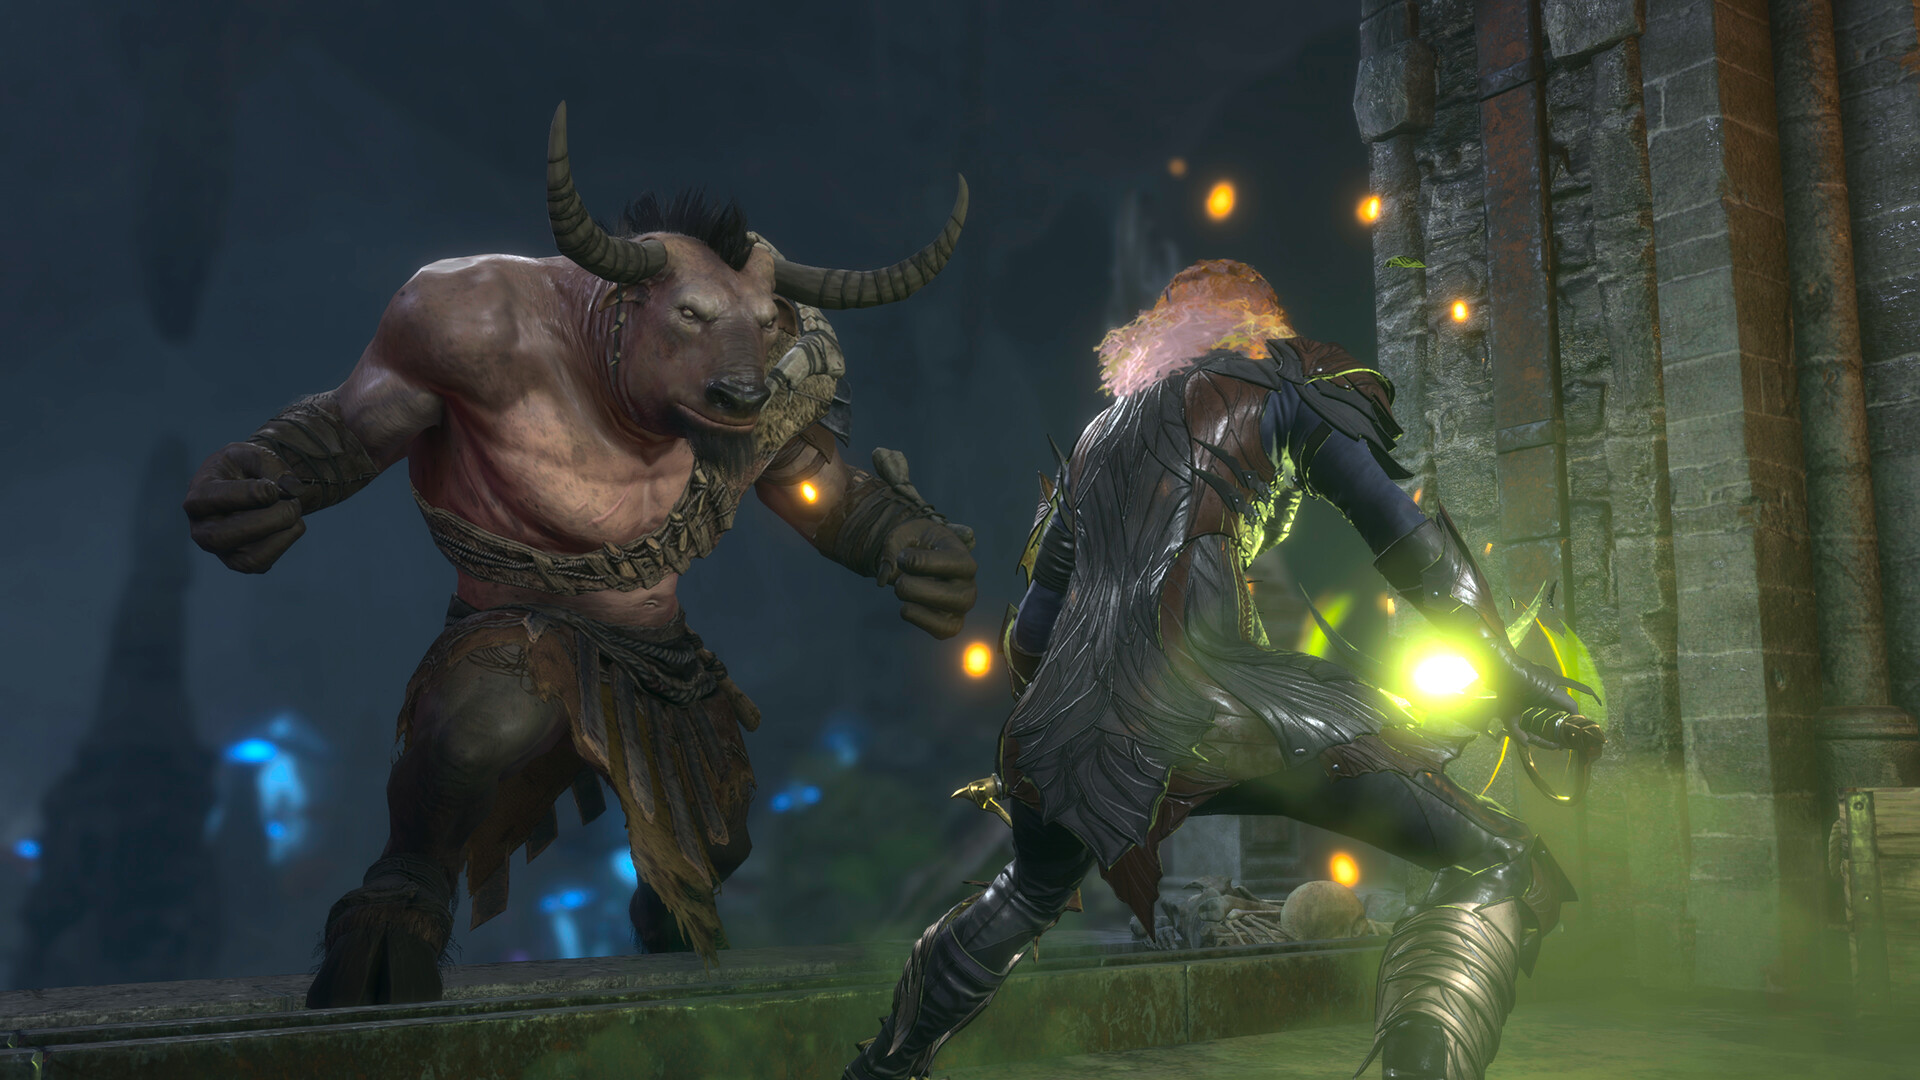
Quick Answer: The baldurs gate 3 best monk build is usually a Dexterity-first, unarmored, mobility-heavy Monk that chains Flurry of Blows, controls initiative, and deletes priority targets before they act.
Build Identity
The best monk build in Baldur’s Gate 3 is a fast, high-tempo striker that wins fights by acting first, reaching backline targets, and turning one turn into a kill window. Monks scale through mobility, action economy, and unarmored defenses rather than raw weapon damage, so the build plays like a precision assassin with enough survivability to stay in melee after the opening engage. In practice, that means you are not standing in the front line trading hits. You are cutting through vulnerable enemies, forcing concentration checks, and removing enemy casters or archers before the fight stabilizes.
This is a strong fit for the current meta because BG3 rewards burst damage, positioning, and encounter control more than slow attrition in many fights. A monk can break the rhythm of encounters in places like the Goblin Camp, Moonrise Towers, and the fight against Orin by getting to the dangerous unit first and ending the threat early. That is exactly why players searching for the baldurs gate 3 best monk build usually want a setup that is consistent from the early game through endgame rather than a gimmick that only works with perfect gear.
The default monk identity is “mobile single-target executioner,” but the class has a few flavor branches. Open Hand is the most generally efficient because it adds reliable combat utility to the core punches-and-mobility kit. Shadow Monk leans into stealth, line-of-sight abuse, and ambush openers. Four Elements trades some of the pure martial focus for niche spell-like tools, but it is usually less direct unless you specifically want elemental flexibility. For a guide centered on best overall performance, Open Hand remains the benchmark because it converts monk fundamentals into the cleanest damage and control package.
A good monk also solves a common BG3 problem: enemies that look fragile but punish slow teams. Examples include Duergar crossbows in the Underdark, enemy mages supporting fights in the Towers, and ranged threats on high ground in Act 3. Monk movement lets you collapse those angles before they snowball. You are not trying to out-tank the game; you are preventing the enemy from having a full turn cycle.
Stat Priority
Your stat priority for the baldurs gate 3 best monk build is Dexterity first, Wisdom second, Constitution third, with Strength usually left low unless you are intentionally using a specific item interaction. Dexterity drives attack rolls, initiative, Armor Class while unarmored, and general turn reliability. Wisdom helps your AC through Unarmored Defense and supports any monk features that scale from it. Constitution keeps you alive long enough to stay in melee, especially when fights force you into exposed positions or when you eat chip damage from AoE effects.
Dexterity: This is your main stat because monk damage and accuracy both reward consistent hit chance, and going early matters as much as raw output. High Dex also improves initiative, which is critical when you want to remove a caster like a Githyanki commander or a cultist support unit before they act.
Wisdom: This is your defensive and utility secondary stat because it improves unarmored AC and supports several monk abilities. It matters most when you are fighting enemies that can punish overextension, such as archers on ledges or spellcasters using control effects.
Constitution: This is your stability stat because monk durability is about surviving counterpressure after you commit. It helps when enemies survive your opening flurry and retaliate with spells, opportunity attacks, or multi-target pressure.
Strength: This is usually a dump stat for a standard monk because your damage engine does not need it. Only consider it if you are deliberately building around a niche itemization plan or a tavern-brawler-style variant, and even then you should check whether that variant actually outperforms the cleaner Dexterity route in your current setup.
Charisma / Intelligence: These are generally lower priority for combat optimization. They matter for dialogue, checks, or party composition balance, but they are not what makes the monk’s combat core function.
A practical starting spread depends on character creation and respec access, but the principle stays the same: maximize what helps you act first and hit reliably. If you are building from a fresh Act 1 start, prioritize a distribution that lets you reach strong Dex thresholds early and then layer Wisdom and Constitution through gear, feats, and later respecs. If you have access to Withers, you can tune the character more aggressively once you understand what role the monk is actually filling in your party.
The cleanest way to think about it is this: Dexterity gets you on the board, Wisdom keeps you there, and Constitution prevents a bad exchange from ending the turn cycle against you. That is the core of the build, and it is why monks feel so oppressive when they are properly tuned. They do not need to win a long war. They win the first two exchanges and force the encounter to collapse.
You might also like
- Baldur's Gate 3 baldurs gate 3 best honour mode builds
- Baldur's Gate 3 baldurs gate 3 best dual wield build
- Baldur's Gate 3 Solve the Open Hand Temple Murders: Beginner Guide
- Baldur's Gate 3 baldurs gate 3 best melee build
- Baldur's Gate 3 baldurs gate 3 best karlach build
Ability Priority
Your ability priority is to open with mobility, then spend your ki or monk resource on burst and control, and only fall back to basic attacks when a target is already crippled or when you are conserving resources for the next engagement. Monk turn order is about choosing the right pressure point, not simply pressing every glowing button as soon as it appears.
Move to the priority target The first job is reaching the enemy that most changes the fight. In Act 1 that is often a caster, crossbow user, or enemy with concentration. In Act 2 and Act 3, it is usually a support unit, healer, or boss add that creates the most board pressure.
Use your main attack action Your Attack action establishes the turn and creates the opening for follow-up pressure. On a monk, this is the baseline before you spend additional resources, because the class is strongest when it turns one opening into multiple hits rather than spreading damage across the field.
Spend Flurry of Blows when the target matters Flurry of Blows is your bread-and-butter burst tool because it converts a single engage into immediate extra pressure. Use it when you can secure a kill, force a concentration check, or remove a threat that would otherwise act next round.
Use control tools when the fight is volatile Open Hand control options and similar monk utility should be used when the enemy is dangerous enough that raw damage is not the whole answer. Knocking prone, pushing, or disabling movement is especially valuable against enemies standing near hazards, cliffs, or allied melee lines.
Reposition after the exchange If the target survives, your next priority is not standing still and hoping for a trade. Monk mobility is one of the build’s defining strengths, so use it to break line of sight, deny retaliation, or line up a safer angle for the next turn.
A good monk turn often looks like this in real play: step onto a ledge at the Goblin Camp, close distance on a shaman or archer, attack once or twice, use Flurry of Blows to finish the target, then reposition so the rest of the enemy party has to waste movement. In another fight, such as the Moonrise Towers outer skirmishes, you may instead use your mobility to reach a backline spellcaster, knock them off balance, and force the enemy formation to turn around. In Act 3, fights against heavily supported enemy groups become much easier when you use monk movement to bypass the front line and remove the unit enabling the rest of the formation.
The key principle is tempo. The monk is not just a damage dealer; it is a tempo thief. You are trying to make the opponent’s best turn happen after their most important piece is already gone. If you do that consistently, the build feels far stronger than a simple “high DPS” label suggests.
Gear and Loadout
Your gear and loadout should support unarmored defense, initiative, and on-hit pressure, because monks scale best when their equipment enhances their natural tempo instead of replacing it. The strongest loadout in Baldur’s Gate 3 is usually a mix of mobility, accuracy, and damage riders, with gear choices changing a lot between the early game and the endgame. Monks can function with surprisingly modest equipment, but the right pieces noticeably sharpen the build’s ceiling.
| Slot | Item | Reason |
|---|---|---|
| Weapon | Unarmed attacks or a monk-appropriate finesse weapon | Monks often want to preserve their class scaling and keep their action economy clean; unarmed is usually the default for the strongest setups. |
| Head | Initiative or save-support headpiece | Going first is a major part of the build’s value, especially when you are aiming to delete a key target before it acts. |
| Cloak | Defensive or mobility cloak | Any item that helps you survive after diving deep improves consistency in fights where you cannot fully disengage. |
| Chest | Unarmored-support chest piece | The monk wants gear that respects unarmored defenses rather than forcing heavy or medium armor patterns. |
| Gloves | Damage-boosting gloves | Gloves are one of the best monk damage slots because they can reinforce the build’s core attack loop. |
| Boots | Movement or positioning boots | Speed, jump, or repositioning tools directly convert into more reliable target access. |
| Amulet | Utility amulet | Good monk amulets usually offer survivability, ki efficiency, or stronger control interactions. |
| Ring 1 | Accuracy or damage ring | The build values reliable hit chance because missing a flurry is a real tempo loss. |
| Ring 2 | Secondary damage or utility ring | This slot is where you patch weaknesses, such as sustain, initiative, or situational protection. |
The exact item names change with your progress and party needs, but the loadout logic is stable. In Act 1, the best monk gear is often whatever improves your survivability without breaking your unarmored setup. That can mean choosing simple, effective items over flashy but mismatched rewards. In Act 2, you start prioritizing pieces that make your first engage decisive, especially anything that increases movement or improves the output of a burst turn. By Act 3, you can usually assemble a more complete package that rewards aggressive positioning and makes your damage cycle cleaner.
For example, if a fight gives you high ground access like the rooftops around Baldur’s Gate, movement-enhancing boots become a real force multiplier because they let you choose whether to engage, disengage, or reposition without losing a turn. Gloves that strengthen your hits matter most in fights against single dangerous enemies, such as bosses or elite commanders, because the monk’s value comes from compressing damage into a short window. Defensive slots matter more when you are diving into dense enemy formations, since monks often attract retaliatory fire once they isolate a target.
The best loadout philosophy is simple: do not force the monk to play like a fighter, paladin, or barbarian. Your gear should amplify the class’s speed, accuracy, and pressure, not turn it into a slower frontliner. If an item looks powerful but slows your plan down, it is usually the wrong fit.
Budget vs Endgame Variant
Your budget version should focus on clean movement, decent Dexterity, and any item that preserves unarmored combat flow, while the endgame version stacks initiative, burst, and defensive quality for a more oppressive opener. This distinction matters because the monk is one of the least gear-dependent classes early, but also one of the classes that benefits a lot from precise itemization later.
| Variant | Goal | What to prioritize | What to avoid |
|---|---|---|---|
| Budget starter | Stay functional through Acts 1 and early Act 2 | Dexterity, movement, survivability, simple on-hit boosts | Heavy armor, awkward weapons, gear that competes with unarmored scaling |
| Endgame | Maximize first-turn impact and kill conversion | Initiative, damage riders, strong gloves, defensive utility, mobility tools | Passive stats that do not improve turn tempo or monk action flow |
On a budget, your mindset should be practical. You do not need the perfect legendary spread to make monk work. A fresh build can already perform well with basic tools if the stat spread is correct and your play pattern is disciplined. That is especially true in BG3, where smart targeting and positioning often matter more than raw stat inflation in the early game. A budget monk can still dominate encounters like the initial skirmishes around the Roadside Cliffs, the Goblin Camp, or the lower-risk parts of the Underdark by simply reaching the right enemy first.
Examples of budget-friendly substitutes include:
- Plain unarmed play with whatever gloves or rings improve hit chance or utility.
- Simple mobility items that help you cross gaps or keep pace with mobile enemies.
- Basic defensive gear that does not interfere with your unarmored setup.
- Any accessory that grants initiative or improves concentration resistance if your party depends on you surviving after an aggressive dive.
The endgame version is about tightening every weak link. In late Act 3, monk performance improves dramatically when you can guarantee early initiative, connect your burst more reliably, and survive enemy counterplay after stepping into the middle of a fight. That matters against dangerous target patterns such as boss support stacks, summoned reinforcements, and enemy casters hiding behind frontliners. A strong endgame monk does not just hit harder. It turns the opening round into a resource denial phase for the enemy.
If you are deciding whether to respec, the rule is straightforward: budget monk is already good if the stat base is correct; endgame monk becomes exceptional when gear and positioning both reinforce the same plan.
Counters and Hard Matchups
Monks are shut down most often by control, forced movement denial, and fights where target access is heavily restricted. The class looks unstoppable when it can pick its fights, but it loses a lot of value when enemies prevent clean movement or punish isolated melee entries. That is why understanding hard matchups matters as much as selecting the right gear.
| Counter type | What shuts the build down | How to adapt |
|---|---|---|
| Hard control | Stuns, paralysis, fear, or similar lockouts | Pre-buff, prioritize saves, and avoid overcommitting without support. |
| Terrain denial | Surfaces, hazards, narrow ledges, or forced-position fights | Use alternative routes, ranged support, or delayed engage timing. |
| Focus fire | Enemies that punish deep dives with concentrated damage | Engage after the enemy spends key actions or enter with support nearby. |
| Anti-melee layouts | Backline units screened by durable frontliners | Use jump, climb, or flank routes instead of trying to walk straight through. |
A monk is most at risk when it cannot choose the angle. Fights with stacked terrain, such as ledges, dangerous surfaces, or cramped interiors, can make the difference between a clean assassination and a bad trade. Examples include encounter spaces where enemies stand behind explosive barrels, ranged units on rooftops, or narrow paths where you cannot disengage freely. In those cases, the monk should not force the same open-field script. Use the environment, wait for a better opening, or let another party member start the fight so the enemy commits first.
Another real weakness is enemy control. A monk that gets stunned, feared, restrained, or otherwise denied its action loses a large chunk of its value. This shows up against enemy casters, elite humanoids, and certain late-game threats that can disable your movement or punish you for ending a turn in the wrong zone. The fix is to respect those threats instead of assuming your mobility will always save you. Bring save support where your party composition allows it, choose engagement angles carefully, and do not dive so far that your healer or support characters cannot reach you.
Examples of hard matchups you should respect include:
- Enemy groups with multiple casters or control effects, where one bad save can erase your turn.
- Battles with limited traversal, where jumping or pathing is awkward and your main advantage is muted.
- Encounters that punish melee clustering with area damage, forcing you to choose between damage and safety.
The adaptation rule is simple: if you cannot guarantee target access, shift from pure aggression to controlled pressure. That means striking from safer angles, using the environment to reduce retaliation, and focusing on high-value targets only when the route is clear. Monk is not weak here, but it is less forgiving than in open fights where movement and initiative decide everything.
Common Mistakes
The most common monk mistakes come from treating the class like a generic melee bruiser instead of a tempo-driven striker.
Dumping Dexterity too hard
Players often do this because they chase flashy damage sources elsewhere. The fix is to keep Dexterity as the core stat so you hit, act early, and maintain consistent output.Overvaluing armor on an unarmored build
This happens when players assume more visible protection is always better. The fix is to respect Unarmored Defense and use gear that supports monk scaling instead of replacing it.Spending ki without a kill plan
New players often use Flurry of Blows just because it is available. The fix is to save burst for targets that matter, such as casters, bosses, or units about to act.Diving too deep without an exit route
This mistake comes from overestimating mobility and underestimating enemy focus fire. The fix is to enter fights with a retreat angle or a plan for where the next turn will happen.Ignoring initiative
Players sometimes focus only on damage numbers. The fix is to build for going first, because monk value rises sharply when you remove a threat before it gets a turn.Targeting the wrong enemy
This is common because frontliners are easier to reach. The fix is to ask which enemy changes the fight most, then spend your movement on that unit instead of the nearest body.
Pro Tips
The monk becomes much stronger when you treat it like a positional control class with burst damage, not just a melee DPS slot.
Tip 1. Open on the unit that breaks the enemy formation
When a fight includes a healer, controller, or high-damage archer, kill that unit first even if another target is closer. In practice, this matters in places like the Goblin Camp, Moonrise Towers, and late-game encounters where one support unit enables the entire enemy line.
Tip 2. Use elevation to shorten your route
If you can approach from above, the monk often reaches backline targets with less risk and less wasted movement. This is especially strong in vertical maps where climbing or jumping is available, because your action economy stays focused on attacking rather than pathfinding.
Tip 3. Treat Flurry of Blows as a tempo tool
Do not think of Flurry as raw damage only. It is also a way to force concentration checks, deny an enemy’s next action, or finish a target that would otherwise force your party to spend another turn on it.
Tip 4. Delay your engage if the enemy has active control
If a caster or elite enemy is clearly set up to punish melee entry, let another party member draw out that action first. Once the enemy commits to a spell or reposition, the monk can punish the opening.
Tip 5. Keep a secondary target in mind
Good monks do not overchase one enemy into a bad position. If your primary target survives, the best follow-up is often to reposition onto a second vulnerable unit rather than spending the rest of the turn in a losing exchange.
Tip 6. Fight around your initiative, not against it
If you consistently act before the enemy, build your turns to create collapse. If you do not, play more cautiously and let your party soften the board first. The monk’s ceiling comes from deciding the pace of the fight.
FAQ
Is monk the best solo class in Baldur’s Gate 3?
Monk is one of the strongest solo-style options when the player knows positioning, but “best” depends on encounter type, gear access, and how much risk you want to carry. It is excellent at deleting targets and moving around the map, though it still respects hard control and bad terrain.
Which monk subclass is best overall?
Open Hand is usually the safest recommendation for the best overall performance because it gives the cleanest mix of burst and control. Shadow Monk is stronger for stealth-centric play, while Four Elements is more specialized.
Does monk need specific gear to work?
No. Monk is playable with modest gear because the class already has a strong core loop. Better items improve ceiling, but the build functions well as long as your stats and positioning are correct.
Is Dexterity better than Strength for monk?
For the standard best monk build, yes. Dexterity is the more consistent priority because it helps offense, defense, and initiative at the same time. Strength only becomes attractive in narrower variants.
How should a monk spend turns in boss fights?
Use movement to get into the most damaging angle, spend burst on the key target, and avoid wasting resources on low-value bodies. Against bosses with support units, the support often matters more than the boss itself for the first round.
Related Guides
- Baldur's Gate 3 best barbarian build
- Baldur's Gate 3 best fighter build
- Baldur's Gate 3 best rogue build
- Baldur's Gate 3 best ranger build
- Baldur's Gate 3 best cleric build
- Baldur's Gate 3 best open hand monk build
- Baldur's Gate 3 class tier list
Sources
- https://store.steampowered.com/app/1086940/
- https://howlongtobeat.com/?q=bg3
- https://api.steambase.io/games/1086940
- https://www.protondb.com/app/1086940
- https://steamcommunity.com/stats/1086940/achievements
- https://store.steampowered.com/app/1086940/
- https://steamspy.com/app/1086940
See also
- Baldur's Gate 3 Kill Raphael's Old Enemy Beginner Guide
- Baldur's Gate 3 best hexblade build: a complete BG3 guide
- Baldur's Gate 3 baldurs gate 3 best jaheira build
- Baldur's Gate 3 Investigate the Sel nite Resistance Beginner Guide
- Baldur's Gate 3 baldurs gate 3 best halsin build
- Baldur's Gate 3 Best Healer Build
- Baldur's Gate 3 baldurs gate 3 best gale build
- Baldur's Gate 3 baldurs gate 3 best cleric build
- Baldur's Gate 3 Save the Grymforge Gnomes Beginner Guide
- Baldur's Gate 3 baldurs gate 3 best barbarian build
Screenshots



Reviewed by
BG3 Hub Editorial
Expertise: Editorial team behind BG3 Hub. Content is compiled from official patch notes, community wikis, and playthrough notes, then reviewed and updated on schedule.
Sources
Baldur's Gate 3 Classes Guides →
Browse the complete classes collection and its focused guides.
Related Guides

🔥 Popular Guides

bg3 class tier list act 1
Act 1 BG3 class tier list with S/A/B ranks, matchup flips, mistakes, tips, and an FAQ for new and returning players.
BG3 Top Baldur's Gate 3 Builds Guide
Best BG3 builds explained with roles, stats, gear, counters, budget swaps, and pro tips for any difficulty.
bg3 best builds for honor mode: Baldur’s Gate 3 Build Guide
Top BG3 Honor Mode builds, stat priorities, gear, counters, and budget options for a safer Baldur’s Gate 3 run.
Baldur's Gate 3 Class Tier List
S, A, and B class rankings for BG3 with methodology, situational flips, patch notes, mistakes, pro tips, and FAQs.
📋 Patch Notes & Updates
🛠️ Popular Tools
Frequently Asked Questions
Quick answers from the guide · click a question to expand.
Is monk the best solo class in Baldur’s Gate 3?
Monk is one of the strongest solo-style options when the player knows positioning, but “best” depends on encounter type, gear access, and how much risk you want to carry. It is excellent at deleting targets and moving around the map, though it still respects hard control and bad terrain.
Which monk subclass is best overall?
Open Hand is usually the safest recommendation for the best overall performance because it gives the cleanest mix of burst and control. Shadow Monk is stronger for stealth-centric play, while Four Elements is more specialized.
Does monk need specific gear to work?
No. Monk is playable with modest gear because the class already has a strong core loop. Better items improve ceiling, but the build functions well as long as your stats and positioning are correct.
Is Dexterity better than Strength for monk?
For the standard best monk build, yes. Dexterity is the more consistent priority because it helps offense, defense, and initiative at the same time. Strength only becomes attractive in narrower variants.
How should a monk spend turns in boss fights?
Use movement to get into the most damaging angle, spend burst on the key target, and avoid wasting resources on low-value bodies. Against bosses with support units, the support often matters more than the boss itself for the first round.
Was this guide helpful?
Rate this guide so we can improve it.
Share your own tip
Found something not in the guide? Submit it below — our editors review every tip before publishing. No account required.