 Baldur's Gate 3
Baldur's Gate 3 baldurs gate 3 best halsin build
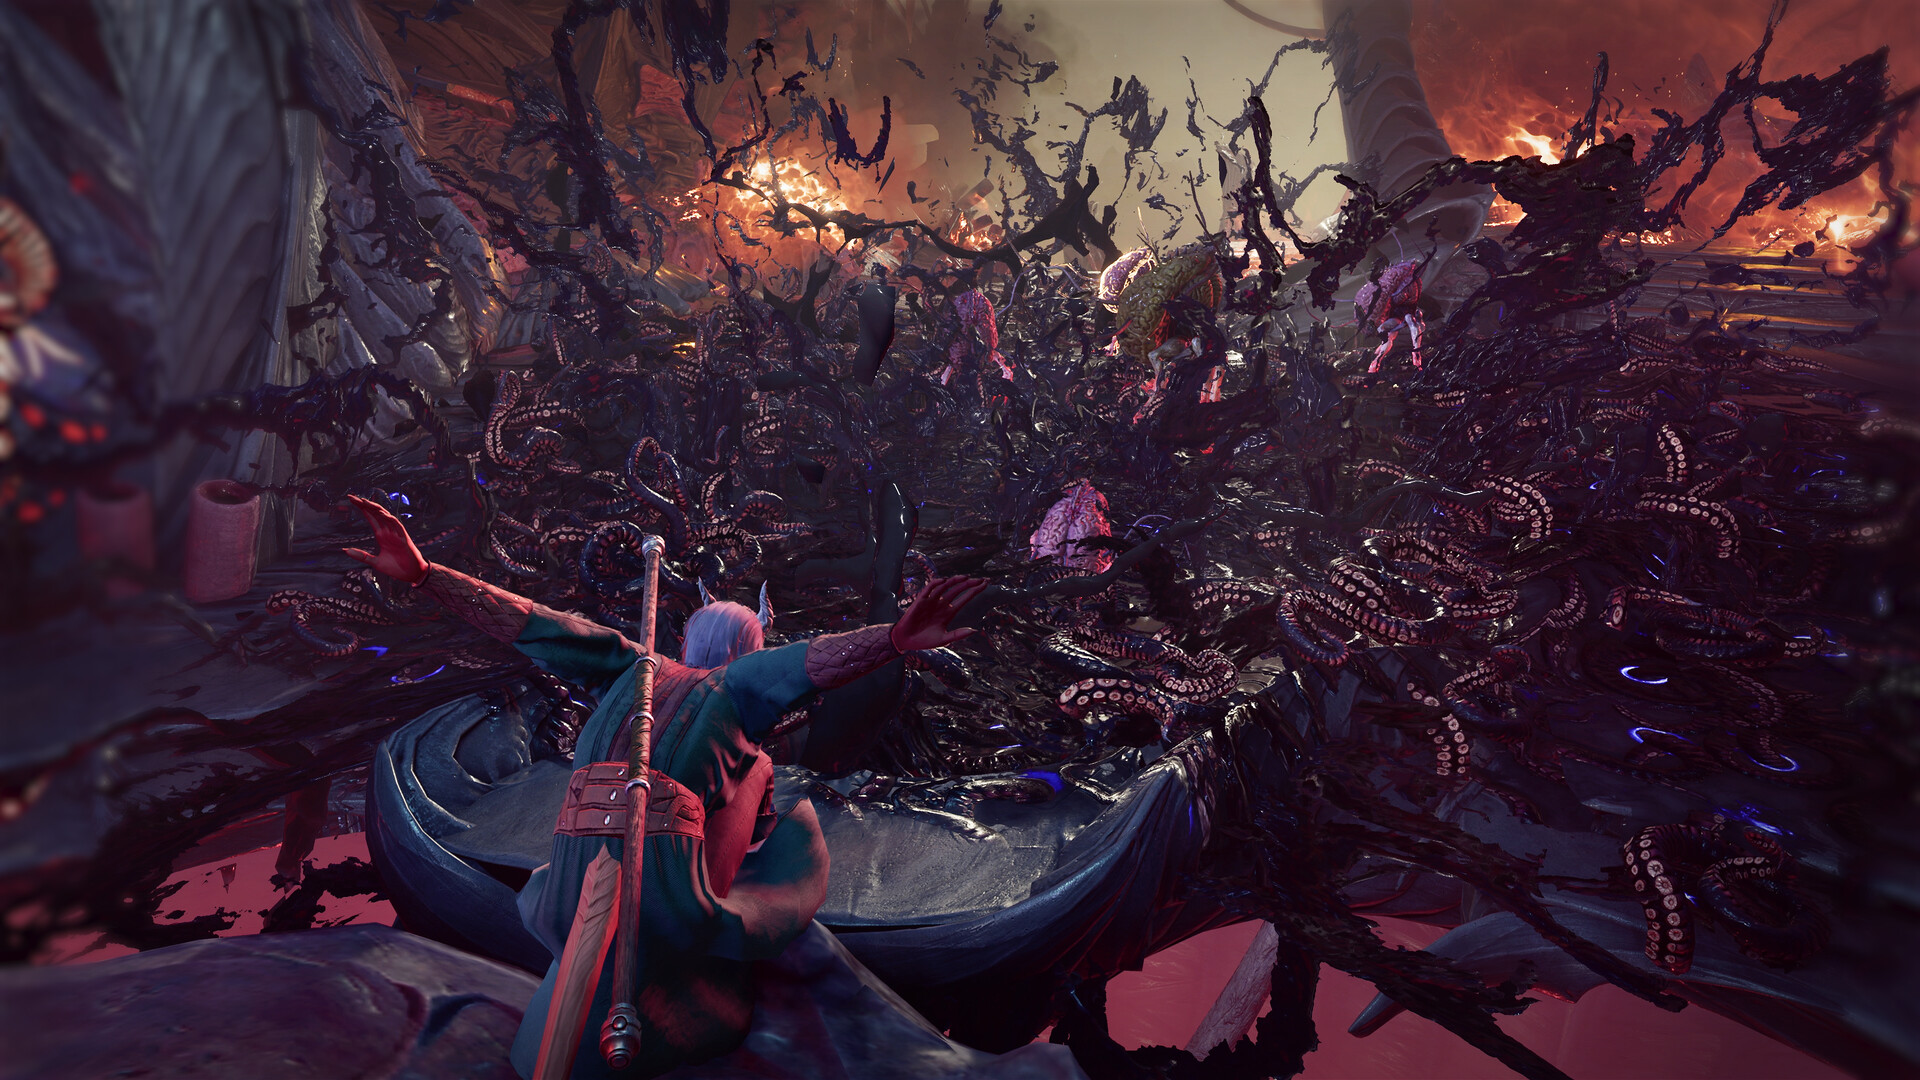
Quick Answer: The best Halsin build in Baldur’s Gate 3 is usually a durable Circle of the Moon Druid or a support-heavy Wild Shape hybrid, leaning into battlefield control, emergency tanking, and flexible spellcasting.
Build Identity
Halsin is best played as a frontline flexible controller who can swap between melee durability, area denial, and party support depending on the encounter. His value is not raw single-target burst; it is tempo control. In practical terms, the strongest Halsin build keeps him relevant in three distinct situations: opening fights with control, stabilizing when the party gets pressured, and converting safe turns into high-value Wild Shape pressure.
That makes him especially good in long, messy fights where enemy positioning matters. Examples include the goblin camp-style multi-target skirmishes, the heavily layered Moonrise Towers battles, and boss rooms where terrain or minions shape the flow of the fight. Halsin does not need to out-damage a dedicated striker such as Lae'zel or a sorcerer-style blaster. He needs to buy actions, force bad movement, and absorb punishment while the rest of the group cleans up.
If you are searching for the baldurs gate 3 best halsin build, the short version is this: build him as a Moon Druid first, not a pure summoner or a pure caster. That gives you the most complete combat profile across the whole campaign. Wild Shape lets him survive when enemies collapse onto the backline. Druid control spells such as Entangle, Spike Growth, and Sleet Storm keep enemies from reaching that backline in the first place. When a fight is already stable, he can still contribute with concentration spells, healing, and summon pressure.
The real reason this build performs well in the current meta is that Druid scales through encounter structure rather than single-button damage. Baldur’s Gate 3 repeatedly rewards flexibility: cramped interiors, vertical terrain, clustered enemies, and surprise waves all favor characters that can change roles without respec-ing mid-run. Halsin does that naturally, and he does it better than most companions once he has access to stronger Wild Shape forms and mid-to-late-game spell slots.
Stat Priority
Halsin’s best stat priority is Wisdom first, Constitution second, and Dexterity third, with the rest staying secondary unless you are deliberately steering him into a niche setup.
| Priority | Stat | Why it matters |
|---|---|---|
| 1 | Wisdom | Improves spell save DC, spell attack reliability, and the strength of core Druid control spells like Entangle and Hold Person-style utility. |
| 2 | Constitution | Keeps concentration intact on spells that decide fights, such as Spike Growth, Call Lightning, or Sleet Storm. |
| 3 | Dexterity | Helps initiative, AC, and general survivability when Halsin is not in Wild Shape. |
| 4 | Strength | Mostly irrelevant for a standard Druid path unless you are using specific gear or a transformed form. |
| 5 | Intelligence | Low priority for this build because Halsin is not here to solve skill checks through raw INT scaling. |
| 6 | Charisma | Not a combat stat for this role; dialogue utility comes from the party, not from the build core. |
Wisdom is the center of the build because Druid power in Baldur’s Gate 3 is front-loaded into control and scaling utility. A high Wisdom Halsin lands Faerie Fire, Entangle, and other disabling tools more consistently, which is what lets him dictate space rather than merely react to it. In fights against grouped enemies like goblin packs, cultist formations, or undead swarms, that reliability is the difference between a clean opener and a scramble.
Constitution is the next priority because concentration is the build’s pressure valve. If Halsin loses Spike Growth after one hit, or drops Sleet Storm before enemy melee characters are forced to waste turns, his value falls sharply. That is especially true in hard fights with ranged pressure or enemies that can close distance quickly. Examples include enemies using jump-based pathing, aggressive teleport effects, or multi-attack melee units that can focus him once they identify him as a threat.
Dexterity is useful because Halsin is often best when he acts early. Going before enemies means he can lay down terrain control before they spread out or commit to a charge. It also helps in the turns where he is not transformed. If you are not relying on heavy armor from gear or specific item interactions, Dex remains a meaningful defensive layer.
A practical stat spread for a conventional Halsin build is simple: max Wisdom as the core scaling stat, then keep Constitution strong enough to protect concentration, then round out Dexterity for initiative and survivability. You do not need to overcomplicate this with hybrid martial investment unless you are intentionally deviating into a shapeshifter or utility hybrid. This is one of those builds where overinvestment in attack stats is usually a trap.
You might also like
- Baldur's Gate 3 baldurs gate 3 best dual wield build
- Baldur's Gate 3 Solve the Open Hand Temple Murders: Beginner Guide
- Baldur's Gate 3 Kill Raphael's Old Enemy Beginner Guide
- Baldur's Gate 3 baldurs gate 3 best gale build
- Baldur's Gate 3 baldurs gate 3 best cleric build
Ability Priority
Halsin’s ability priority should favor control first, sustain second, and Wild Shape aggression third, because his most efficient turns come from forcing enemies to move badly rather than from trading basic attacks.
Entangleand similar opening control spells
Use these when enemies are clustered, moving through choke points, or approaching your backline. This is ideal in early goblin encounters and narrow dungeon rooms.Spike Growth
Drop this in corridors, bridges, doorways, or enemy approach lanes. It is one of the strongest “tempo” buttons in the kit because it punishes movement rather than relying on a save every turn.Sleet Stormor equivalent terrain denial
Use it when enemy casters, archers, or melee groups need to be delayed. It is especially good in large fights where enemies want to spread and focus priority targets.- Healing and stabilization spells
Save these for turns where the party is under immediate pressure. Do not overvalue healing as throughput; in BG3, prevention through control usually wins more fights than reactive healing. - Wild Shape after the battlefield is already controlled
Once the enemy is slowed, stuck, or forced into awkward positioning, Wild Shape becomes a conversion tool. You turn an already-favorable board state into an even harder one for the enemy to recover from.
A clean combat loop looks like this: open with terrain control, punish movement, then shift into a form that can either soak damage or finish weakened enemies. On a fight like Moonrise Towers, that often means creating a problem the enemy team has to spend turns solving before they can start dealing real damage. In more open fights, such as wilderness ambushes or camp-side skirmishes, it often means using Entangle or Spike Growth to split a formation, then sending Halsin into the weakest lane.
If you want the build to feel consistent, think in terms of encounter phases rather than single attacks. Early turns are about board control. Mid fight is about maintaining concentration and denying movement. Late fight is about converting into Wild Shape or using support casting to stabilize allies. That flow is why this companion scales so well: the build is not tied to one resource spike, so it stays useful even when an encounter runs long.
For players who prefer a more direct rotation, the priority can be summarized like this:
| Situation | Best action | Why |
|---|---|---|
| Enemies are grouped | Entangle or Spike Growth |
Maximizes value from enemy clustering and movement. |
| Enemies are rushing the party | Terrain control first | Forces wasted movement and interrupts momentum. |
| Concentration is safe | Keep control spell active | The ongoing zone is usually worth more than a low-impact attack. |
| Party is falling behind | Use healing or Wild Shape tanking | Stabilizes the fight without burning a damage slot. |
| Enemy line is broken | Shift into form and pressure exposed targets | Converts control into board dominance. |
Gear and Loadout
Halsin’s best gear loadout prioritizes spell DC, concentration protection, survivability, and utility that remains useful whether he is casting or transformed.
| Slot | Item | Reason |
|---|---|---|
| Weapon | Staff or quarterstaff with spell-focused bonuses | Keeps Halsin relevant while preserving the option to cast instead of forcing melee-only play. |
| Off-hand | Shield, if the setup allows it | Extra defense matters when Halsin is concentrating outside Wild Shape. |
| Armor | Medium armor or armor equivalent that does not interfere with the intended Druid plan | Improves survivability in caster form without forcing a martial identity. |
| Gloves | Gloves that improve spell use, concentration, or general durability | Strong gloves help the build feel stable in harder fights. |
| Boots | Mobility or positioning boots | Better positioning means better control placement and safer re-engagements. |
| Amulet | Concentration or spell utility amulet | Protects the spells that actually swing fights. |
| Ring 1 | Defensive or spell-enhancing ring | Any ring that improves consistency is better than raw flavor value. |
| Ring 2 | Utility ring | Ideal for initiative, resistance, or encounter-specific survivability. |
The most important thing about Halsin’s loadout is that the gear should support his role as a flexible controller, not force him into a false identity. A common mistake is to equip whatever looks flashy for melee and then play him like a martial bruiser. That wastes the main strengths of Druid, especially in encounters where terrain and concentration matter more than direct weapon damage.
In practical terms, you want items that improve three categories. First, anything that increases the reliability of your control spells. Second, anything that protects concentration or survivability when enemies do reach Halsin. Third, anything that helps him act before enemy momentum is fully online. That combination is what makes him feel oppressive in fights with multiple waves, such as a battlefield with reinforcements or a room with doors and chokepoints.
Examples of useful gearing logic include choosing a staff over a pure weapon damage setup when the fight demands spellcasting, wearing defensive armor before an area where you expect archers, and favoring mobility tools when you know the map has ledges, ladders, or door funnels. In a lot of BG3 content, being able to place one strong zone spell in the right place is stronger than carrying a higher weapon damage number.
You should also think about form compatibility. Gear that matters in caster form loses value once Halsin is shifted, so do not overpay mentally for bonuses that only apply to a phase you will spend little time in. The best build keeps enough non-Wild Shape value to remain useful before and after transformation. That is what separates a strong Halsin from a gimmick shapeshifter.
For comparison, here is a simple tier view of loadout priorities:
| Loadout tier | What to chase | When it matters |
|---|---|---|
| S | Spell DC, concentration, initiative | Core campaign progression and hard fights. |
| A | General defense and mobility | Nearly every encounter. |
| B | Melee damage boosts | Only when you are intentionally spending more time unshifted in combat. |
| C | Flavor-only items | Fine for roleplay, but not build-defining. |
Budget vs Endgame Variant
Halsin’s budget version is a straightforward control Druid with basic survivability gear, while the endgame version leans harder into concentration protection, stronger battlefield denial, and more reliable transformation pressure.
The budget setup is what you should use when Halsin first joins and while your party is still assembling core item synergies. In that stage, you do not need perfect gear. You need a build that works with what the campaign naturally gives you. Cheap starter substitutes include any decent staff, basic medium armor if available, and simple defensive accessories that improve AC or concentration stability. The goal is not to spike damage immediately. The goal is to keep Halsin alive long enough to make his control matter.
A solid budget path looks like this:
- Use control spells as your default.
- Keep one healing option ready for emergencies.
- Shift into Wild Shape only when the battlefield is already shaped in your favor.
- Wear the best defensive gear you can find without compromising the Druid role.
- Prioritize items that help concentration before items that look flashy on paper.
The endgame version should be tighter and more specialized. At that point, Halsin becomes much more threatening because the build can assume that you know when to cast, when to transform, and when to hold resources. Stronger equipment turns the already-good control package into a highly reliable encounter plan. He becomes much harder to remove, much better at locking enemies into bad lanes, and much more punishing when opponents ignore him.
The key difference between budget and endgame is not just raw power. It is consistency. In the budget version, you might accept a slightly weaker opening if the available gear is mediocre. In the endgame version, you are looking for a more polished combat loop: early control, stable concentration, controlled repositioning, then Wild Shape pressure or support casting depending on what the fight needs.
Examples of budget substitutions:
- A plain staff instead of a highly optimized caster weapon.
- Basic armor with decent defense instead of a perfect build-defining piece.
- General-purpose rings and amulets instead of niche synergy accessories.
Examples of endgame targets:
- Gear that improves spell reliability and concentration.
- Defensive slots that keep Halsin alive while he holds zones.
- Utility pieces that let him act earlier or reposition more safely.
This is also where player comfort matters. If you prefer a more aggressive companion, you can lean harder into transformation and treat Halsin as a secondary frontline. If you prefer a more tactical approach, keep him in caster form longer and use him as a board-control engine. Both versions are viable, but the strongest version of the build in the current meta is still the one that respects Druid identity first and melee identity second.
Counters and Hard Matchups
Halsin’s hardest matchups are enemies that break concentration, ignore terrain, or force him to spend turns reacting instead of controlling the fight.
The main threats are straightforward:
- Heavy ranged focus that can repeatedly break concentration.
- Enemies with mobility tools that bypass
Spike Growth-style zoning. - Areas where terrain denial has little value because the fight is already split or highly vertical.
- Burst-heavy encounters where Halsin is forced to Wild Shape defensively before he has established control.
- Bosses or elite enemies that punish setup turns and do not stay inside your zones.
A classic example is any fight where enemy casters and archers can pressure from safety while frontliners keep your line busy. In those fights, Halsin can get dragged into a bad exchange if you overcommit to a long concentration spell before the enemy threats are dealt with. Another example is a fight with lots of teleport-like movement or jump-heavy pathing, where an enemy can simply avoid the area you spent a turn creating. A third example is a cramped boss arena where your own party formation makes it hard to use large zones without clipping allies out of the ideal position.
The adaptation is to become more selective, not more greedy. If a fight is likely to break your concentration, use shorter-value control or shift earlier into Wild Shape. If enemies are highly mobile, use control on their landing zones rather than their starting positions. If the encounter is heavily vertical, focus on line-of-approach denial and safe body blocking instead of trying to cover the whole map.
A practical counter table:
| Threat | What it does | Best adaptation |
|---|---|---|
| Focus fire | Breaks concentration and removes your strongest spell value | Open from safer angles, use cover, or shift earlier. |
| High mobility enemies | Walk or jump around your terrain | Place zones on choke points, ladders, and likely landing areas. |
| Burst damage | Forces emergency defense before you are set up | Prioritize survival over greedy setup turns. |
| Split formations | Reduce zone value | Support the side of the fight that matters most instead of trying to cover everything. |
| Anti-melee pressure | Punishes Wild Shape commitment | Stay caster-side longer and let the party create space first. |
The important point is that Halsin does not hard lose these matchups; he just needs a different tempo. He is at his weakest when you insist on a single script for every encounter. He is strongest when you treat him as a flexible answer to map pressure. That is why the build remains strong across the campaign: it adapts cleanly to encounter structure, and BG3 rewards that more often than raw stat checking.
Common Mistakes
The most common Halsin build mistakes come from overcommitting to one half of his kit and ignoring the other half.
Treating him like a pure melee bruiser
- Why it happens: Wild Shape looks like the obvious centerpiece, so players push him toward repeated brawling.
- Fix: Use control spells first, then shift only when the fight state rewards it.
Burning concentration on the wrong spell
- Why it happens: Players want immediate impact and pick flashy zones without reading the board.
- Fix: Save your strongest concentration tools for choke points, clustered enemies, or fights where movement control matters.
Ignoring Constitution
- Why it happens: Stat planning often overvalues Wisdom and forgets that the build needs concentration to function.
- Fix: Keep Constitution high enough that one incidental hit does not delete the spell that was carrying the encounter.
Shifting too early
- Why it happens: Wild Shape feels powerful, so players transform before the battlefield is actually controlled.
- Fix: Cast first when possible; transform after the enemy is already delayed or split.
Standing in open lines of fire
- Why it happens: The build can feel tanky, so players assume Halsin can absorb everything in caster form.
- Fix: Use cover, body blocking, and safer angles so concentration does not evaporate to ranged pressure.
Trying to do everything at once
- Why it happens: Druid flexibility invites a generalist mindset.
- Fix: Decide each fight whether Halsin is a controller, a stabilizer, or a transformed frontline, then play that role for the current turn cycle.
Pro Tips
The best Halsin players in Baldur’s Gate 3 treat him like a tempo tool, not a damage stat stick.
Tip 1. Use chokepoints before damage
When a fight begins in a doorway, bridge, ladder, or hallway, open with Spike Growth or Entangle before anything else. This is stronger than trying to trade early hits because enemy movement becomes the real resource you are taxing.
Tip 2. Shift only after the enemy commits
Wild Shape is much better once enemies have already crossed into your space or spent movement trying to answer your control. If you transform too early, you lose the value of forcing them to come to you.
Tip 3. Respect concentration as a win condition
If Halsin is maintaining a spell that controls half the battlefield, protect him even if that means using another party member to body block or peel. In a lot of fights, concentration is more important than raw HP.
Tip 4. Anchor fights around enemy pathing
Look at ladders, broken walls, narrow stairs, and ledges before you act. Halsin gets much more value when his zones match where enemies are forced to travel rather than where they happen to start.
Tip 5. Use support casting when the board is already won
If enemies are pinned, slowed, or separated, do not overforce damage. Heal, reposition, or preserve resources so the next engagement begins from a stronger position.
Tip 6. Keep one turn reserved for recovery
In longer campaigns, especially across multiple encounters without full reset comfort, having one low-commitment turn available keeps Halsin from getting stuck in a bad resource trade. That might mean a basic reposition, a defensive cast, or a safer shift rather than a greedy opener.
FAQ
Is Halsin better as a Druid or a Wild Shape brawler?
He is better as a Druid first and a Wild Shape brawler second. The strongest version of the build uses spells to shape the fight, then uses Wild Shape to capitalize on that control.
What Circle is best for Halsin?
Circle of the Moon is usually the best fit because it supports his strongest identity: flexible frontline pressure with strong transformation value.
Should Halsin focus on healing?
He should carry healing tools, but healing is not his main job. In most fights, control and positioning are higher-value uses of his turns than spamming recovery.
Can Halsin work without optimal gear?
Yes. The build functions well on budget gear because its core power comes from spell choice, concentration, and encounter control rather than from a specific weapon package.
Is Halsin good in harder difficulty runs?
Yes. His flexibility scales well in harder fights because he can absorb pressure, create zones, and adapt his role depending on how the encounter develops.
Related Guides
- Best Baldur's Gate 3 Druid Build
- Best Circle of the Moon Build
- Best Companion Builds in Baldur's Gate 3
- Best BG3 Support Build
- Best BG3 Tank Build
- Best BG3 Control Build
Sources
- https://store.steampowered.com/app/1086940/
- https://howlongtobeat.com/?q=bg3
- https://store.steampowered.com/app/1086940/
- https://www.protondb.com/app/1086940/
- https://steamcommunity.com/stats/1086940/achievements
See also
- Baldur's Gate 3 Investigate the Sel nite Resistance Beginner Guide
- Baldur's Gate 3 baldurs gate 3 best barbarian build
- Baldur's Gate 3 Save the Grymforge Gnomes Beginner Guide
- Baldur’s Gate 3 Best Astarion Build Guide
- Baldur's Gate 3 Steal a Githyanki Egg Beginner Guide
- Baldur's Gate 3 Investigate the Suspicious Toys Beginner Guide
- Baldur’s Gate 3 How to Steal the Sacred Idol: Beginner Guide
- Baldur's Gate 3 Rescue the Trapped Man Beginner Guide
- Baldur's Gate 3 How to Rescue the Grand Duke Beginner Guide
- Baldur's Gate 3 Gloves of Soul Catching Beginner Guide
Screenshots


Reviewed by
BG3 Hub Editorial
Expertise: Editorial team behind BG3 Hub. Content is compiled from official patch notes, community wikis, and playthrough notes, then reviewed and updated on schedule.
Sources
Baldur's Gate 3 Classes Guides →
Browse the complete classes collection and its focused guides.
Related Guides

🔥 Popular Guides
Baldur's Gate 3 Ceremonial Practices for Initiate Umberlants
Book guide to Ceremonial Practices for Initiate Umberlants, including what it is, where to find it, and how it compares to ritual spells.
Baldur's Gate 3 areas hidden missed act 2
Find the hidden and easily missed Act 2 areas in BG3, including Reithwin Town, Moonrise Towers, and the Shadowfell point of no return.
Baldur's Gate 3 How to Get to Moonrise Towers
Fast route to Moonrise Towers in BG3, including shadow curse protection, route steps, pitfalls, and verification.
Baldur's Gate 3 achievements Guide
Complete BG3 achievements guide with rarest unlocks, missables, hidden trophies, and the best route to 100%.
📋 Patch Notes & Updates
🛠️ Popular Tools
Frequently Asked Questions
Quick answers from the guide · click a question to expand.
Is Halsin better as a Druid or a Wild Shape brawler?
He is better as a Druid first and a Wild Shape brawler second. The strongest version of the build uses spells to shape the fight, then uses Wild Shape to capitalize on that control.
What Circle is best for Halsin?
Circle of the Moon is usually the best fit because it supports his strongest identity: flexible frontline pressure with strong transformation value.
Should Halsin focus on healing?
He should carry healing tools, but healing is not his main job. In most fights, control and positioning are higher-value uses of his turns than spamming recovery.
Can Halsin work without optimal gear?
Yes. The build functions well on budget gear because its core power comes from spell choice, concentration, and encounter control rather than from a specific weapon package.
Is Halsin good in harder difficulty runs?
Yes. His flexibility scales well in harder fights because he can absorb pressure, create zones, and adapt his role depending on how the encounter develops.
Was this guide helpful?
Rate this guide so we can improve it.
Share your own tip
Found something not in the guide? Submit it below — our editors review every tip before publishing. No account required.