 Baldur's Gate 3
Baldur's Gate 3 Guide Walkthrough
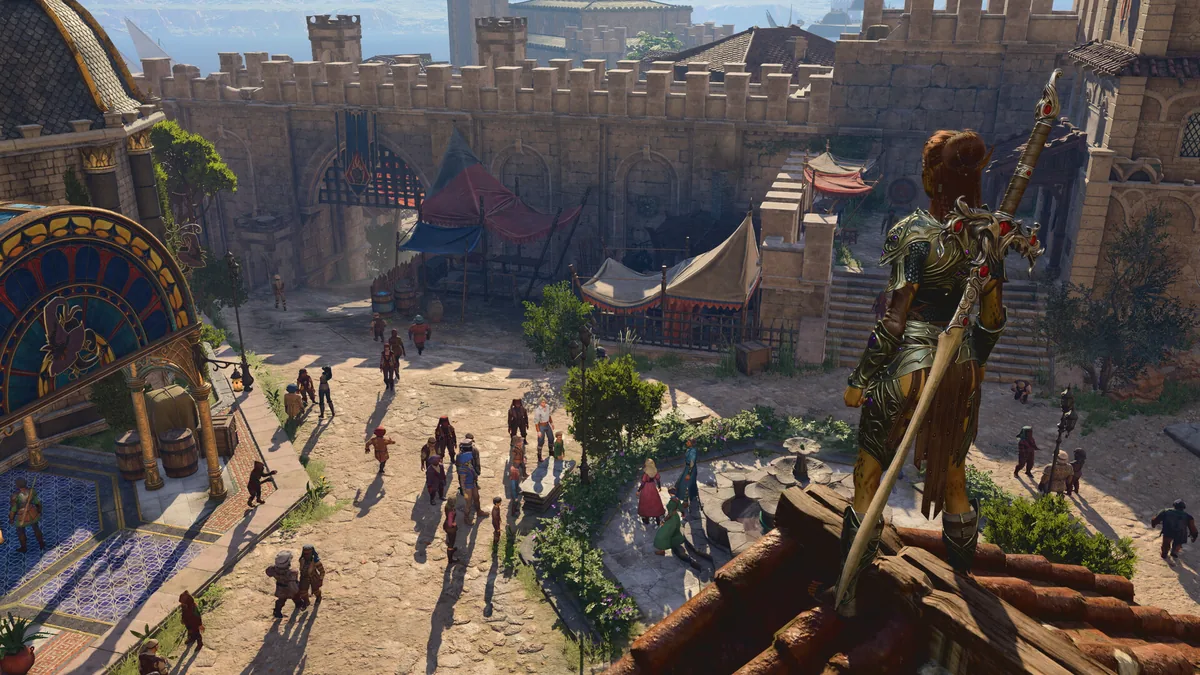
Quick Answer: This baldurs gate 3 guide walkthrough takes you through a reliable full-run route, the hardest fights, key rewards, and missable content so you can clear the campaign with strong quest sequencing and fewer lockouts.
Prerequisites
You do not need a perfect build to finish Baldur’s Gate 3, but you do need a party that can cover dialogue, scouting, crowd control, burst damage, and emergency healing. The game is a party-based RPG set in the world of Dungeons & Dragons, so your route is easier when you build around encounter structure rather than trying to brute-force every fight. Baldur’s Gate 3 is also a story-rich RPG where choices matter, which means your setup should account for conversation outcomes, companion approval, and quest branching rather than only combat power. Source
- Level target: Enter each major act with a coherent power spike, not a random spread of abilities. By the time you face act-defining bosses, your party should have access to multi-target control, a dependable front line, and at least one character that can solve exploration problems with stealth or mobility.
- Equipment: Prioritize weapons and armor that stabilize your action economy. Examples include a reach or two-handed weapon for a frontliner, a shield and defensive gear for a tankier support, and ranged options such as bows or hand crossbows for consistent chip damage.
- Party composition: A balanced core works best in a blind walkthrough. Good examples are a martial frontliner like Lae'zel or Karlach, a support or controller like Shadowheart or Gale, a face character like Astarion or your custom protagonist, and a flexible damage dealer who can swap between ranged and melee pressure.
- Difficulty: Balanced is the safest blind-clear setting, while Tactician and Honor-style play demand tighter resource management, more pre-buffing, and better positioning. On higher difficulties, every bad initiate or wasted long rest compounds into later attrition.
- Consumables: Keep potions of healing, speed, antitoxins, scrolls of Misty Step, and surface-control items such as alchemist’s fire or grease. These are not filler; they are fight-swinging tools when a boss encounter punishes bad terrain or a surprise reinforcement wave.
- Party planning: Keep one character with high Perception for traps and hidden paths, and one character with strong Charisma for merchant discounts and critical dialogue checks. In practice, that means a Ranger, Rogue, Bard, Sorcerer, Paladin, or Warlock-style face all perform well.
The biggest mistake new players make is treating Baldur’s Gate 3 like a pure combat gauntlet. It is really a route-management game with combat attached. Your preparations should respect quest order, resting cadence, and companion availability, because some choices close doors permanently while others move a questline forward in a way you cannot undo. If you are using this baldurs gate 3 guide walkthrough as a first clear reference, think in terms of keeping options open until you know which faction, companion, or region-specific reward matters most to your party.
Step-by-Step Route
The safest full-route path is to clear each area in a way that preserves experience, major companions, and key quest rewards before advancing to the point of no return. Baldur’s Gate 3 rewards exploration, but not every side route should be done immediately, especially when a main story trigger can lock out NPCs or alter a region. The sequence below is written for a stable blind run and favors low-risk quest order over absolute optimization.
1. Build your Act 1 foundation before committing to faction lines
Start by stabilizing your camp, recruiting your early party, and clearing the immediate map around the crash zone and nearby settlements. Early examples include the nautiloid aftermath, the Emerald Grove area, and the first encounters around the Wilderness. Recruit characters as soon as they become available, because companion utility matters more than perfect solo damage at this stage. In practical terms, that means taking Shadowheart early for healing and utility, Lae'zel for front-line pressure, Astarion for locks and traps, and Gale if you want ranged burst and broad spell coverage.
Your route priority should be simple: unlock the camp, gather your core companions, then clear the local side content that has obvious reward density. Do not rush toward major faction confrontation before you have a stable resource loop. Use dialogue to keep access open where possible, because Act 1 contains multiple mutually disruptive outcomes that can influence later availability of traders, companions, and quest chains.
2. Clear the Grove and surrounding wilderness in a controlled order
The Emerald Grove line is one of the most important early decision points, so do not treat it as a single fight. Complete the surrounding wilderness content first if you want more experience and more context for the faction conflict. That usually means handling nearby bandit camps, hidden cave spaces, ruins, and optional character quests before you hard-commit to either side of the druid-goblin conflict.
A good rule is to secure XP from self-contained content before talking your way into a major resolution. Examples include the Overgrown Ruins, the Owlbear-related encounter chain, and side interactions tied to the grove’s internal politics. This approach gives your party more levels and more tactical tools before you commit to the larger battle that can change vendor access and companion states.
3. Use the Underdark as your Act 1 power spike
The Underdark is a major route branch, not optional fluff. It gives you strong loot, additional experience, and a path to more advanced encounter types that teach you how the game expects you to manage verticality, line of sight, and environmental danger. If you arrive underleveled, the area can feel punishing; if you arrive prepared, it becomes one of the best ways to stabilize your midgame power curve.
Move through the Underdark methodically: scout with stealth, avoid unnecessary multi-angle pulls, and use high-ground or chokepoint fights whenever possible. Notable examples of this area’s value include the Myconid-related quest network, the duergar pressure points, and the transitions that feed into later act progression. This is also a good place to pick up gear that materially improves your damage or survivability compared with early surface loot.
4. Resolve Act 1 companion and faction quests before crossing major thresholds
Before moving into the next act, finish the companion arcs and side objectives you actually care about. Baldur’s Gate 3 is built around permanent consequence, and some questlines become unavailable once you push the wrong progression flag. If you want the widest choice set, keep an eye on conversations tied to Wyll, Karlach, Astarion, Gale, Shadowheart, and Lae'zel, because their outcomes can affect both combat strength and later story resolution.
The practical route here is to clear obvious companion scenes whenever they appear at camp, then do region-specific quests before advancing the main story. For example, rescue-style objectives, hidden recruitments, and faction negotiation outcomes should happen before you jump through a major story gate. This prevents the classic first-playthrough problem where a player wins the next zone only to discover they skipped a unique reward or lost a companion branch.
5. In Act 2, prioritize light, travel, and objective safety
Act 2 is where route discipline matters most, because the environment itself becomes part of the challenge. Darkness, shadow pressure, and navigation constraints force you to think about light sources, protective effects, and how far your party can move before becoming exposed. Begin by securing traversal stability and then work outward from safe points toward the major story objectives.
Quest order should prioritize access restoration, not raw aggression. If you see an objective that threatens to hard-lock a region, do the nearby side content first. Examples of useful priorities are freeing useful NPCs, stabilizing your base of operations, and handling smaller cult or undead clusters before the main tower and temple-related encounters. This act rewards characters with Misty Step, ranged punish tools, and effects that can reposition enemies into dangerous terrain.
6. Prepare for the act-defining boss sequence instead of rushing it
The major Act 2 culmination is one of the first places where underprepared parties get exposed. Do not enter those encounters with drained spell slots, half-broken positioning, or a party configuration that cannot answer adds and terrain hazards at the same time. Finish side exploration first, rest cleanly, and bring enough consumables to recover from a failed first attempt without needing to reload hours of progress.
This is also where you should start using scrolls and elixirs more aggressively. Baldur’s Gate 3 is not a game that punishes item use in the way some RPGs do; it punishes hoarding items until they become irrelevant. If you know the next boss has summons, area denial, or a moving arena, stock tools accordingly.
7. In Act 3, solve the city like a web of linked quests, not a checklist
Act 3 is less about survival and more about sequencing. The city is dense with overlapping questlines, faction outcomes, companion resolutions, and optional bosses. The best route is to pick one cluster at a time, resolve it, and then move to the next cluster rather than wandering randomly between districts. That keeps your mental map clean and reduces the chance of triggering a quest state before its associated rewards are secured.
Examples of smart clustering include companion quest resolution, major political or faction threads, and the city’s high-value side areas. Keep a close eye on NPC dialogue because some conversation choices can alter which rewards, allies, or endings remain available. If your goal is a smooth completion rather than a perfect roleplay outcome, avoid unnecessary escalation until you have exhausted the local quest chain for rewards and experience.
8. Save the endgame decision-making for after you secure the best version of your party
Do not lock in the finale until you have resolved companion arcs, vendor priorities, and any optional endgame resources you want to bring forward. The final stretch is mostly about whether you have built enough redundancy into your party. If one character can heal, one can control, one can tank, and one can burst, the finale becomes manageable even on harder settings.
At this point, the walkthrough is less about exploration and more about execution. Keep your strongest potions, scrolls, and short-rest recovery tools for the last major sequence. If your route has been disciplined, the closing battles should feel like a test of consistency rather than a panic check.

You might also like
- Baldur's Gate 3 patch 8 release date: Patch Notes Explained
- baldurs gate 3 how to get lae'zel down: Beginner Guide for New Players
- Baldur's Gate 3 How to Open Gilded Chest: Beginner Guide
- baldurs gate 3 tips and tricks for beginners
- baldurs gate 3 how to get owlbear cub Beginner Guide
Hardest Encounters
The hardest encounters in Baldur’s Gate 3 are the ones that combine terrain pressure, summons, and action economy denial, because those fights punish both positioning mistakes and resource mismanagement. On a first clear, the challenge is rarely raw enemy damage alone. It is the way the game stacks initiative variance, environmental hazards, and layered objectives so that a normal-looking fight becomes a wipe if you waste your opener.
| Encounter type | Why it is hard | Reliable tactic |
|---|---|---|
| Multi-wave boss fights | Extra enemies compress your turns and overwhelm isolated targets | Open with crowd control, then delete support units before focusing the boss |
| Shadow-heavy Act 2 battles | Limited visibility and movement punish poor route planning | Bring light, mobility, and ranged pressure to stay on favorable ground |
| High-ground ambushes | Enemies gain positional advantage and ranged tempo | Pre-scout with stealth, then split aggro with summons or familiar bodies |
| Fights with reinforcements | New enemies convert a manageable fight into attrition | Save burst for the turn reinforcements arrive, not only for the opener |
| Arena or environment hazards | Forced movement or surfaces can break formation | Use jump, shove, Misty Step, and doors/chokepoints to control space |
One of the hardest patterns is the fight where the boss is not the real problem. In Baldur’s Gate 3, that usually means an encounter with casters or summoned adds behind the primary target. Examples include battles in which the enemy backline maintains buffs while the front line locks you in place, or a boss arena with vertical separation that makes your melee units waste turns moving. The correct response is usually not to tunnel the boss. It is to remove the units enabling the boss first, then collapse the field.
Another difficult pattern is the “you cannot play fair” fight. That includes shadow-dominated spaces, cramped interiors, and fights where your party starts split. In those cases, pre-positioning matters more than build novelty. Enter with protective effects already active, keep your healer and controller safe, and do not burn movement on cosmetic repositioning. If a fight looks like it will spawn reinforcements, stop treating damage as the only win condition. Use control spells, consumables, and terrain to reduce the number of active enemies.
The final category is the encounter that punishes greed. A player sees a nearly dead enemy and starts chasing, only to get caught by an opportunity attack, explosion, or add wave. This is where a clean baldurs gate 3 guide walkthrough mindset helps: win the board state first, then take the kill. If you are on a harder difficulty, the correct play is often to spend a resource to guarantee tempo rather than saving that resource for a theoretical later fight that may never be more dangerous than the current one.
Rewards and Loot
The best rewards in Baldur’s Gate 3 are not just gold and weapons but unlocks that improve future routing, companion resolution, and combat consistency. A strong walkthrough should treat every meaningful fight and quest turn-in as both an XP source and a route unlock, because the value of an encounter is often bigger than its immediate loot window.
Baldur’s Gate 3 is also a highly successful RPG on the market, which helps explain why so many players build detailed route plans around it. The game’s Steam page describes it as a story-rich, party-based RPG in the universe of Dungeons & Dragons, and that design shows up directly in how rewards are structured: quest completion often changes who lives, who joins, and what options remain later. Source
| Reward type | Examples | Why it matters |
|---|---|---|
| Combat gear | Rare weapons, armor, shields, and accessories | Raises damage, defense, or utility in a way that affects future encounters |
| XP gains | Boss clears, exploration, dialogue, and quests | Unlocks stronger spells, feats, and class features |
| Route unlocks | New travel paths, companion access, faction standing | Expands what content remains available in later acts |
| Consumables | Potions, elixirs, scrolls, grenades | Solves specific tactical problems without requiring a respec |
| Story rewards | Companion progression, unique scenes, and endings | Changes the long-term value of decisions and quest order |
Some of the most valuable rewards are hidden behind side content that players skip because they chase the main objective too hard. Examples include gear from optional underground zones, rewards tied to companion approval, and faction outcomes that produce better vendor access later. In a full clear, the practical value of a reward is not only its immediate stats but whether it lets you skip a difficult check, preserve a spell slot, or enter the next zone with a better combat baseline.
Loot planning should also be tied to who in your party can use it best. A melee weapon that looks strong on paper may be less valuable than a defensive amulet on your concentration caster, because preserving a key spell often swings an entire fight. Likewise, a scroll of Misty Step or a mobility potion can be stronger than a modest damage upgrade if your route includes terrain-heavy encounters. That is the proper way to evaluate rewards in a baldurs gate 3 guide walkthrough: by downstream impact, not just item rarity.
Missables
The most important missables in Baldur’s Gate 3 are companions, faction outcomes, quest rewards, and location-based scenes that disappear once you advance the wrong main story trigger. This game is generous about exploration but strict about progression order, so a blind run can lose meaningful content simply by moving forward too early.
- Companion recruitment windows: Some companions and companion states can be missed, altered, or lost if you ignore their early scenes or resolve their associated conflict in the wrong way. Examples include early recruitment opportunities and camp scenes tied to approval.
- Faction resolution rewards: If you side too early or push a conflict to its conclusion, the opposing route may shut out traders, quests, and unique outcomes. The Emerald Grove-style conflict in Act 1 is the clearest example of this kind of permanent branching.
- Region lockouts: Advancing past a major act threshold can close exploration in earlier zones. If you still have unexplored caves, hidden traders, or side bosses, finish them first.
- Companion quest endings: Character arcs can produce different end states depending on what you did earlier. Examples include whether a companion remains aligned with you, changes allegiance, or gains access to a unique resolution.
- Unique dialogue scenes: Some story beats only happen if you arrive with the right companion present, the right item equipped, or the right prior flag completed. If you rush through a zone once, those scenes may never come back.
- Optional boss rewards: A number of the game’s strongest items and story bits are tied to side bosses that can be bypassed accidentally. If the map suggests a hidden route or a suspiciously isolated chamber, clear it before advancing the main quest.
The safest way to protect against missables is to make your own soft checklist before entering each act’s main turning point. Ask three questions: have I recruited the companions I care about, have I resolved the local faction conflict, and have I cleared the hidden or underground areas on the map? If the answer is no, stop pushing the main line. Baldur’s Gate 3 rarely rewards rushing in a first clear, because the biggest losses are not deaths but content states you never see again.
Common Mistakes
Most failed first runs come from a small set of repeatable errors, and the fix is usually routing discipline rather than mechanical skill.
- Overcommitting to the main quest too early: Players do this because the story is urgent and the game pushes them forward. The fix is to clear nearby side content first, especially any companion or faction quests in the current act.
- Ignoring party balance: New players often stack damage dealers and then get stuck in attrition fights. The fix is to keep one controller, one durable frontliner, one healer or support, and one flexible damage slot.
- Long resting without checking quest pressure: Players rest as a habit and accidentally advance state-sensitive events. The fix is to review camp scenes and quest urgency before spending resources on a long rest.
- Tunneling the boss instead of the board state: This happens because boss HP is the most obvious target. The fix is to remove summoners, casters, and reinforcements first when the arena demands it.
- Forgetting consumables: Players hoard potions and scrolls until the campaign ends. The fix is to use them on hard encounters, especially mobility tools and crowd-control scrolls.
- Walking into unexplored rooms blind: This is common because players trust the camera and movement speed. The fix is to scout with stealth, keep formation tight, and check for traps or height advantage before committing.
- Skipping companion dialogue: Players focus on combat and miss approval or quest triggers. The fix is to speak with companions at camp after major events and keep the relevant character in the party when entering their zone.
Pro Tips
The best advanced play in Baldur’s Gate 3 comes from converting small advantages into consistent tempo across the whole act.
Tip 1. Open fights from high ground whenever possible
If your party can start above the enemy, do it. High ground improves ranged consistency and often makes the first round decisive, especially when you combine it with stealth or surprise. Examples include ledges near outdoor camps, elevated ruin platforms, and any room where a staircase lets you force enemy pathing.
Tip 2. Use summons to absorb bad tempo
If an encounter looks like it will eat your action economy, deploy a summon, familiar, or temporary body before committing your main line. This is especially useful against enemies that love opportunity attacks, area denial, or forced target swapping. A throwaway body can buy the turn you need to reposition Gale, Shadowheart, or your own controller.
Tip 3. Treat Misty Step as route insurance, not just a mobility spell
Misty Step solves verticality, terrain traps, and split-party openings. Keep at least one source available through a scroll, item, or spell slot when you know the next area has ledges, locked rooms, or environmental hazards. The spell often matters more for survival than for offense.
Tip 4. Save your concentration for the spell that changes the board
Do not concentrate on a minor effect when a major control spell is available. In practice, that means using the right spell for the fight: crowd control against clustered enemies, protection when your front line is under pressure, and offensive setup only when the enemy cannot punish you immediately.
Tip 5. Speak to merchants after major clears
A lot of players miss the best upgrade timing because they shop too early. After a major quest turn-in, revisit vendors to check for new stock and updated prices. The difference between entering the next zone with standard gear and entering it with a meaningful upgrade can be the difference between a clean win and a resource drain.
Tip 6. Keep one character built for conversation
A strong face character lets you avoid unnecessary combat, secure better outcomes, and preserve resources. That can be a Paladin, Bard, Sorcerer, Warlock, or a custom build with high Charisma. In a blind run, the face role is not optional polish; it is route control.
FAQ
Should I play Baldur’s Gate 3 blind or follow a guide?
A blind first run is viable, but a walkthrough helps if you want to avoid missables and bad quest order. The game is designed around branching outcomes, so a guide is most useful for major act transitions and companion content.
What is the safest party composition for a first run?
The safest composition is one durable melee character, one healer or support, one ranged caster, and one rogue-like utility slot. That covers damage, survival, locks, traps, and conversation without over-specializing.
When should I use long rest?
Use long rest when your spell slots, class resources, and healing tools are too depleted to handle the next fight safely. Do not sleep blindly if you still have sensitive camp events or urgent companion scenes to resolve.
Which act has the hardest fights?
Act 2 usually punishes new players the most because of visibility, terrain, and objective pressure. Act 3 has more complex quest states, but Act 2 is where unprepared parties most often collapse.
Can I miss companions permanently?
Yes. Some companions are easiest to recruit early, and some quest resolutions can change whether they remain available. The safest approach is to recruit anyone you care about as soon as the game makes that possible.
Related Guides
- Baldur's Gate 3 Best Beginner Classes
- Baldur's Gate 3 Companions Guide
- Baldur's Gate 3 Best Builds
- Baldur's Gate 3 Act 1 Walkthrough
- Baldur's Gate 3 Act 2 Walkthrough
- Baldur's Gate 3 Act 3 Walkthrough
- Baldur's Gate 3 Missable Quests
- Baldur's Gate 3 Boss Guide
Sources
- https://store.steampowered.com/app/1086940/
- https://en.wikipedia.org/wiki/Baldur's_Gate_(video_game)
See also
- baldurs gate 3 how to get to the underdark: Beginner Guide
- Baldur’s Gate 3: how to baldurs gate 3 cross play for beginners
- baldurs gate 3 beginner class reddit: Beginner Guide for New Players
- Baldur’s Gate 3 baldurs gate 3 how to save mayrina Beginner Guide
- baldur's gate 3 vs elden ring: which should you play?
- baldurs gate 3 how to recruit minthara: Beginner Guide for New Players
- baldurs gate 3 how to free shadowheart: Beginner Guide
- Baldur’s Gate 3 beginner tips reddit: A Complete Beginner Guide
- baldurs gate 3 best class for beginners: A Beginner Guide to Starting Strong
- Baldur's Gate 3 Guide PDF Walkthrough
Screenshots



Reviewed by
BG3 Hub Editorial
Expertise: Editorial team behind BG3 Hub. Content is compiled from official patch notes, community wikis, and playthrough notes, then reviewed and updated on schedule.
Sources
Related Guides

%27/><stop offset=%271%27 stop-color=%27hsl(80,50%,18%)%27/></linearGradient></defs><rect width=%27460%27 height=%27215%27 fill=%27url(%23g)%27/><text x=%27230%27 y=%27115%27 text-anchor=%27middle%27 font-family=%27sans-serif%27 font-size=%2724%27 font-weight=%27700%27 fill=%27rgba(255,255,255,0.85)%27>App 1086940</text><text x=%27230%27 y=%27142%27 text-anchor=%27middle%27 font-family=%27sans-serif%27 font-size=%2711%27 fill=%27rgba(255,255,255,0.6)%27>no image yet</text></svg>)
🔥 Popular Guides
How to Cool Off Karlach in Baldur's Gate 3 — Infernal Engine Fix
Cool off Karlach in Baldur's Gate 3: fix her infernal engine overheating, romance approval gates, Act 1–3 steps, and what happens if you ignore it.

Best Shadowheart Build BG3 — Free Her, Trickery Cleric & Romance
Free Shadowheart on the Nautiloid, then run the best Trickery Cleric build. Pod rescue steps, approval tips, romance gates, and Act 1–3 skill picks.
BG3 Best Baldur's Gate 3 Characters Tier List
Rank the best Baldur's Gate 3 characters with S/A/B tiers, matchup callouts, methodology, and patch notes for smarter party picks.
Baldur's Gate 3 elden ring let me solo her build
Solo BG3 build guide for a high-survivability, first-turn-dominant playstyle with stats, gear, counters, and budget options.
📋 Patch Notes & Updates
🛠️ Popular Tools
Frequently Asked Questions
Quick answers from the guide · click a question to expand.
Should I play Baldur’s Gate 3 blind or follow a guide?
A blind first run is viable, but a walkthrough helps if you want to avoid missables and bad quest order. The game is designed around branching outcomes, so a guide is most useful for major act transitions and companion content.
What is the safest party composition for a first run?
The safest composition is one durable melee character, one healer or support, one ranged caster, and one rogue-like utility slot. That covers damage, survival, locks, traps, and conversation without over-specializing.
When should I use long rest?
Use long rest when your spell slots, class resources, and healing tools are too depleted to handle the next fight safely. Do not sleep blindly if you still have sensitive camp events or urgent companion scenes to resolve.
Which act has the hardest fights?
Act 2 usually punishes new players the most because of visibility, terrain, and objective pressure. Act 3 has more complex quest states, but Act 2 is where unprepared parties most often collapse.
Can I miss companions permanently?
Yes. Some companions are easiest to recruit early, and some quest resolutions can change whether they remain available. The safest approach is to recruit anyone you care about as soon as the game makes that possible.
Was this guide helpful?
Rate this guide so we can improve it.
Share your own tip
Found something not in the guide? Submit it below — our editors review every tip before publishing. No account required.