 Baldur's Gate 3
Baldur's Gate 3 Walkthrough Guide
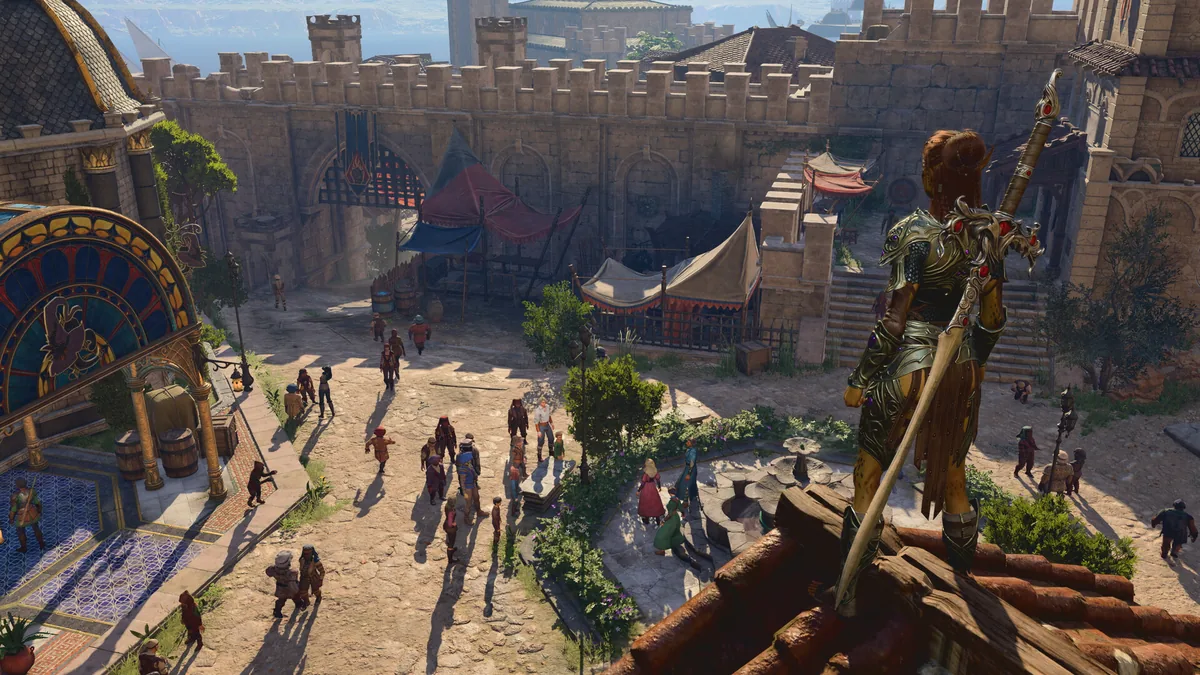
Quick Answer: This baldurs gate 3 walkthrough guide shows you how to progress through the main story, prepare for the hardest fights, avoid missable content, and grab the best rewards without getting lost in the game’s branching choices.
Baldur’s Gate 3 is a story-rich, party-based RPG set in the universe of Dungeons & Dragons, so the best walkthrough is less about following a single path and more about making smart decisions at each major turning point.
Prerequisites
You do not need a perfect build to finish Baldur’s Gate 3, but you do need a party that can handle dialogue, healing, exploration, and burst damage. The game rewards flexibility far more than raw damage alone, and that is especially true on higher difficulties where bad positioning can snowball fast.
- Recommended level range: Aim to be on-level or slightly overleveled for major story fights, especially when entering Act 2 and Act 3. If a boss feels impossible, it is usually a sign you skipped too much side content.
- Party composition: Bring one frontliner, one healer or support, one ranged damage dealer, and one flexible slot for utility, crowd control, or dialogue-focused skills.
- Equipment priorities: Favor weapons and armor that improve your main stats, concentration, initiative, and survivability. In practice, items that help your wizard keep concentration or your rogue act first can be more valuable than flashy damage.
- Consumables: Stock up on healing potions, elixirs, scrolls, and throwable tools. Baldur’s Gate 3 loves giving you problems that a single scroll of Misty Step, Invisibility, or Hold Person can solve.
- Difficulty: Balanced is comfortable for a first run, but Tactician or Honor-style play demands cleaner resource management, better scouting, and stronger use of terrain.
- Party size: Keep your full adventuring party together for difficult routes. Splitting off solo for a conversation or stealth section can be useful, but it is risky if combat starts unexpectedly.
- Dialogue focus: A character with strong Charisma, Insight, Persuasion, or Deception makes several story checks much smoother, especially in social-heavy areas like the Goblin Camp, Moonrise Towers, and the Lower City.
A practical party setup might include a fighter or barbarian to hold the line, a cleric or paladin for support, a wizard or sorcerer for crowd control, and a rogue or ranger for scouting and single-target pressure. Examples that work well in the base game include Lae’zel as a martial bruiser, Shadowheart as a support caster, Gale as ranged magical control, and Astarion as a stealth opener. You can swap almost anyone out, but the important thing is covering roles rather than locking into one “best” build.
Step-by-Step Route Through the Main Story
The main route in Baldur’s Gate 3 is easiest to follow if you think in acts, because each act has its own geography, major factions, and point-of-no-return moments. The exact order of side content can change, but the sequence below gives you a reliable path that avoids dead ends, protects major questlines, and keeps you strong enough for the toughest encounters.
1. Escape the Nautiloid and secure your first allies
Your walkthrough begins with survival, not optimization. On the Nautiloid, grab the starter weapons, use the environment, and recruit who you can before the crash. The immediate goal is to get off the ship alive, not to clear every room.
Key examples:
- Free Shadowheart from her pod if you want an early cleric.
- Recruit Lae’zel at the first opportunity if you want a strong frontliner.
- Grab Us if you want a helpful early companion option during the opening sequence.
Once you land on the Ravaged Beach, explore carefully and pick up the basic supplies scattered around the crash site. You are looking for healing items, simple weapons, and early XP from easy encounters. The early wilderness is forgiving enough to let you experiment with movement, stealth, and positioning, so use it to learn the game’s rhythm.
2. Clear the Emerald Grove and surrounding wilderness
The Emerald Grove is your first major hub, and it is also where many beginners accidentally lock themselves out of later content. Talk to everyone, complete nearby side quests, and do not rush the main conflict with the goblins until you have explored the surrounding map.
Important activities here include:
- Helping the tieflings and druids resolve their conflict.
- Reaching Withers for respec and companion management later.
- Picking up side quests that feed into the Goblin Camp, the owlbear area, and the underground routes.
The key to Act 1 pacing is to treat the wilderness as a layered sandbox. Clear the Overgrown Ruins, visit the Blighted Village, search the Dank Crypt, and then decide which faction lines you want to push. If you charge directly into the goblin leadership without exploring, you lose XP, loot, and several useful dialogue paths.
3. Handle the Goblin Camp and choose your faction outcome
The Goblin Camp is one of the first major story forks in this baldurs gate 3 walkthrough guide, and it matters because it influences ally access, story tone, and quest resolution. You can infiltrate the camp, fight your way through, or manipulate the leaders through dialogue and stealth.
Two common approaches are:
- Infiltration route: Use disguise, dialogue, or stealth to get inside, then pick off targets selectively.
- Direct assault route: If your party is strong enough, eliminate the goblin leadership and finish the grove conflict head-on.
The hard part is not just the combat; it is the social pressure around the choice. You should clear side rooms, free prisoners if you want the extra rewards, and make sure your party is topped up before confronting the leaders. Saving before talking to key NPCs is smart here because a single dialog choice can change who survives.
4. Finish Act 1 side arcs before leaving the surface region
Before moving deeper underground, tie up the side quests that matter to your build and story preferences. This is where a lot of players unknowingly miss content, because they advance too quickly and never return.
Examples of worthwhile Act 1 threads:
- The hag encounter in Auntie Ethel’s questline.
- The owlbear cave and related creature encounters.
- The Zhentarim content, including trade and smuggling opportunities.
- The Underdark entrances and the Grymforge route.
The Underdark is not optional in spirit even when it is technically optional in structure. It gives you gear, XP, and extra story context that makes Act 2 much smoother. The key is to treat Act 1 as a preparation phase rather than a straight line.
5. Push through the Underdark and Grymforge
The Underdark is where Baldur’s Gate 3 starts demanding smarter resource use. Enemies hit harder, the environment becomes more dangerous, and verticality matters more. You will deal with duergar, deep gnomes, the Arcane Tower, and the Grymforge sequence, all of which reward careful positioning.
Your goals in the Underdark should be:
- Complete enough content to gain strong XP.
- Secure useful gear from hidden areas and merchants.
- Resolve the forge-related content if you want its unique rewards.
The Grym encounter is one of the first major skill checks for new players because it combines a boss, a machine, and a terrain puzzle. Save before you enter the final room, inspect the environment, and make sure at least one character can manipulate the forge mechanism safely.
6. Transition into Act 2 through the Shadow-Cursed Lands
Act 2 shifts the game’s tone sharply. The Shadow-Cursed Lands punish reckless movement, and the story becomes more concentrated around Moonrise Towers, Last Light Inn, and the struggle between surviving locals and the forces controlling the region.
The route here is generally:
- Reach Last Light Inn.
- Protect your key allies and secure safe passage.
- Investigate the major quest threads leading to Moonrise Towers.
- Explore the surrounding cursed areas only when prepared.
Because the curse itself is a constant hazard, you need light sources, protection, or methods to resist the darkness. Keep your party together and avoid wandering off into unexplored, curse-heavy paths without a plan. This act is where many players first feel like the game is “too hard,” but the real issue is usually under-preparation.
7. Resolve the big Act 2 story lines before entering the point of no return
Act 2 has a major narrative threshold tied to the endgame-style dungeon sequence. Before crossing that line, finish the side arcs that matter, especially companion quests and faction outcomes.
In practice, that means:
- Clearing the main Moonrise-related objectives.
- Resolving the Nightsong path carefully.
- Handling companion story choices with attention to consequences.
- Looting and buying anything useful before progression locks certain areas.
This is the act where you should slow down and check quest logs often. If a quest feels like it is about to climax, it probably is. Once you move past the threshold, you may lose access to vendors, side conversations, or safe travel routes.
8. Enter Act 3 and explore Baldur’s Gate itself
Act 3 is where the game opens back up, but with far more danger, content density, and interconnected questlines. The Lower City, Wyrm’s Crossing, the Circus area, and the city’s political factions all compete for your attention.
A smart Act 3 order is:
- Secure your city access and rest points.
- Pick up companion quests early.
- Visit merchants before getting pulled into major boss arcs.
- Clear faction content in a way that supports your preferred ending.
This is also where a lot of players become overwhelmed. The trick is to pick a lane: do you want to pursue companion conclusions first, major villain routes first, or side content and merchant upgrades first? Any of those can work, but switching randomly wastes time and consumables.
9. Close out the endgame with your strongest buffs and resources
The final stretch in Baldur’s Gate 3 is a series of increasingly intense encounters where preparation matters more than improvisation. Enter with your best armor, your favorite weapons, and your most reliable consumables saved for the fights that matter.
Before the finale:
- Use your strongest elixirs and scrolls.
- Refresh key buffs before starting major encounters.
- Make sure your spellcasters have reliable concentration protection.
- Keep emergency mobility tools ready, such as Misty Step or Dimension Door.
The ending can branch substantially depending on your decisions, but the combat principle stays the same: control the battlefield, protect your vulnerable units, and do not spend your last high-level spell on a minor enemy when a boss phase is still coming.

You might also like
- Baldur's Gate 3 patch 8 release date: Patch Notes Explained
- baldurs gate 3 how to get lae'zel down: Beginner Guide for New Players
- Baldur's Gate 3 How to Open Gilded Chest: Beginner Guide
- baldurs gate 3 tips and tricks for beginners
- baldurs gate 3 how to get owlbear cub Beginner Guide
Hardest Encounters and How to Beat Them
The hardest encounters in Baldur’s Gate 3 are difficult because they combine action economy, dangerous terrain, and enemy abilities that punish careless positioning. The fix is usually not “deal more damage” so much as “control the fight better.”
| Encounter | Why it is hard | Reliable tactic |
|---|---|---|
| Grym in Grymforge | The fight mixes boss damage, platforming, and machine mechanics, so new players often waste turns while standing in bad positions. | Lure Grym into the forge mechanism, use environmental control, and keep one character focused on triggering the hammer safely. |
| Auntie Ethel | She can split attention, use deceptive positioning, and force players into poor trades if they chase her blindly. | Save resources for the decisive phase, keep party spacing tight, and punish her after revealing her true position. |
| Ketheric-related Act 2 fights | These battles often stack narrative pressure with enemy reinforcements and terrain hazards. | Enter with full buffs, prioritize adds first when they threaten your backline, and use crowd control to prevent enemy momentum. |
| Cazador | The arena and his vampire tools can snowball if you leave key allies exposed. | Focus on positioning, protect vulnerable party members, and deny his ability to isolate your team. |
| House of Hope-style endgame clashes | High-threat enemies can punish weak initiative, poor resource use, and bad target selection. | Open with control spells, burst priority targets, and keep escape tools ready for repositioning. |
The core tactical rule in tough fights is to identify what is actually killing you. In many cases, the answer is not the boss’s raw HP bar. It is the minions acting before you, the high ground you abandoned, or a concentration spell you lost too early.
For example, against Grym, the room itself is the weapon. Against Auntie Ethel, the fight is about pattern recognition and patience. Against Ketheric-style encounters, your turn economy matters more than flashy damage, because surviving the opening round often decides the whole battle. And in Act 3, bosses like Cazador punish parties that bunch up or ignore status effects.
A good habit is to start each major fight with a saved game, inspect the arena, and ask three questions:
- Who acts first?
- What can delete my backline?
- Which environmental tool changes the entire fight?
Answer those, and most “impossible” fights become manageable.
Rewards and Loot
The best rewards in Baldur’s Gate 3 come from doing side content early, winning faction decisions cleanly, and taking your time in hidden areas. You will gain gear, XP, story unlocks, merchant access, companion scenes, and permanent quality-of-life benefits that shape the rest of the run.
Major reward categories
- Experience points from side quests, exploration, and optional combat.
- Unique weapons and armor from boss areas, secret rooms, and faction content.
- Quest unlocks that change who survives, who joins you, and which endings remain available.
- Merchant access that expands as you progress through hubs like the Emerald Grove, Last Light Inn, and Baldur’s Gate.
- Companion development through personal quests, camp events, and approval-driven scenes.
Some concrete examples of valuable reward types include:
- Early-game magic items from the Dank Crypt and wilderness exploration.
- Forge-related gear from the Grymforge route.
- Act 2 rewards tied to Moonrise Towers, Last Light Inn, and shadow-related questlines.
- Act 3 city loot from faction strongholds, hidden houses, and major boss lairs.
| Reward type | Example source | Why it matters |
|---|---|---|
| Weapon upgrades | Goblin Camp, Grymforge, Act 3 city zones | Higher accuracy and stronger damage scaling make difficult fights more consistent. |
| Defensive gear | Underdark, cursed-region vendors, late-game dungeons | Better AC and saving throw support reduce wipe risk. |
| Utility items | Merchants, hidden chests, quest rewards | Scrolls and potions solve problems that raw stats cannot. |
| Narrative unlocks | Companion quests, faction decisions, major story choices | These affect ending options, companion outcomes, and certain NPC outcomes. |
If you are trying to maximize rewards on a fresh run, do not skip optional bosses and puzzle zones. Baldur’s Gate 3 is generous with loot in places that feel like detours, and the best walkthrough route often includes “bonus” content that actually functions as power progression.
Missables You Should Not Skip
You can permanently lose a surprising amount of content in Baldur’s Gate 3 if you advance too quickly, rest at the wrong time, or resolve a major quest before cleaning up smaller arcs. Missables are one of the biggest reasons players need a walkthrough rather than just a map.
Big missables to watch for
- The Emerald Grove outcome: If you push the goblin conflict too far before finishing grove content, you can lose access to tiefling and druid questlines.
- Companion recruitment windows: Some companions and story scenes can be missed or altered if you leave key areas too early.
- Act 2 side content: Moving past the main threshold in the Shadow-Cursed Lands can lock out vendors, NPCs, and unfinished quests.
- Quest-related prisoners and NPCs: Certain captives, allies, and named characters can die if you delay too long.
- Faction-specific rewards: Choosing one side in a conflict may permanently close the other side’s rewards and dialogue.
- Camp scenes and approval moments: If you skip rests too aggressively, you can miss important companion developments.
Two especially common examples are the tiefling-related content in Act 1 and the Last Light Inn sequence in Act 2. In both cases, players rush the main objective, assume they can clean up later, and then discover the world has already moved on. Another classic missable is underestimating how many companion scenes trigger at camp; if you only long rest when you are nearly empty, you can delay or skip a lot of characterization.
A simple rule solves most of this: before any major story push, do a full sweep of the region, talk to all named NPCs, check your quest log, and rest if several camp scenes are queued. In Baldur’s Gate 3, “later” often means “too late.”
Common Mistakes
The most common mistakes in Baldur’s Gate 3 come from treating it like a linear action RPG instead of a reactive, systems-driven campaign. Small errors stack quickly, but the fixes are straightforward once you know what to watch for.
- Rushing the main quest too early — Players do this because story markers feel urgent. Fix: clear side areas, explore hidden zones, and finish local quest hubs before advancing major act transitions.
- Ignoring camp rests — Players save rests to conserve resources, then miss companion scenes and quest triggers. Fix: long rest more often, especially after big story beats or when companions have new dialogue.
- Forcing one combat solution every time — Players lean on raw damage because it feels reliable. Fix: use control spells, terrain, height, doors, surfaces, and stealth opens to shape fights.
- Underusing consumables — Players hoard scrolls and elixirs for a “later” that never comes. Fix: spend items on hard fights, especially when a scroll can solve a problem your build cannot.
- Splitting the party carelessly — Players want to explore faster or steal loot quietly. Fix: keep the group together in dangerous areas and only split when you understand the risks.
- Skipping dialogue checks without saving — Players assume every choice is safe. Fix: quick-save before important conversations, especially with leaders, bosses, and companions.
- Entering boss fights unprepared — Players underestimate how much setup matters. Fix: rest, buff, inspect the arena, and enter with a plan for turn one.
The game is forgiving in some ways, but it is not forgiving about poor pacing. If you learn to slow down before major story nodes, the entire run becomes easier and more rewarding.
Pro Tips
These advanced tips help you squeeze more value out of every act, every fight, and every conversation.
Tip 1. Start hard fights from stealth or high ground
If your party can see the arena before combat begins, place ranged characters on elevated terrain and open with an ambush. Encounters like goblin patrols, duergar skirmishes, and city ambushes become much easier when your first turn is already optimized.
Tip 2. Save mobility tools for repositioning, not just travel
Misty Step, Dimension Door, and similar effects are strongest when they rescue a vulnerable caster or let you bypass a lethal zone. Using them only to chase enemies wastes their real value.
Tip 3. Pre-buff before entering doors and elevators
A lot of BG3’s hardest encounters start right after a transition. If you know a boss room is next, cast defensive buffs, apply weapon coatings, and position your team before you trigger the conversation or scene.
Tip 4. Keep one character built for dialogue
A high-Charisma party face can change entire quest outcomes in places like the Emerald Grove, Moonrise Towers, and Baldur’s Gate itself. That character does not need to be your strongest combat unit, but they should be present for key conversations.
Tip 5. Use environmental hazards as your hidden damage source
Explosive barrels, chasms, grease, fire, and webbing can delete enemies faster than a clean melee trade. This is especially strong in cramped interiors like goblin halls, underground chambers, and some city basements.
Tip 6. Rotate your rests to control camp scenes
If you know a major companion conversation is likely, avoid burning through multiple long rests in a row without checking camp. This keeps story progression flowing and reduces the chance that a scene sits untriggered for too long.
Related Guides
- Baldur’s Gate 3 Best Early Game Builds
- Baldur’s Gate 3 Companion Recruitment Guide
- Baldur’s Gate 3 Act 1 Walkthrough
- Baldur’s Gate 3 Act 2 Walkthrough
- Baldur’s Gate 3 Act 3 Walkthrough
- Baldur’s Gate 3 Best Weapons and Armor
- Baldur’s Gate 3 Boss Fight Strategies
- Baldur’s Gate 3 Missable Quests Guide
Sources
- https://store.steampowered.com/app/1086940/
- https://en.wikipedia.org/wiki/Baldur's_Gate_(video_game)
See also
- baldurs gate 3 how to get to the underdark: Beginner Guide
- Baldur's Gate 3 Walkthrough Act 3
- Baldur’s Gate 3: how to baldurs gate 3 cross play for beginners
- baldurs gate 3 beginner class reddit: Beginner Guide for New Players
- Baldur’s Gate 3 baldurs gate 3 how to save mayrina Beginner Guide
- baldur's gate 3 vs elden ring: which should you play?
- baldurs gate 3 how to recruit minthara: Beginner Guide for New Players
- Baldur’s Gate 3 beginner tips reddit: A Complete Beginner Guide
- baldurs gate 3 best class for beginners: A Beginner Guide to Starting Strong
- Baldur's Gate 3 Guide Walkthrough
Screenshots



Reviewed by
BG3 Hub Editorial
Expertise: Editorial team behind BG3 Hub. Content is compiled from official patch notes, community wikis, and playthrough notes, then reviewed and updated on schedule.
Sources
Related Guides

%27/><stop offset=%271%27 stop-color=%27hsl(80,50%,18%)%27/></linearGradient></defs><rect width=%27460%27 height=%27215%27 fill=%27url(%23g)%27/><text x=%27230%27 y=%27115%27 text-anchor=%27middle%27 font-family=%27sans-serif%27 font-size=%2724%27 font-weight=%27700%27 fill=%27rgba(255,255,255,0.85)%27>App 1086940</text><text x=%27230%27 y=%27142%27 text-anchor=%27middle%27 font-family=%27sans-serif%27 font-size=%2711%27 fill=%27rgba(255,255,255,0.6)%27>no image yet</text></svg>)
🔥 Popular Guides
Baldurs Gate 3 Beginner Guide: Complete New Player Starting Guide
Learn Baldur's Gate 3 basics with this beginner guide covering classes, combat, resources, mistakes, and early-game tips.
How to Cool Off Karlach in Baldur's Gate 3 — Infernal Engine Fix
Cool off Karlach in Baldur's Gate 3: fix her infernal engine overheating, romance approval gates, Act 1–3 steps, and what happens if you ignore it.

Best Shadowheart Build BG3 — Free Her, Trickery Cleric & Romance
Free Shadowheart on the Nautiloid, then run the best Trickery Cleric build. Pod rescue steps, approval tips, romance gates, and Act 1–3 skill picks.
BG3 Best Baldur's Gate 3 Characters Tier List
Rank the best Baldur's Gate 3 characters with S/A/B tiers, matchup callouts, methodology, and patch notes for smarter party picks.
📋 Patch Notes & Updates
🛠️ Popular Tools
Was this guide helpful?
Rate this guide so we can improve it.
Share your own tip
Found something not in the guide? Submit it below — our editors review every tip before publishing. No account required.