 Baldur's Gate 3
Baldur's Gate 3 Walkthrough
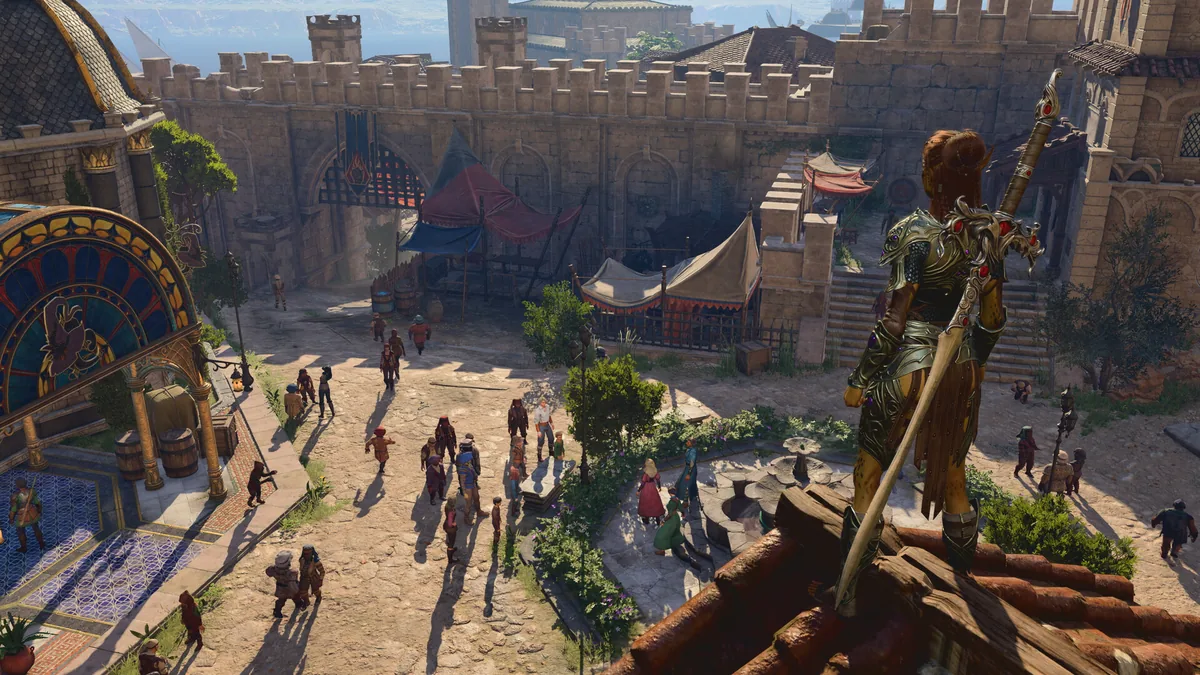
Quick Answer: This baldurs gate 3 walkthrough guides you through the main story flow, key route choices, hardest fights, missable rewards, and practical tactics so you can clear each act cleanly and avoid losing important content.
Baldur’s Gate 3 is a story-rich, party-based RPG set in the universe of Dungeons & Dragons, and its branching quests reward careful exploration, smart party building, and timely decisions. It also launched to strong critical reception, with a Metacritic score of 96 Source, which is a good hint that the game expects you to engage with its systems rather than rush past them.
Prerequisites
You do not need a perfect build to finish Baldur’s Gate 3, but you do need a party that can handle dialogue, traps, control spells, and burst damage. The game is extremely flexible, yet a smoother first playthrough usually comes from covering a few essentials before you push deep into the main acts.
- Recommended level range: Enter early-game areas with a balanced low-level party and do not rush major story hubs underpowered. By the time you reach the later act bosses, you want your core team fully online with class features, concentration spells, and upgraded gear.
- Equipment priorities: Look for one reliable weapon user, one frontliner with decent armor, one dedicated spellcaster, and one character with utility for lockpicking, disarming, or dialogue support.
- Party composition: A simple, effective setup is a martial frontliner, a ranged damage dealer, a control caster, and a support or rogue-style utility slot. Examples include Lae’zel, Astarion, Gale, and Shadowheart, or your custom character filling one of those roles.
- Difficulty choice: Balanced is the safest first-run option, while Tactician demands tighter resource management and better encounter knowledge. Custom settings can help if you want a story-first run without making fights trivial.
- Consumables and supplies: Keep healing potions, scrolls, surface-clearing spells, and camp supplies on hand. Scrolls like Misty Step, Invisibility, or Hold Person can swing dangerous fights.
- Character setup: A high-Charisma protagonist makes dialogue smoother in many scenes, while a high-Dexterity character helps with initiative, stealth, and trap handling.
- Save discipline: Keep multiple manual saves before major choices, long rests, and boss arenas. Baldur’s Gate 3 is full of permanent branch points, and one overwrite can cost you a whole questline.
A good walkthrough mindset is to treat every act like a self-contained adventure. Explore side paths before advancing obvious main-story markers, because this game often hides companions, vendors, and rewards just off the route. If you are coming from older RPGs, the biggest adjustment is that “best path” usually means “most prepared path,” not “fastest line on the map.”
Step-by-Step Route Through the Main Story
The safest route through Baldur’s Gate 3 is to clear each act methodically, recruit key companions early, complete major side quests before moving the story forward, and only then commit to irreversible decisions. The game is built around hidden exits, timed consequences, and faction conflicts, so the order of operations matters a lot.
1. Escape the nautiloid and secure your opening party
Start by surviving the prologue, grabbing whatever useful gear you can, and recruiting the earliest companion opportunities.
Your first objective is simple: get off the mind flayer ship alive. Along the way, pick up the obvious starter tools, check every room for supplies, and use the ship’s chaos to your advantage. This opening matters because it teaches the game’s core rhythm: use the environment, don’t stand in obvious danger, and talk when dialogue offers an advantage.
Once you reach the early crash-zone area, recruit the companions you can find immediately. Shadowheart is one of the earliest and most useful pickups because she gives you healing, support, and strong cleric utility. Astarion brings lockpicking and stealth. Lae’zel gives you reliable melee pressure. Even if you do not keep all of them in your final party, having them available gives you far more tactical options.
Do not charge straight toward the biggest quest marker. Instead, explore the nearby wilderness, small camps, and side roads to collect XP and basic equipment. Early fights against goblins, undead, and other scattered threats are much easier if you have already found a few consumables and some better armor.
2. Stabilize the wilderness and finish your Act 1 foundations
Use the first major stretch of the game to recruit, explore, and lock in your act-wide quest state.
The wilderness portion is where a lot of players accidentally lock themselves out of content by advancing too quickly. Prioritize the following:
- Recruit key companions when available.
- Talk to every major NPC hub before making hostile choices.
- Clear side areas for XP and gear.
- Buy or steal useful consumables from vendors.
- Resolve the big local conflict before pushing the act forward.
This is also where you should decide how aggressive your run will be. If you want the cleanest walkthrough, you should clear optional caves, ruins, and camps before committing to a faction outcome. That approach gives you more experience and lets you better understand which NPCs are important before they disappear.
Astarion’s utility is especially useful here because traps and locked doors are common. Gale is excellent if you find yourself needing ranged area damage. Wyll can help in fights with his Eldritch Blast style pressure and strong early magical utility. Your custom character can fill any missing role, but one character should ideally be built for conversation so you can handle the many persuasion and deception checks.
3. Resolve the goblin-tied storyline before moving deeper
Choose your side carefully, because this is one of the first major points where Baldur’s Gate 3 starts paying off its branch structure.
Whether you lean toward defending the grove, working with the goblins, or navigating a more deceptive route, this section is a major story hinge. If you want the most complete first-run experience, spend time talking to both sides, exhaust dialogue trees, and complete any rescue or delivery objectives attached to the local conflict before you commit.
This arc is important for three reasons:
- It affects companion approval and later story tone.
- It can change which vendors, rewards, and friendly NPCs remain available.
- It determines whether some scenes and locations stay open or close permanently.
If you are playing for the broadest content coverage, do not rush the confrontation. Finish errands for the area’s major groups, investigate suspicious side rooms, and only then resolve the central dispute. Strong party control helps here, especially spells that limit enemy movement or punish clustered goblins. Sleep, Hold Person, and simple chokepoint fighting can make a huge difference.
4. Enter the underground and treat exploration as a second route
The underdark-style zone and similar subterranean paths are not side content in the casual sense; they are a major route with real rewards and danger.
This part of the game rewards a slow, disciplined approach. You will often face enemies that punish careless movement, stealth mistakes, or bad positioning. Bring light sources, ranged options, and at least one way to handle vertical terrain or mobility. Scrolls and jump-related abilities become much more valuable here than many new players expect.
The key to this route is to treat every suspicious landmark as a potential combat setup. Do not cluster your party blindly. Check ledges, poison hazards, and enemy sightlines before initiating. Some enemies will overwhelm you if you allow them to start with the high ground or if you walk into narrow spaces without scouting first.
This is also a strong area for experience farming and gear upgrades. If your party feels undergeared, it is often smarter to finish more side exploration here before continuing upward into the next story beat. By the time you leave this section, your party should feel distinctly stronger than it did on the surface.
5. Advance into the next major act only after closing loose ends
Do not cross major act transitions until you are satisfied with everything you wanted to preserve in the prior zone.
Baldur’s Gate 3 is generous, but it is not forgiving about major progression gates. Some NPCs, side quests, and locations can be altered or lost once the story advances. Before you move on, check that you have:
- Finished important companion scenes.
- Resolved local faction disputes.
- Bought needed gear from relevant vendors.
- Explored any named areas you wanted to keep accessible.
- Saved manually in a separate slot.
This is a good time to review your party’s balance. If your damage is fine but your survivability is low, swap in a sturdier companion or respec if needed. If your conversation checks are failing, lean harder into buffs and inspiration management. If fights are dragging, rework your spell loadout around control and burst rather than only single-target damage.
6. Push through the midgame with companion quests active
The middle of the game is where companion stories and main objectives start weaving tightly together.
This stretch is best handled by keeping companion quests active in parallel with your main route. For example, if a companion wants to visit a specific location or confront a personal enemy, do not ignore that thread for too long. Companion storylines are not just roleplay filler; they often deliver strong rewards, important lore, and access to more powerful combat options.
You should also be more selective about long resting. Resting is useful because it advances scenes and refreshes resources, but it can also alter event timing in some areas. If a quest appears urgent, make sure you are not burning through all your rest opportunities before checking whether a companion or NPC needs immediate attention.
This is the phase where control spells and item management matter most. You should have scrolls, elixirs, arrows, and potion stacks organized by use case: emergency healing, repositioning, and crowd control. Baldur’s Gate 3 heavily rewards players who treat inventory like a tactical toolbox rather than a storage pile.
7. Finish Act 3 with preparation, not panic
Act 3 is the point where the game stops being polite about your planning.
By the time you reach the final stretch, you should already know which companions are core to your build, which quests are priority, and which optional fights are worth your resources. The city environment brings more NPC density, more quest interlocking, and more opportunities to miss things if you advance too quickly.
Keep your approach simple:
- Finish side threads before committing to endgame chains.
- Talk to major NPCs in each area before attacking or stealing.
- Keep at least one high-mobility escape option on the party.
- Save before every major confrontation.
- Read quest updates carefully, because the final act often asks you to make permanent decisions.
The last sequence is less about raw exploration and more about consistency. If you have arrived prepared, the game’s endgame becomes a satisfying payoff rather than a scramble to recover from bad earlier choices.

You might also like
- Baldur's Gate 3 patch 8 release date: Patch Notes Explained
- baldurs gate 3 how to get lae'zel down: Beginner Guide for New Players
- Baldur's Gate 3 How to Open Gilded Chest: Beginner Guide
- baldurs gate 3 tips and tricks for beginners
- baldurs gate 3 how to get owlbear cub Beginner Guide
Hardest Encounters and How to Beat Them
The hardest encounters in Baldur’s Gate 3 are difficult because they combine enemy numbers, terrain pressure, and action economy, so the best answer is usually control, positioning, and target priority rather than brute force alone. Bosses and major encounters often feel punishing when you let enemies act freely, but they become much more manageable when you force them into bad lanes.
A few examples of hard-fight patterns that show up throughout the game:
- Swarm fights: goblin-heavy arenas, undead clusters, and cultist groups can overwhelm you if you spread damage too thin.
- Vertical or hazard fights: battles with ledges, poison, fire, or chasms punish poor positioning.
- Single-target bosses with support: a boss plus adds is often harder than the boss itself.
- Sustain checks: encounters where the enemy keeps coming back, healing, or summoning reinforcements can drain your spell slots quickly.
Here is a practical difficulty breakdown for the kinds of problems you will face:
| Encounter Type | Why It’s Hard | Best Answer |
|---|---|---|
| Swarm enemies | They outnumber your party and can focus fire one character | Use AoE, choke points, and control spells like Hold Person |
| High-ground fights | Enemies gain range and advantage from better positioning | Open with stealth, ranged burst, or mobility tools like Misty Step |
| Boss plus adds | Too many threats at once | Kill support units first or disable the boss with control |
| Hazard arenas | Fire, poison, and ledges punish movement mistakes | Spread out, move carefully, and use shove-proof positioning |
| Long attrition fights | You run out of healing and spell slots | Use short-rest efficiency, scrolls, and focused burst windows |
One of the most reliable tactics across the whole game is to start fights from stealth or from a favorable doorway. If you can make enemies run through a narrow path, they become much easier to control with surface effects and ranged pressure. Another strong tactic is to identify the one enemy doing the most tactical damage—often a caster, summoner, or support unit—and remove that target first. A boss with no backup can be a lot less threatening than a group of elite minions allowed to act freely.
The best defensive habit is not to waste healing on characters who can be repositioned instead. A knocked-back enemy or a character moved out of focus fire is often a better solution than raw healing. Likewise, scrolls are not “emergency only” items in this game; using a scroll of Invisibility, Haste, or Hold Person at the right moment can completely rewrite an encounter.
Rewards, Loot, XP, and Unlocks
The rewards in Baldur’s Gate 3 are worth chasing because they often change how your party plays, not just how much damage you deal. Story progress unlocks new regions and companions, while side content gives you equipment, scrolls, crafting ingredients, and enough experience to keep pace with the main story.
The main reward categories are:
- Experience points: gained from combat, quest completion, exploration, and dialogue outcomes.
- Equipment: weapons, armor, accessories, and special items that shape your build.
- Unlocks: companions, vendors, story routes, camps, and area access.
- Consumables: potions, scrolls, arrows, elixirs, and grenades that solve tactical problems.
- Narrative rewards: companion approvals, story scenes, and later branching options.
Examples of valuable reward types you should actively seek include:
- Mobility tools like Misty Step-style effects, which help in both combat and exploration.
- Control items such as paralysis, fear, or silence effects, which are especially strong against dangerous humanoids and casters.
- Utility gear that boosts initiative, spell save DC, or stealth, because these stats often matter more than raw armor in the current meta.
- Companion-related unlocks, since completing personal stories can open up new dialogue or combat options.
The most important reward principle is that not all loot is equal. A green-quality item that fixes your action economy or grants a crucial spell can matter more than a straight damage upgrade. For example, a piece of gear that improves initiative can let Gale disable enemies before they act, while a resistance accessory can save Shadowheart from being instantly focused down in a fight with elemental damage.
A strong walkthrough habit is to think in terms of loadout synergy. If your fighter is built around pushing enemies, then anything that gives advantage on shoves, mobility, or battlefield control becomes high-value loot. If your wizard depends on concentration, then defensive items and positioning tools are often better than a small raw damage bump.
Missables You Should Not Skip
Missables in Baldur’s Gate 3 are usually not hidden in a cruel old-school way, but they are absolutely real if you rush story beats or pick hostile dialogue too early. If you want a full-content run, treat irreversible decisions with caution and keep a separate save before major transitions.
The biggest things you can permanently lose are:
- Companion recruitment opportunities if you move past their location or trigger hostile outcomes.
- Quest chains tied to local settlements, since some can close after act transitions.
- Vendor inventories and unique gear if the relevant NPC becomes unavailable.
- Dialogue scenes that only trigger before a specific plot milestone.
- Alternative resolutions to faction conflicts if you commit too early.
The most common missable pattern is simple: players see a main quest marker and assume they should follow it immediately. In Baldur’s Gate 3, that often means skipping a nearby cave, failing to talk to a key NPC, or advancing past a social situation that would have opened a better solution. Another frequent miss is ignoring camp conversations. Several companion developments happen there, and missing them can make later scenes feel abrupt or incomplete.
A few concrete examples of what to watch carefully:
- If you are in a settlement with a major conflict, finish side errands before choosing a side.
- If a companion is recruitable in the current region, do not assume they will still be there later.
- If a quest feels time-sensitive, long rest or zone transitions may change the state of the area.
- If a vendor is tied to a fragile faction or camp, their shop may disappear after a story decision.
The easiest way to protect yourself is to keep a “decision save” before each major turning point. One save before entering a dangerous area, another before making a faction choice, and another before a boss fight will save you from a lot of regret. That habit is especially useful in a game where choices can echo into later acts.
Common Mistakes
The most common mistakes are usually caused by treating Baldur’s Gate 3 like a standard action RPG instead of a systems-heavy party game. Small planning errors can snowball into missed content, rough fights, or wasted resources.
- Rushing the main quest too early — Players see urgent story beats and ignore side routes; fix this by clearing nearby zones and companion scenes before advancing.
- Ignoring party balance — A squad with only damage dealers struggles when traps, healing, or control are needed; fix this by bringing at least one utility slot.
- Burning spell slots in trivial fights — New players overcast in minor encounters and arrive at bosses empty; fix this by leaning on cantrips, positioning, and short rests.
- Standing in obvious hazards — Fire, poison, and ledges are easy to underestimate; fix this by spreading out and using the environment before the enemy does.
- Skipping camp conversations — Important companion scenes often happen there, and players miss them by resting too casually; fix this by checking camp after big story beats.
- Not carrying utility items — Scrolls and potions feel optional until a hard fight locks you down; fix this by keeping mobility and control consumables ready.
- Locking in choices too fast — Dialogue can close off whole quest branches if you click the first aggressive line; fix this by reading all options and saving beforehand.
The common thread behind these mistakes is impatience. The game rewards preparation, curiosity, and tactical patience far more than raw speed. If you hit a wall, the answer is usually not “grind harder,” but “approach the encounter from a different angle.”
Pro Tips
These advanced tips go beyond the basics and can make your run much cleaner, especially if you want a smooth first playthrough or are revisiting the game on a harder difficulty.
Tip 1. Open tough fights from stealth
If you can position one character out of sight before combat begins, you can often start with a free shot, a disabling spell, or a better initiative setup. This works especially well against humanoid groups, where one removed target can collapse the whole enemy plan.
Tip 2. Save mobility tools for terrain problems, not just damage
Misty Step, jumps, and other repositioning effects are often more valuable for reaching high-value targets or escaping lethal zones than for raw offense. Use them to bypass chokepoints, escape aoe surfaces, or isolate a caster.
Tip 3. Keep one character built for dialogue
A high-Charisma main character or a companion setup with persuasion and deception support pays off constantly. Many quest branches become easier when you can talk your way through a scene instead of forcing a fight.
Tip 4. Use summons and expendable bodies to soak pressure
Temporary allies, summons, and familiars can absorb attacks, trigger traps, or bait enemy actions. That is especially useful against bosses or ranged-heavy groups where action economy matters more than raw stats.
Tip 5. Rotate your camp usage after major story beats
After significant quest events, check camp for new dialogue and rest only when needed. This helps you avoid missing scene triggers and gives you a cleaner sense of when the game wants you to pause and reflect.
Tip 6. Build around concentration protection
Many of the strongest spells in the game depend on concentration, so keeping that caster alive and unshaken is a huge power increase. Position them behind frontliners, give them defensive gear, and avoid leaving them exposed to archers or casters.
Tip 7. Treat the environment like a weapon
Chests, ledges, explosive barrels, choke points, and surfaces are not background detail. If you can push, burn, freeze, or drop an enemy into a bad lane, you often save more resources than you would by trading direct damage.
Related Guides
- Best Baldur’s Gate 3 Companions Guide
- Baldur’s Gate 3 Beginner Tips
- Baldur’s Gate 3 Class Tier List
- Baldur’s Gate 3 Best Builds
- Baldur’s Gate 3 Romance Guide
- Baldur’s Gate 3 Act 1 Walkthrough
- Baldur’s Gate 3 Act 2 Walkthrough
- Baldur’s Gate 3 Act 3 Walkthrough
Sources
- https://store.steampowered.com/app/1086940/
- https://en.wikipedia.org/wiki/Baldur's_Gate_(video_game)
See also
- baldurs gate 3 how to get to the underdark: Beginner Guide
- Baldur’s Gate 3: how to baldurs gate 3 cross play for beginners
- Baldur’s Gate 3 baldurs gate 3 how to save mayrina Beginner Guide
- baldurs gate 3 beginner class reddit: Beginner Guide for New Players
- baldur's gate 3 vs elden ring: which should you play?
- baldurs gate 3 how to recruit minthara: Beginner Guide for New Players
- baldurs gate 3 how to free shadowheart: Beginner Guide
- Baldur’s Gate 3 beginner tips reddit: A Complete Beginner Guide
- baldurs gate 3 best class for beginners: A Beginner Guide to Starting Strong
- Baldur's Gate 3 Guide Walkthrough
Screenshots



Reviewed by
BG3 Hub Editorial
Expertise: Editorial team behind BG3 Hub. Content is compiled from official patch notes, community wikis, and playthrough notes, then reviewed and updated on schedule.
Sources
Related Guides
%27/><stop offset=%271%27 stop-color=%27hsl(80,50%,18%)%27/></linearGradient></defs><rect width=%27460%27 height=%27215%27 fill=%27url(%23g)%27/><text x=%27230%27 y=%27115%27 text-anchor=%27middle%27 font-family=%27sans-serif%27 font-size=%2724%27 font-weight=%27700%27 fill=%27rgba(255,255,255,0.85)%27>App 1086940</text><text x=%27230%27 y=%27142%27 text-anchor=%27middle%27 font-family=%27sans-serif%27 font-size=%2711%27 fill=%27rgba(255,255,255,0.6)%27>no image yet</text></svg>)
🔥 Popular Guides
How to Cool Off Karlach in Baldur's Gate 3 — Infernal Engine Fix
Cool off Karlach in Baldur's Gate 3: fix her infernal engine overheating, romance approval gates, Act 1–3 steps, and what happens if you ignore it.

Best Shadowheart Build BG3 — Free Her, Trickery Cleric & Romance
Free Shadowheart on the Nautiloid, then run the best Trickery Cleric build. Pod rescue steps, approval tips, romance gates, and Act 1–3 skill picks.
BG3 Best Baldur's Gate 3 Characters Tier List
Rank the best Baldur's Gate 3 characters with S/A/B tiers, matchup callouts, methodology, and patch notes for smarter party picks.
Baldur's Gate 3 elden ring let me solo her build
Solo BG3 build guide for a high-survivability, first-turn-dominant playstyle with stats, gear, counters, and budget options.
📋 Patch Notes & Updates
🛠️ Popular Tools
Was this guide helpful?
Rate this guide so we can improve it.
Share your own tip
Found something not in the guide? Submit it below — our editors review every tip before publishing. No account required.