 Baldur's Gate 3
Baldur's Gate 3 Walkthrough Act 1
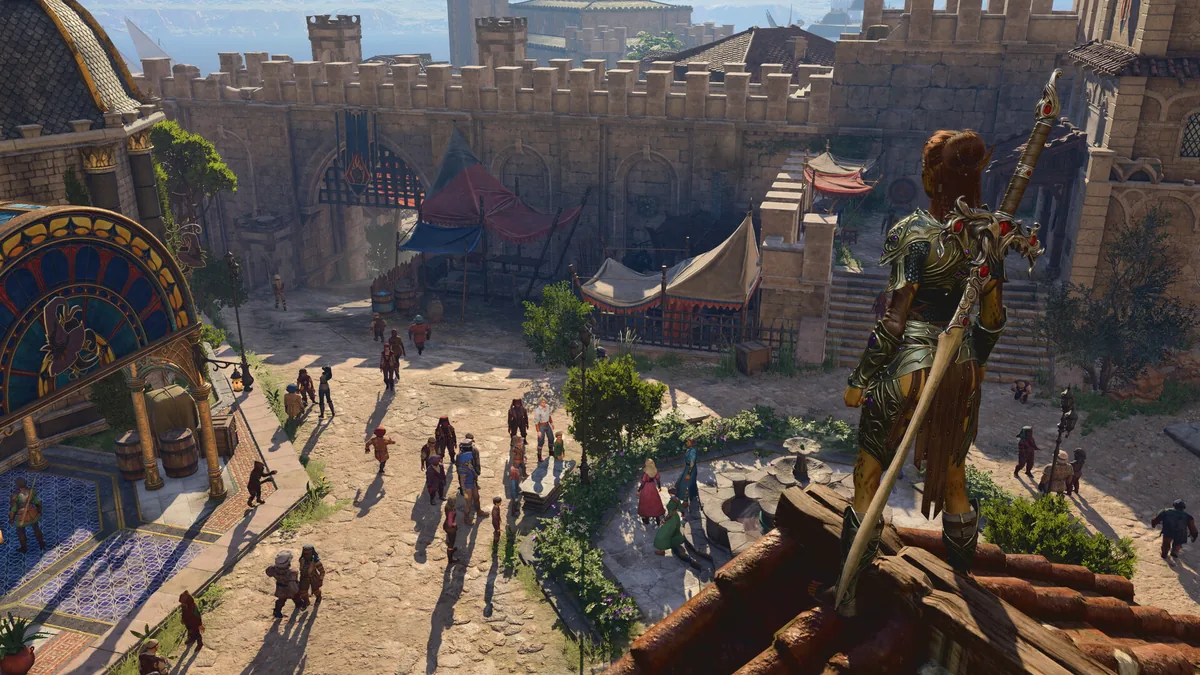
Quick Answer: The baldurs gate 3 walkthrough act 1 starts with escaping the Nautiloid, then opens into the Wilderness where you recruit companions, clear side content in smart order, and prepare for major fights like the Goblin Camp and the Underdark.
Baldur’s Gate 3 is a story-rich, party-based RPG set in the universe of Dungeons & Dragons, and your Act 1 route matters because companion order, loot routing, and quest timing can permanently change later outcomes. Source
Prerequisites
You do not need a perfect build to clear Act 1, but you do need a balanced party, a few core consumables, and a plan for dialogue checks and positioning.
- Recommended level range: Start the Nautiloid at level 1 and aim to leave Act 1 zones around level 5 if you want the smoothest power curve. The early game is very forgiving if you avoid overpulling and use elevation, surprise, and control spells.
- Party composition: Bring one frontliner, one flexible damage dealer, one support or control caster, and one utility slot. A common early spread is Lae’zel or Karlach as the melee anchor, Shadowheart for support, Astarion for lockpicking and burst, and Gale for ranged damage or utility.
- Equipment priorities: Prioritize weapons and armor that improve hit chance, initiative, survivability, and action economy. Early standout gear includes a better two-handed weapon for Lae’zel, a shield and medium armor for Shadowheart, and any bows or finesse weapons that help Astarion contribute without spending resources.
- Difficulty choice: Balanced is the safest first-clear option, Tactician punishes sloppy positioning and resource waste, and Honor-style rules demand much stricter resource discipline. If you are learning the map, use a conservative approach regardless of difficulty.
- Consumables to stock: Carry healing potions, antidotes or poison cures when available, scrolls for emergency crowd control, and grenades or alchemist’s fire for clustered enemies.
- Role expectations: Keep one character competent at Persuasion, one at Sleight of Hand or Thieves’ Tools, and one with a good ranged attack for high-ground turns.
- Mindset: Act 1 rewards exploration, but not reckless completionism; many fights can be made easier by recruiting the right allies first, opening shortcuts, or returning later at a higher level.
For context, the game is a full party-based RPG built around D&D rules and branching choice outcomes, so the best route is usually the one that preserves options rather than the one that rushes every combat. Source
Act 1 Route Overview
The safest Act 1 route is to escape the crash site, recruit your core party, clear the Wilderness in a quest-efficient loop, then tackle the Goblin Camp, Zhentarim content, and the Underdark before moving deeper.
Act 1 is large, but it is not random. The game pushes you through a sequence of natural power spikes: early companion recruitment, then small bandit and beast fights, then faction and boss encounters, then subterranean content that often raises your level right before the toughest fights in the act. If you follow that structure, the act becomes much more manageable.
A clean route usually looks like this:
- Escape the Nautiloid
- Secure the crash site and nearby recruitments
- Clear the Emerald Grove perimeter and surrounding wilderness
- Resolve the tiefling/goblin conflict on your terms
- Exploit the Underdark for experience, gear, and alternate entries
- Return for the hardest surface fights once your party is stronger
You do not need to clear every single encounter in one pass. In fact, some of the most reliable routes involve leaving difficult content unresolved until you have stronger spell slots, more HP, and better positioning tools. That is especially true for fights like the Goblin leaders, the Hag, or optional mini-bosses hidden behind exploration gates.
This route also reduces missables. If you recruit companions early, you unlock their approval reactions and personal quests sooner. If you visit merchant hubs before major conflict choices, you can buy or steal useful early-game gear before merchants disappear or become hostile. If you push the Underark too late, you may overlevel some surface content, but the tradeoff is usually worth it because your tactical options expand.
The key principle of any baldurs gate 3 walkthrough act 1 is simple: recruit first, gear second, then fight the hard content in an order that preserves resources and narrative flexibility.

You might also like
- Baldur's Gate 3 patch 8 release date: Patch Notes Explained
- baldurs gate 3 how to get lae'zel down: Beginner Guide for New Players
- Baldur's Gate 3 How to Open Gilded Chest: Beginner Guide
- baldurs gate 3 tips and tricks for beginners
- baldurs gate 3 how to get owlbear cub Beginner Guide
Step-by-Step Walkthrough
The best step-by-step route in Act 1 is to follow a recruit-and-unlock path rather than a straight combat path, because the game heavily rewards having more tools before major battles.
1. Escape the Nautiloid and pick up your first tools
Your first objective is to survive the ship, learn the basic combat loop, and leave with as many resources as possible intact.
- Grab Us if you want an early ally and an easy advantage in the opening escape sequence.
- Prioritize the early weapon and armor pickups near your route rather than stopping for every container.
- Use the Mind Flayer and hostile cambions against each other where possible; this teaches you how environmental advantage works in BG3.
- If you see a high-DC option to save someone or gain a temporary bonus, take it only if it does not slow your escape.
The goal here is not to farm the ship. It is to exit with a full party mindset and enough spell slots to handle the crash site. If you waste resources in the prologue, the next several fights become unnecessarily awkward.
2. Establish the crash site, then recruit your first companions
Once on the beach, head toward the closest useful recruitments and stabilize your party composition.
- Find Shadowheart early; she is one of the strongest Act 1 anchors because she brings healing, buffs, and support utility.
- Recruit Astarion if you want lockpicking, trap handling, and strong opener damage.
- Search for Lae’zel quickly, because she adds immediate front-line pressure and helps in many early fights.
- If you prefer a more aggressive frontliner later, keep Karlach in mind while clearing the Wilderness path.
You should also interact with the early encounter chain around the crash site rather than sprinting past it. These scenes often produce approval, dialogue flags, and small rewards that matter later. BG3 frequently turns “small” conversations into companion state changes.
3. Resolve the first Wilderness skirmishes methodically
The area around the road, ruins, and nearby paths is where most players overextend.
- Clear low-risk encounters first to build experience.
- Use high ground whenever possible; even a small elevation advantage improves ranged performance.
- Separate enemies by pulling them into narrow terrain or doorways.
- Avoid burning your strongest spell slots on trash unless you need to preserve a companion from being downed.
The early Wilderness teaches the central Act 1 rule: action economy matters more than raw stats. Two weak enemies standing next to your wizard are more dangerous than one stronger enemy across the map. Keep melee characters in front, keep ranged units on ledges, and use shove, grease, or other crowd-control options to break enemy formation.
4. Visit the Emerald Grove before committing to the goblin conflict
The Emerald Grove is your best social and economic checkpoint before the act’s large faction decisions.
- Talk to the main NPCs inside the grove before you trigger irreversible conflict.
- Buy or steal early useful items from vendors if your party lacks a key weapon or armor piece.
- Resolve the kagha-related and tiefling-related content if you want more XP and story context.
- Pick up companion-driven conversations whenever they appear, because many of them feed later approval thresholds.
The Grove is also where Act 1 starts to branch. If you rush straight into the goblin storyline, you can lock yourself out of some social rewards and quest progression. If you clear the grove chain first, you gain context for the conflict and often leave with a more complete party state.
5. Build toward the Goblin Camp instead of charging it
The Goblin Camp is one of the act’s most important hubs, but it is easier if approached as an infiltration problem rather than a frontal assault.
- Enter with dialogue tools if you can; several paths allow safer access.
- Use stealth, disguises, or social checks to move deeper into the camp.
- Identify the three goblin leaders before starting a full fight, because splitting them up is much safer than aggroing everything.
- Clear side loot and prisoner opportunities before committing to open combat.
This section of the act is often where players get punished for impatience. The camp has multiple layered encounters, sight lines, and patrol interactions. If you can isolate one leader, eliminate nearby adds, and retreat to choke points, the whole area becomes much more manageable.
6. Recruit or secure Karlach and other wilderness-side content
Before or during your goblin route, make sure you do not miss key side recruitments and content in the surrounding region.
- Track Karlach if you want another powerful melee option.
- Follow the relevant side paths for the owlbear, paladin-related content, and nearby exploration nodes.
- Explore the riverbank and hidden side trails carefully, because Act 1 hides useful gear in small detours.
- Keep an eye on approval if you intend to use a specific companion throughout the game.
The reason this matters is simple: Act 1 companions are not just party options; they are quest engines. Missing one changes what conversations you can trigger, what combat style you can support, and what later story beats become available.
7. Clear the Underdark after your surface route is stable
The Underdark is one of the best places to turn a shaky Act 1 into a stable one.
- Explore its routes only after you have your surface priorities under control.
- Take fights that give strong XP and meaningful loot.
- Watch for terrain hazards, visibility issues, and dangerous vertical drops.
- Use the Underdark as a power bridge before returning to unresolved surface content.
This zone is excellent for players who want more control over pacing. It offers alternate routes, strong rewards, and a natural way to round out level progression. If the surface feels too punishing, the Underdark often gives you the additional experience and equipment needed to come back stronger.
8. Finish the hardest unresolved Act 1 content
Once your party has more resources, finish the remaining major threats.
- Return to difficult bosses with a fuller resource pool.
- Use elixirs, scrolls, and pre-positioning before you trigger the fight.
- Save mobility tools for emergency disengage or repositioning.
- Clean up any faction or companion quests you still want before moving on.
By the end of Act 1, you should have a clear sense of your party’s strengths and a better idea of what kind of build direction you want for the rest of the game. That makes the act less about raw victory and more about setting up Act 2 on favorable terms.
Hardest Encounters in Act 1
The hardest encounters in Act 1 are difficult because they combine bad terrain, enemy numbers, and punishing positioning checks rather than just raw damage.
The Goblin Camp and Goblin Leaders
The Goblin Camp is hard because it rewards enemy coordination more than player impulse. Dror Ragzlin, Priestess Gut, and Minthara each create different problems: one is a danger in open combat, one punishes sloppy room control, and one can overwhelm you if you fight the camp as a single blob.
Concrete tactic:
- Isolate one leader at a time.
- Use stealth or dialogue to reduce the number of enemies that join the fight.
- Fight from choke points, ladders, or doorways where possible.
- Save crowd control for the adds, not the main target.
If you can avoid alerting the whole camp at once, the encounter becomes much more tactical and much less chaotic.
Auntie Ethel
Auntie Ethel is hard because she mixes deception, mobility, and status pressure, which can bait weak parties into wasting turns on the wrong target. Her arena also encourages bad positioning if you chase clones or split too far.
Concrete tactic:
- Bring reveal and control tools rather than pure damage.
- Focus on maintaining formation so she cannot isolate one party member.
- Use forced movement or focus fire when her defensive patterns open a window.
- Keep healing and condition removal ready for the party member she targets most.
The fight feels unfair if you treat it like a standard brawl. It becomes manageable when you treat it like a puzzle that rewards discipline.
The Owlbear and Related Beast Fights
The owlbear encounter is hard because it punishes underleveled parties that stand too close and fail to respect burst damage. It can delete an exposed character if you let it charge or surround you with poor spacing.
Concrete tactic:
- Open from range and keep one layer of separation.
- Use terrain and elevation to reduce its charge effectiveness.
- Let one durable character absorb attention while the rest attack safely.
- If dialogue options exist for your route, use them to reduce unnecessary risk.
A beast fight like this is often less about the monster itself and more about whether your party formation can survive the first two turns.
Spider and Trap-Heavy Areas
The spider-related content and trap-heavy spaces are hard because they punish careless movement and visibility mistakes. Webs, pits, and terrain hazards can turn a routine pull into a disaster.
Concrete tactic:
- Send a scout first.
- Disarm or bypass traps instead of brute-forcing through them.
- Use ranged attacks to start fights from safe ground.
- Avoid stacking the party where one area effect can hit everyone.
The best response to trap content is patience. If your scout can see the route first, the rest of the party does not have to pay the price.
Rewards and Loot
Act 1 rewards are strongest when you think in terms of power spikes, not just individual items, because gear, XP, and unlocks all interact with each other.
| Reward Type | Examples | Why It Matters |
|---|---|---|
| Early companion unlocks | Shadowheart, Astarion, Lae’zel, Karlach | Expands party roles and dialogue options |
| Merchant access | Grove and camp vendors | Lets you buy missing essentials before harder fights |
| Combat loot | Weapons, armor, scrolls, consumables | Smooths the difficulty curve and improves survival |
| Quest unlocks | Companion quests, grove/goblin branch content | Opens major story routes and later reward paths |
| Exploration rewards | Hidden chests, side-zone gear, Underdark finds | Provides power without forcing every fight |
Specific high-value Act 1 reward patterns include:
- Weapons and armor upgrades: Even a small improvement to hit chance or armor class can change an entire encounter in BG3’s action economy.
- Scrolls and consumables: Scrolls of damage or control are especially strong in Act 1 because they let non-casters solve problems their normal kit cannot handle.
- XP from optional fights: Many side encounters are worth doing because Act 1 has enough content to raise party power without grinding.
- Quest progression: Saving tieflings, resolving grove-related content, and completing companion-facing scenes often gives more long-term value than a single loot chest.
A good Act 1 route also improves unlocks. You gain more companion approval opportunities, more merchant access before hostilities, and more freedom to choose who carries social checks later. The act’s best loot is often not the object itself, but the ability to enter Act 2 with a cleaner build and stronger quest state.
If you are min-maxing the baldurs gate 3 walkthrough act 1 route, think of rewards in layers: immediate combat power, party utility, and future narrative leverage.
Missables
Act 1 has several missables that can permanently change your run if you progress too far or resolve major conflicts too early.
- Companion recruitments: If you move too quickly past early recruitment zones, you can lose opportunities to recruit or properly meet key companions in their preferred locations.
- Grove side content: The tiefling and grove storylines can disappear if you trigger the wrong faction outcome before finishing their quests.
- Merchant inventories: Some merchants become unavailable, hostile, or less useful once the act’s major conflict resolves.
- Companion approval scenes: Many approval conversations only trigger if you keep the relevant companion in party rotation before specific story beats.
- Hidden exploration routes: Areas like side caves, traps, and secret paths can be sealed off or become irrelevant after certain world-state changes.
- Quest resolution outcomes: Some choices determine whether future NPCs survive, flee, or become unavailable in later acts.
The most dangerous mistake is rushing the main conflict before you have done the surrounding content. BG3 does not always warn you when a world state will shift; often the game simply moves on, and the missing content is gone. That is why a good Act 1 route starts with recruitment, then exploration, then faction resolution.
A practical rule: before you commit to any major goblin-versus-grove outcome, make sure you have talked to the relevant NPCs, explored the surrounding wilderness, bought the items you need, and recruited the companions you care about. If a questline looks like it could close the act’s political map, stop and clean up the rest of the zone first.
Common Mistakes
Act 1 punishes a handful of repeat mistakes more than it punishes bad luck.
- Rushing the main objective too early — Players want momentum and accidentally lock themselves out of side content; fix it by clearing the Grove, recruitment routes, and key exploration before major faction decisions.
- Ignoring elevation and line-of-sight — New players treat BG3 like a flat RPG; fix it by taking rooftops, ridges, and ledges before initiating fights.
- Splitting the party without a plan — This happens because stealth looks safe until one character gets isolated; fix it by scouting with one unit and moving the rest only after the route is clear.
- Spending every spell slot on minor fights — Players feel pressured to win every encounter in one pass; fix it by using cantrips, weapons, and positioning for trash fights, saving resources for elites and bosses.
- Entering boss fights unprepared — People underestimate Act 1 bosses because the early game seems lenient; fix it by pre-buffing, checking consumables, and knowing escape routes.
- Skipping dialogue with companions — Players focus on combat and miss approval or quest triggers; fix it by cycling key companions into story scenes and long rest conversations.
- Looting too slowly during hostile zones — A few extra containers can cost turns and attract enemies; fix it by looting only high-value rooms and returning later if needed.
The pattern behind most mistakes is the same: players underestimate how much BG3 rewards setup. The game is rarely won by raw output alone; it is won by entering the fight with the right context.
Pro Tips
Act 1 becomes much easier when you exploit systems that are easy to miss on a first run.
Tip 1. Use dialogue as an encounter skip, not just flavor
If you can talk your way into a camp, room, or prisoner situation, do it before you fight. The Goblin Camp and several Grove-adjacent scenes reward social entry because you can choose the angle of engagement instead of inheriting the enemy’s formation.
Tip 2. Keep one character purely for utility
Asterion-style lockpicking, trap disarming, and chest access are worth more than one extra damage dealer in Act 1. If you make one party slot your utility specialist, you will lose fewer resources and pick up more gear.
Tip 3. Pre-position before dialogue ends
A lot of players start conversations with the wrong character standing in the wrong place. Move melee units forward, ranged units to high ground, and a reserve healer out of immediate danger before you click the trigger.
Tip 4. Treat potion throwing as a real support action
Healing potions are not only for drinking. In Act 1, throwing a potion at a downed ally or clustered group can recover multiple actions’ worth of value, especially when a revive is too expensive.
Tip 5. Save your strongest control for enemy reinforcement waves
If a fight is likely to pull extra enemies, hold back your best control spell until the second wave arrives. That matters in camp fights, trap rooms, and any encounter where the battlefield can expand unpredictably.
Tip 6. Return to unfinished areas after one level spike
If a fight felt “almost winnable,” leave, gain one more level or a better weapon, then come back. BG3 is full of encounters that become dramatically easier once your party’s accuracy, HP, and spell access improve by a single step.
Frequently Asked Questions
How long does Act 1 take?
Act 1 length varies heavily depending on exploration, companion routing, and difficulty, but a complete run can be much shorter if you focus on the critical path and much longer if you clear every optional zone.
Should I side with the grove or the goblins?
If you want the safest all-around first playthrough, the grove side is usually easier to manage because it preserves more early story and companion flexibility, but the right choice depends on your roleplay and quest goals.
What level should I be before the Goblin Camp?
You want enough levels to feel comfortable with multi-target fights and resource pressure, so if the camp feels overwhelming, finish more of the Wilderness, Grove, and side content first.
Can I miss companions in Act 1?
Yes, you can miss or delay key recruitments if you skip their locations or trigger world-state changes too early, so it is best to recruit the core party before committing to major faction decisions.
Is the Underdark optional?
Yes, but it is one of the strongest ways to gain XP, loot, and tactical leverage before moving deeper into the game, so skipping it usually makes Act 1 harder than it needs to be.
Related Guides
- Baldur’s Gate 3 Best Early Companions Guide
- Baldur’s Gate 3 Goblin Camp Walkthrough
- Baldur’s Gate 3 Underdark Guide
- Baldur’s Gate 3 Best Early Game Builds
- Baldur’s Gate 3 Beginner Tips and Tricks
- Baldur’s Gate 3 Act 2 Walkthrough
Sources
- https://store.steampowered.com/app/1086940/
- https://en.wikipedia.org/wiki/Baldur's_Gate_(video_game)
See also
- baldurs gate 3 how to get to the underdark: Beginner Guide
- Baldur's Gate 3 guide act 1 Walkthrough
- Baldur’s Gate 3: how to baldurs gate 3 cross play for beginners
- baldurs gate 3 beginner class reddit: Beginner Guide for New Players
- Baldur’s Gate 3 baldurs gate 3 how to save mayrina Beginner Guide
- baldur's gate 3 vs elden ring: which should you play?
- baldurs gate 3 how to recruit minthara: Beginner Guide for New Players
- baldurs gate 3 how to free shadowheart: Beginner Guide
- Baldur’s Gate 3 beginner tips reddit: A Complete Beginner Guide
- baldurs gate 3 best class for beginners: A Beginner Guide to Starting Strong
Screenshots



Reviewed by
BG3 Hub Editorial
Expertise: Editorial team behind BG3 Hub. Content is compiled from official patch notes, community wikis, and playthrough notes, then reviewed and updated on schedule.
Sources
Related Guides

%27/><stop offset=%271%27 stop-color=%27hsl(80,50%,18%)%27/></linearGradient></defs><rect width=%27460%27 height=%27215%27 fill=%27url(%23g)%27/><text x=%27230%27 y=%27115%27 text-anchor=%27middle%27 font-family=%27sans-serif%27 font-size=%2724%27 font-weight=%27700%27 fill=%27rgba(255,255,255,0.85)%27>App 1086940</text><text x=%27230%27 y=%27142%27 text-anchor=%27middle%27 font-family=%27sans-serif%27 font-size=%2711%27 fill=%27rgba(255,255,255,0.6)%27>no image yet</text></svg>)
🔥 Popular Guides
Baldurs Gate 3 Beginner Guide: Complete New Player Starting Guide
Learn Baldur's Gate 3 basics with this beginner guide covering classes, combat, resources, mistakes, and early-game tips.
How to Cool Off Karlach in Baldur's Gate 3 — Infernal Engine Fix
Cool off Karlach in Baldur's Gate 3: fix her infernal engine overheating, romance approval gates, Act 1–3 steps, and what happens if you ignore it.

Best Shadowheart Build BG3 — Free Her, Trickery Cleric & Romance
Free Shadowheart on the Nautiloid, then run the best Trickery Cleric build. Pod rescue steps, approval tips, romance gates, and Act 1–3 skill picks.
BG3 Best Baldur's Gate 3 Characters Tier List
Rank the best Baldur's Gate 3 characters with S/A/B tiers, matchup callouts, methodology, and patch notes for smarter party picks.
📋 Patch Notes & Updates
🛠️ Popular Tools
Frequently Asked Questions
Quick answers from the guide · click a question to expand.
How long does Act 1 take?
Act 1 length varies heavily depending on exploration, companion routing, and difficulty, but a complete run can be much shorter if you focus on the critical path and much longer if you clear every optional zone.
Should I side with the grove or the goblins?
If you want the safest all-around first playthrough, the grove side is usually easier to manage because it preserves more early story and companion flexibility, but the right choice depends on your roleplay and quest goals.
What level should I be before the Goblin Camp?
You want enough levels to feel comfortable with multi-target fights and resource pressure, so if the camp feels overwhelming, finish more of the Wilderness, Grove, and side content first.
Can I miss companions in Act 1?
Yes, you can miss or delay key recruitments if you skip their locations or trigger world-state changes too early, so it is best to recruit the core party before committing to major faction decisions.
Is the Underdark optional?
Yes, but it is one of the strongest ways to gain XP, loot, and tactical leverage before moving deeper into the game, so skipping it usually makes Act 1 harder than it needs to be.
Was this guide helpful?
Rate this guide so we can improve it.
Share your own tip
Found something not in the guide? Submit it below — our editors review every tip before publishing. No account required.