 Baldur's Gate 3
Baldur's Gate 3 Rescue the Gnome and Stop the Windmill Beginner Guide
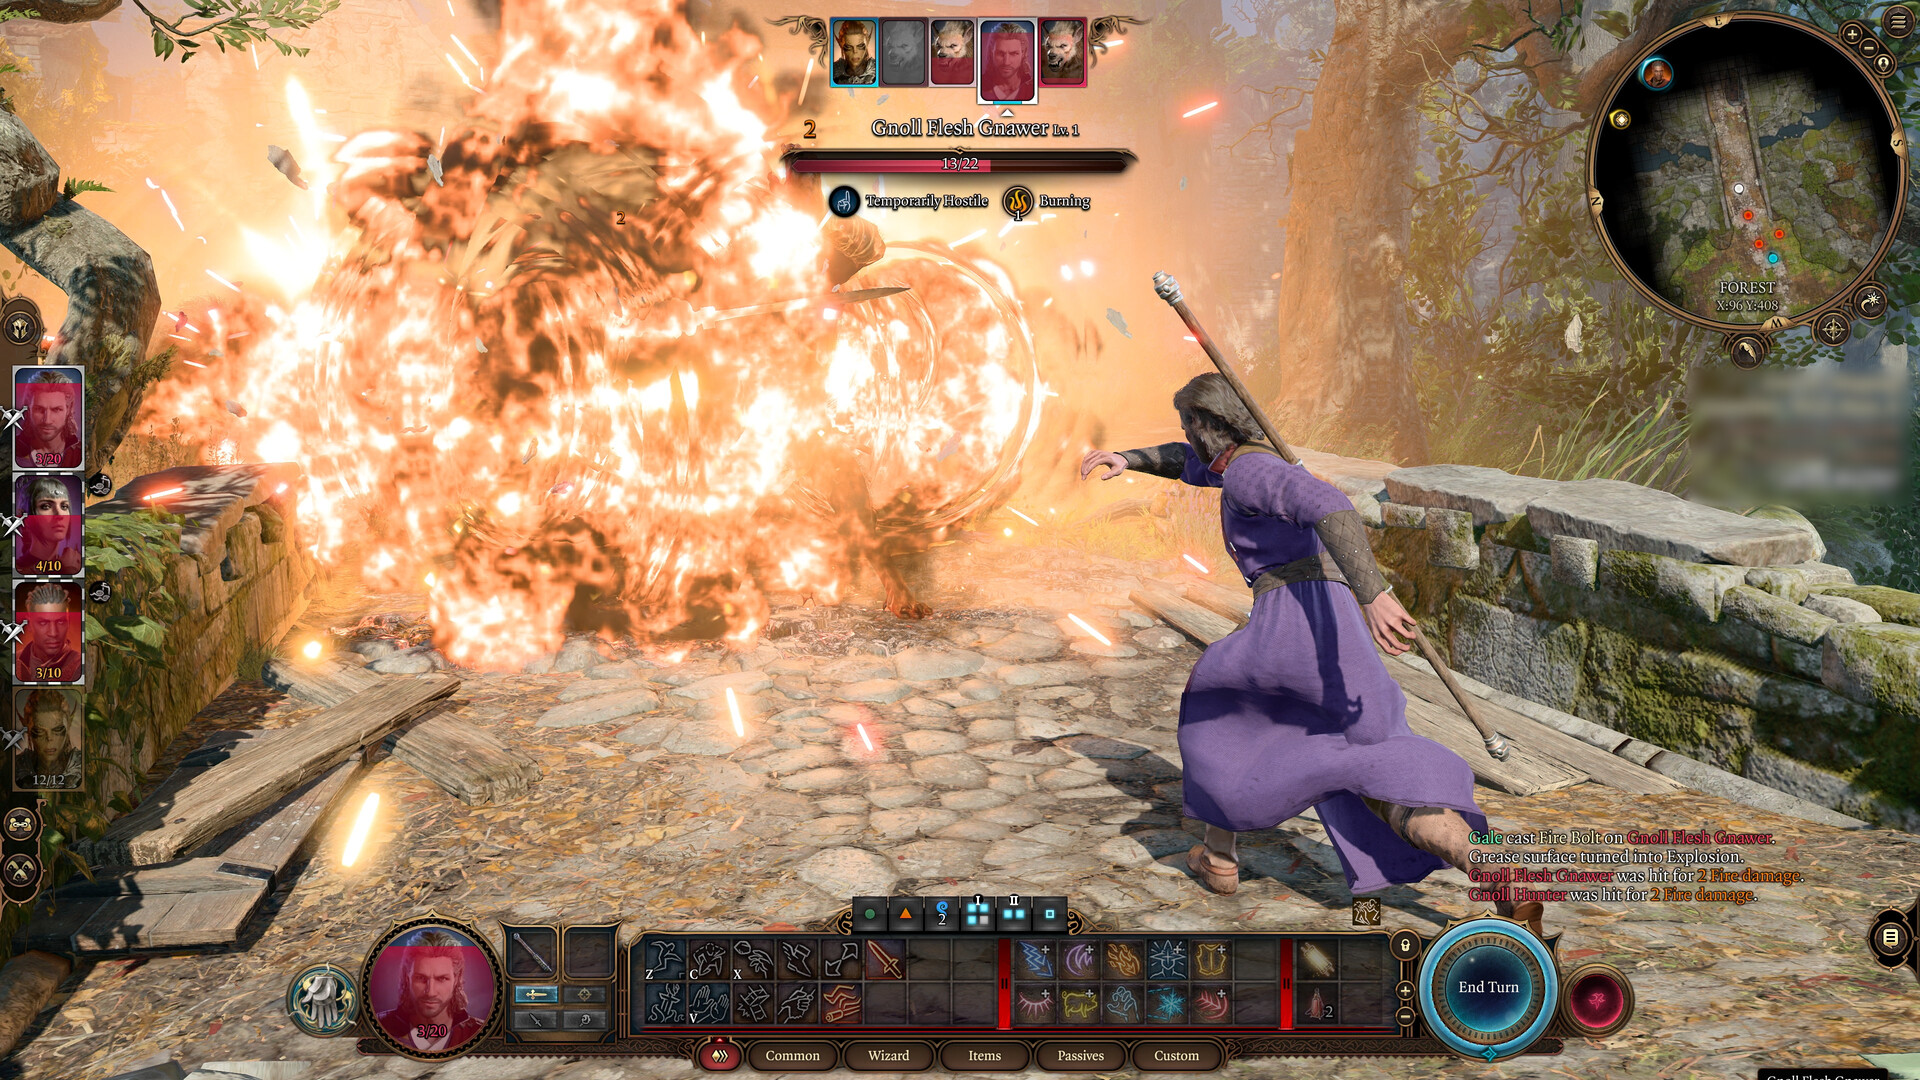
Quick Answer: In Baldur's Gate 3 Rescue the Gnome and Stop the Windmill, split your party, use turn-based mode to reach the control lever safely, deal with the goblins first, and then free Barcus Wroot before he gets flung by the windmill.
What This Quest Actually Demands
Baldur's Gate 3 Rescue the Gnome and Stop the Windmill is a short early-game rescue that asks you to manage positioning, initiative, and timing rather than raw damage. The immediate goal is to stop the moving windmill, save Barcus Wroot, and avoid turning a simple encounter into a messy fight with the goblins around the Blighted Village.
This quest is a strong beginner test because it teaches several core BG3 habits at once. You need to scout before rushing in, understand that turn-based mode is useful outside combat, and recognize that dialogue can be as important as combat. It also sits near other early Act 1 decisions that can snowball, so new players often overcommit to the wrong target or enter the area without checking the ground level, upper platforms, and nearby enemies.
A useful mindset here is to treat the quest like a small tactical puzzle. Examples of the relevant moving parts include the windmill control lever, the goblins patrolling nearby, and Barcus himself, who is in immediate danger until the mechanism is stopped. If your party includes ranged characters such as Astarion or a spellcaster such as Gale, they can help cover the approach while a tougher frontliner like Lae'zel or Shadowheart handles the risky movement. The fight is not hard in the abstract, but it punishes careless pathing.
The wider game reinforces that this is a tutorial in disguise. Baldur's Gate 3 is a story-rich, party-based RPG set in the universe of Dungeons & Dragons, and its choices, movement, and resource use matter as much as your attack rolls. It is also a long game by any normal standard: HowLongToBeat reports roughly 72.71 hours for the main story, 115.69 hours with extras, and 179.74 hours for completion Source. That makes early efficiency worthwhile.
First-Hour Checklist
Your first hour should focus on preparing the party, learning the terrain, and reaching the windmill with enough resources left to handle the rescue cleanly. The best early route is not to sprint straight at the windmill door. Instead, clear a little of the surrounding map, open the ways for a safe approach, and make sure you have basic healing and a few spell slots available when you arrive.
What to do before the windmill
- Recruit your early companions as soon as possible. Shadowheart, Astarion, and Lae'zel each cover a different role, and the rescue is easier when one character can lock down enemies while another handles the lever.
- Check your party formation before entering the Blighted Village. Keep a durable character near the front, and leave ranged characters slightly behind so they do not waste movement on the first turn.
- Use the environment to your advantage. High ground, ladders, and rooftops are common in the area, and BG3 often rewards line-of-sight control more than direct rushing.
- Save before entering the windmill area. This is the kind of early encounter that can go wrong simply because a character takes the wrong path or an NPC becomes hostile.
- Keep a healing potion or spell ready. A basic Misty Step, Healing Word, or potion can recover a failed approach or reposition someone who gets trapped by the terrain.
How to approach the encounter
Once you reach the windmill, pause and inspect the area rather than clicking the lever immediately. The quest becomes much smoother if you first identify where the goblins stand, whether they are already suspicious, and which route gives you the shortest line to the controls. Turn-based mode is valuable here even if combat has not started, because it lets you move each character carefully without wasting time to real-time pathing.
A beginner-friendly approach is to send one stealth-capable character forward, such as Astarion, while the others wait out of sight. If that is not your build, you can still split the party manually and move a single character to the lever while the others stay ready to intervene. Examples of good intervention tools include Ray of Frost from Gale to slow or disrupt, Sacred Flame or Healing Word from Shadowheart for support, and a melee opener from Lae'zel if a goblin gets too close.
The safest order of operations
- Scout the area from a distance.
- Switch to turn-based mode before anyone commits to a bad path.
- Move one character toward the lever.
- Deal with any nearby goblins that threaten the interaction.
- Stop the windmill.
- Speak to Barcus and complete the rescue.
That sequence matters because the rescue is easier when you remove pressure before interacting with the machine. If the goblins are alive and adjacent, they can force you into a messy exchange right when you need precise control. If you already started the fight, keep your support character focused on stabilizing the party rather than trying to maximize damage.
The first hour of BG3 is also about learning how forgiving the game can be if you treat it as a tactical puzzle. The game can be played alone or in a group Source, but either way the early lesson is the same: positioning often matters more than a single big attack. That is especially true in rescue quests like this one, where the objective is not to clear every enemy but to finish the interaction safely.
You might also like
- Baldur's Gate 3 Silver Sword of the Astral Plane Beginner Guide
- Baldur's Gate 3 baldurs gate 3 build dark urge Guide
- baldurs gate 3 lae'zel build: Best Fighter Setup for Lae’zel
- Baldur's Gate 3 baldurs gate 3 best honour mode builds
- Baldur's Gate 3 necromancy build
How to Rescue Barcus Without Making the Area Explode
You rescue Barcus by stopping the windmill before or while the goblins are dealt with, then talking to him after the machinery is under control. The exact struggle for a first-time player is usually not the dialogue; it is the timing. Many players click through too fast, let the party spread out, or trigger a fight on their own terms instead of choosing when to engage.
The cleanest method is to treat the windmill as a priority objective and the goblins as a threat to be managed, not necessarily exterminated. You do not need to turn the whole area into a full clear unless the situation goes badly. If one goblin is blocking the path, focus that target first. If multiple enemies can act on the same turn, use crowd control or focused damage to reduce incoming pressure. Good examples include Shove to create space, Sleep early in the game when available, or any single-target spell that removes one attacker from the rotation.
Practical rescue sequence
- Enter the area with a plan to stop movement, not to chase kills.
- Position one character near the lever before the rest of the party commits.
- Use stealth if possible to reduce the chance of an immediate fight.
- If combat begins, prioritize enemies that can interrupt the lever interaction.
- Once the windmill is stopped, let Barcus speak before wandering off.
A common mistake is spending too many actions on low-value targets while Barcus is still at risk. Another is assuming the quest is failed if combat starts. It is not. The encounter still gives you room to recover as long as you keep the rescue objective in mind. That makes it a strong example of BG3's broader design philosophy: combat and quest resolution are often intertwined, and success comes from solving both at once.
If your party is under-leveled or low on resources, step back and look for a safer route. You can use the surrounding village terrain to regroup, rest if necessary, or approach from a different angle. The encounter is not a DPS check in the usual sense. It is an execution check. A lower-damage group with good positioning can do better here than a stronger group that arrives disorganized.
This is also where turn order knowledge becomes important. If the lever holder acts before enemy pressure lands, the rescue becomes much easier. If not, pre-buffing or movement skills can still save the run. Misty Step, Jump, and ordinary dash movement often decide these early BG3 encounters more than flashy damage numbers. That is useful to learn early because later Act 1 and Act 2 fights keep using the same logic in larger, harsher spaces.
Resource Priority Order
Your resource priority should favor survival tools, movement, and flexible consumables before luxury spending or niche crafting. Early BG3 punishes players who spend everything on the first vendor window, because the game regularly asks for healing, repositioning, and class-specific utility in the same stretch of Act 1.
Spend and hoard in this order
| Priority | What to Spend or Save | Why It Matters | Early Examples |
|---|---|---|---|
| 1 | Healing consumables and restoration tools | They keep you functional after a bad pull or a failed save | Potions of Healing, Healing Word, short rests |
| 2 | Movement and positioning options | They solve rescue, escape, and elevation problems | Misty Step, Jump, Dash, arrows for opening angles |
| 3 | Core weapon and armor upgrades | These improve consistency without forcing a new playstyle | A better bow for Astarion, stronger armor for Lae'zel, a shield for Shadowheart |
| 4 | Scrolls and situational utility | They are useful, but only when the encounter asks for them | Scroll of Feather Fall, Scroll of Thunderwave, Scroll of Revivify if available later |
| 5 | Crafting and novelty purchases | Useful later, but not urgent in the first hour | Ingredients, niche arrows, camp extras |
This priority order works because early BG3 is more about options than power spikes. A potion lets you survive a bad turn. A movement spell lets you reach the lever or high ground. A weapon upgrade matters, but only after your basic utility is covered. If you buy every shiny item you see, you may arrive at the windmill with no healing and no flexible answers to a bad initiative roll.
What to hoard early
- Healing potions and camp supplies should be saved for unavoidable pressure, not small scratches.
- Scrolls should be treated as emergency tools, especially if your party lacks a spell that matches the situation.
- Throwables and arrows are best used when they change the shape of a fight, such as knocking an enemy away from the lever.
- Gold is worth more than it looks in the first act because it gives you room to correct bad gearing decisions.
What to spend early
- Buy gear that fixes a real problem, such as armor for a character who keeps getting hit or a weapon that matches your main ability score.
- Spend on consumables that create tactical flexibility, not just raw damage.
- If a vendor offers something that improves stealth, mobility, or survival, that is often better than a small damage bump.
A lot of new players overvalue crafting and undervalue mobility. BG3 rewards both in the long run, but the rescue quest shows why movement is king at the start. A single reposition can save Barcus, avoid a lethal hit, and prevent a failed quest state. That is a much better use of early resources than buying a minor consumable you may never need.
The game's broader reception suggests players keep running into this learning curve successfully, not because the game is easy, but because its systems are readable once you understand the priorities. Steam lists Baldur's Gate 3 as "Overwhelmingly Positive" at 96.8% positive across 848142 reviews Source, which is a good reminder that the early complexity is intentional rather than accidental. The trick is to spend like someone who expects the next encounter to punish waste.
Common Mistakes
Common beginner mistakes in Baldur's Gate 3 Rescue the Gnome and Stop the Windmill usually come from rushing, ignoring terrain, or treating the encounter like a standard fight instead of a timed rescue. The good news is that each mistake has a direct correction.
1. Charging straight to the lever
Players do this because the objective is visually obvious and the windmill looks like a simple interactable. The fix is to scout first, then send one character forward while the others hold position or cover the route.
2. Fighting every goblin instead of prioritizing the rescue
Players fall into this because BG3 trains you to clear threats, but this quest rewards focus more than completeness. The fix is to remove only the enemies that block the lever or threaten Barcus, then stop the machine and decide whether the rest of the fight is worth finishing.
3. Forgetting to use turn-based mode outside combat
Players miss this because they assume turn-based mode only matters after initiative starts. The fix is to switch it on before the final approach so you can move each character deliberately and avoid wasting movement or triggering unwanted pathing.
4. Arriving with no healing or movement options
Players spend consumables earlier and then hit the rescue with an empty toolbox. The fix is to keep at least one healing resource and one repositioning tool available, such as a potion, Misty Step, or Dash-supported approach.
5. Splitting the party too far apart
Players do this because they want to flank or loot at the same time. The fix is to keep the group close enough that one enemy turn does not isolate your healer, frontliner, and lever runner.
6. Assuming the quest is failed once combat begins
Players panic when the goblins turn hostile or the path gets crowded. The fix is to keep acting toward the objective. In BG3, many encounters remain recoverable if you keep the rescue state in mind instead of letting the fight become the whole point.
7. Using expensive damage too early
Players often spend strong spell slots or limited items on the first visible target. The fix is to reserve your best tools until you know whether the lever can be reached safely or whether a goblin needs to be removed immediately.
These mistakes show up across the rest of Act 1 too. If you correct them here, you will also play the game better in the goblin camp, around the grove, and in the underground areas later on. The lesson is simple: objectives, not enemy count, should determine your priority.
Pro Tips
The best beginner pro tips for this quest are the ones that improve your control over movement, enemy pressure, and turn order. They go beyond simply "be careful" and give you specific triggers to look for.
Tip 1. Enter turn-based mode before the last visible corner
If you can see the windmill but have not yet committed to the walkway, switch to turn-based mode and advance one character at a time. This prevents awkward pathing and gives you a clean response if an enemy patrol starts moving.
Tip 2. Keep one ranged character on standby
A character like Astarion, Gale, or Wyll can contribute without standing next to the lever. That matters if a goblin blocks the route or if you need to pressure an enemy from safety while your frontliner moves in.
Tip 3. Use high ground to control the approach
If a roof, ladder, or rise lets you see the fight before committing, take it. High ground can improve attack angles, reveal enemies, and make it harder for melee foes to surround your lever runner.
Tip 4. Treat movement spells as rescue tools, not combat luxuries
Misty Step, Jump, and similar effects are especially valuable when a quest objective sits in a tight space. Save them for the moments that truly need them, like reaching the lever or escaping after the windmill is stopped.
Tip 5. Consider who speaks to Barcus
After the rescue, the conversation is usually easiest if the character who handled the rescue also speaks to him. It is not mandatory, but keeping the same character on the objective often makes the scene feel cleaner and reduces confusion about where everyone is standing.
Tip 6. Watch initiative order before spending your best action
If an enemy acts before your lever character, pause and reassess. Sometimes the correct play is to use a cheap control option or move rather than force damage. A small adjustment can preserve the rescue better than a desperate all-in attack.
Tip 7. Bring at least one answer to forced movement
Shove, Thunderwave, repelling effects, and positioning tricks can all help if a goblin or barrier blocks the route. This is especially relevant in cramped early areas where one body can stall the whole rescue.
These tips matter because BG3 rewards planning that looks small in the moment but saves entire turns. A good rescue is often won by one correct move before combat really starts, not by a dramatic cleanup afterward.
Graduation Threshold
You are out of the beginner phase when you can predict encounters like Baldur's Gate 3 Rescue the Gnome and Stop the Windmill before they happen and solve them with minimal panic. That means you no longer rely on luck or brute force to survive early quests; you are reading terrain, turn order, and party roles on the fly.
A practical way to judge readiness is whether you can handle three early situations without looking up a solution:
- You can move one character to a quest objective while the other three stay protected and useful.
- You understand when to use consumables versus when to save them.
- You can identify which enemy matters most in the current turn, rather than attacking the nearest target by habit.
Once those habits stick, you are ready for the more demanding parts of Act 1. For example, the goblin camp becomes more manageable when you already know how to isolate a target and protect a key character, and the underdark or later quest chains stop feeling like sudden difficulty spikes. You also start building parties around role coverage rather than just favorite characters, which is a major transition in BG3.
The game's length itself reinforces that the beginner phase is only the opening stretch. With a main story around 72.71 hours and completion climbing to 179.74 hours according to HowLongToBeat Source, the first-hour lesson is really about building habits that survive the rest of the campaign. If you can rescue Barcus without wasting resources, you are already thinking more like a BG3 player and less like someone testing buttons.
Related Guides
These next-step guides should come after the rescue quest because they connect directly to the same early-game decisions.
- open hand temple murders Baldur's Gate 3 Early Game Party Composition Guide
- related guide Baldur's Gate 3 Best Beginner Builds
- silent library puzzle Baldur's Gate 3 Act 1 Walkthrough
- related guide Baldur's Gate 3 Companion Recruitment Guide
- baldur's gate 3 tips Baldur's Gate 3 Combat Basics for New Players
- related guide Baldur's Gate 3 Best Early Spells and Cantrips
- baldur's gate 3 tips Baldur's Gate 3 Goblin Camp Beginner Guide
Sources
- https://store.steampowered.com/app/1086940/
- https://howlongtobeat.com/?q=bg3
- https://www.protondb.com/app/1086940
- https://steamcommunity.com/stats/1086940/achievements
- https://store.steampowered.com/app/1086940/
- https://en.wikipedia.org/wiki/Baldur's_Gate_3
- https://api.steambase.io/games/1086940
- https://www.cheapshark.com/redirect?dealID=KR6JzYIE5jQz4X%2FqfqZL7uqeWAALnY%2Beipr2lwHIFGI%3D
See also
- Baldur's Gate 3 baldurs gate 3 best dual wield build
- Baldur's Gate 3 Kill Raphael's Old Enemy Beginner Guide
- baldurs gate 3 best lae'zel build
- Baldur's Gate 3 Investigate the Sel nite Resistance Beginner Guide
- Baldur's Gate 3 baldurs gate 3 builds youtube Build Guide
- Baldur's Gate 3 baldurs gate 3 best rogue build
- Baldur's Gate 3 baldurs gate 3 build tool: A Practical Build Guide for Reliable Party Power
- Baldur’s Gate 3 baldurs gate 3 build randomizer Build Guide
- Baldur's Gate 3 baldurs gate 3 builds delta
- Baldur's Gate 3 build warlock: Best BG3 Warlock Build Guide
Screenshots

Reviewed by
BG3 Hub Editorial
Expertise: Editorial team behind BG3 Hub. Content is compiled from official patch notes, community wikis, and playthrough notes, then reviewed and updated on schedule.
Sources
Related Guides

%27/><stop offset=%271%27 stop-color=%27hsl(80,50%,18%)%27/></linearGradient></defs><rect width=%27460%27 height=%27215%27 fill=%27url(%23g)%27/><text x=%27230%27 y=%27115%27 text-anchor=%27middle%27 font-family=%27sans-serif%27 font-size=%2724%27 font-weight=%27700%27 fill=%27rgba(255,255,255,0.85)%27>App 1086940</text><text x=%27230%27 y=%27142%27 text-anchor=%27middle%27 font-family=%27sans-serif%27 font-size=%2711%27 fill=%27rgba(255,255,255,0.6)%27>no image yet</text></svg>)
🔥 Popular Guides

bg3 class tier list act 1
Act 1 BG3 class tier list with S/A/B ranks, matchup flips, mistakes, tips, and an FAQ for new and returning players.
BG3 Top Baldur's Gate 3 Builds Guide
Best BG3 builds explained with roles, stats, gear, counters, budget swaps, and pro tips for any difficulty.
bg3 best builds for honor mode: Baldur’s Gate 3 Build Guide
Top BG3 Honor Mode builds, stat priorities, gear, counters, and budget options for a safer Baldur’s Gate 3 run.
Baldur's Gate 3 Class Tier List
S, A, and B class rankings for BG3 with methodology, situational flips, patch notes, mistakes, pro tips, and FAQs.
📋 Patch Notes & Updates
🛠️ Popular Tools
Was this guide helpful?
Rate this guide so we can improve it.
Share your own tip
Found something not in the guide? Submit it below — our editors review every tip before publishing. No account required.