 Baldur's Gate 3
Baldur's Gate 3 Walkthrough Act 3
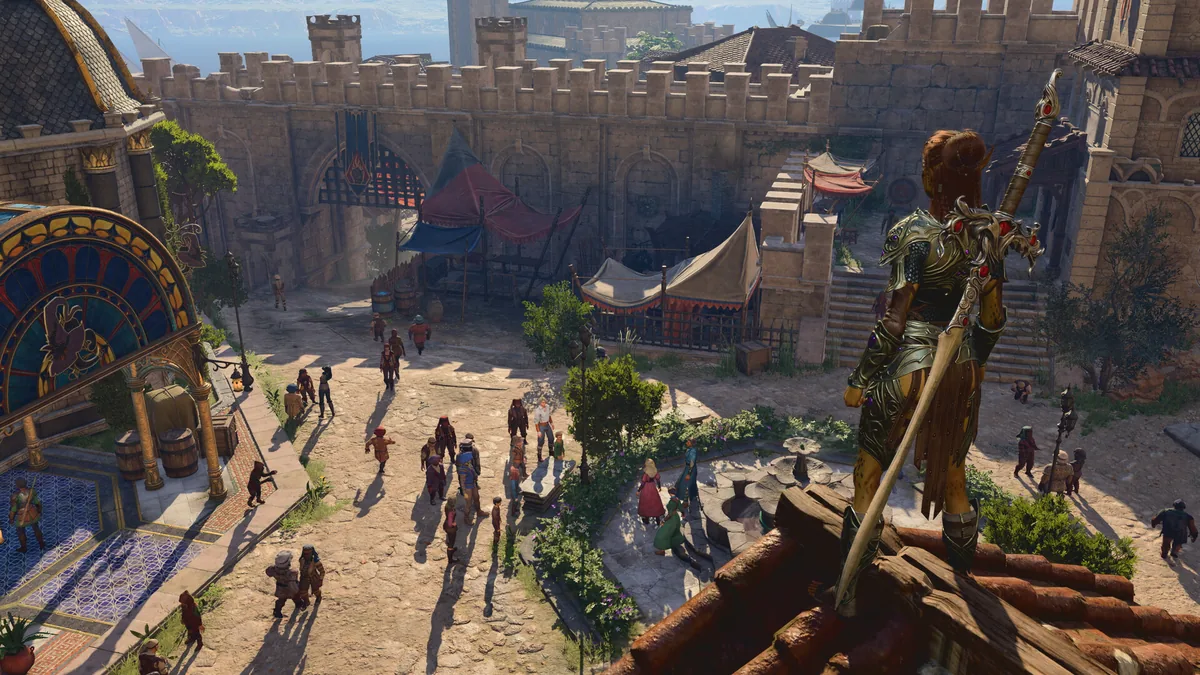
Quick Answer: Baldurs Gate 3 walkthrough act 3 follows the main questline through Baldur’s Gate, prioritizing the Orin and Gortash arcs, companion resolutions, and endgame setup while avoiding missable city content.
Overview
Act 3 is the point where Baldur’s Gate 3 stops being a road trip and becomes a citywide pressure test. The game opens up into dense quest clusters, multiple faction layers, and a pile of irreversible choices, so the cleanest route is to push the main story only when you have cleared the companion and district content that can disappear behind progression gates. That matters because Act 3 is less about raw exploration and more about sequencing. If you enter the Lower City too fast, you can lock yourself out of side arcs, vendor inventories, and companion outcomes that are easy to miss on a blind run.
The tone of the act fits the game’s core premise. Steam describes Baldur’s Gate 3 as a “story-rich, party-based RPG set in the universe of Dungeons & Dragons” where choices shape “a tale of fellowship and betrayal, survival and sacrifice, and the lure of absolute power” Source. That description is not marketing fluff in Act 3; it is the actual structure of the chapter. The city is where companion conflicts, faction tensions, and the final Absolute arc converge.
From a practical walkthrough standpoint, treat Act 3 like a late-game route optimization problem. You want to preserve optional XP, vendor access, and companion triggers before advancing the main plot to points of no return. The strongest pattern is to finish the open-ended side content first, then commit to the Orin and Gortash sequence, and only then push the final battle chain. That approach reduces backtracking, limits accidental fail states, and keeps your party at peak readiness for the hardest encounters.
Prerequisites
You should enter Act 3 with a levelled, balanced party, upgraded core gear, and a plan for crowd control, burst damage, and mobility.
- Level: Aim to be in the late game range before entering the city proper. Act 3 is tuned for parties that already have access to their strongest class features, defensive layers, and spell packages.
- Party composition: Bring one frontliner, one dedicated healer or support, one area-control caster, and one flexible damage dealer. A balanced four-person group handles the act’s mixed encounter design best.
- Equipment: Prioritize +1 or better weapons, reliable saving-throw gear, mobility tools, and defensive accessories that protect against control effects, fear, paralysis, and burst damage.
- Difficulty: On higher difficulties, the act punishes sloppy positioning and resource waste. Tactician-style play benefits from pre-buffing, focus-fire discipline, and safe rest timing.
- Consumables: Carry scrolls, elixirs, invisibility tools, and condition-clearing items. Act 3 has enough dialogue-driven traps and ambushes that utility items are not optional.
- Class coverage: Make sure you can handle locked doors, detection checks, enemy summons, and explosive set pieces without relying on a single character to do everything.
The best Act 3 party is not necessarily the highest-damage party. It is the one that can answer multiple problem types without spending all of its resources in the first two fights. Examples that work well in the current meta are a martial core with a control wizard, a healer-buff support, and a skill monkey for city checks; or a paladin, cleric, rogue, and sorcerer setup that spreads damage types and utility. In Baldur’s Gate specifically, that flexibility matters more than pure damage because the game repeatedly shifts from social scenes to ambushes to multi-stage boss events.
A second requirement is mental, not mechanical: keep a clean save before each major district push. Act 3 has several points where one questline can override another, and the city’s density makes it easy to lose track of what you have already resolved. If you treat every district as a mini-route instead of free roam, the act becomes much more manageable.

You might also like
- Baldur's Gate 3 patch 8 release date: Patch Notes Explained
- baldurs gate 3 how to get lae'zel down: Beginner Guide for New Players
- Baldur's Gate 3 How to Open Gilded Chest: Beginner Guide
- Baldur's Gate 3 Walkthrough Act 2
- baldurs gate 3 tips and tricks for beginners
Step-by-Step Route
The safest Act 3 route is to clear the city in layers, save the major bosses for later, and never push the main quest forward before checking companion and faction locks.
1. Secure your foothold in the city
Start by stabilizing your camp, checking your active companion quests, and visiting the first cluster of vendors and quest givers in the city’s opening area. This is the point where you should re-equip everyone, redistribute scrolls, and confirm who still needs personal quest progression. Act 3 is full of hidden fail states tied to dialogue timing, so the first job is not fighting. It is identifying which NPCs and companions have urgent triggers before you advance anything major.
Do the obvious utility work first. Rest, inspect your inventory, refresh buffs, and note any unfinished “talk to X” markers. This helps because Baldur’s Gate 3 routinely hides key progression behind conversations rather than combat. A clean opening pass also reveals whether your build is missing anything obvious, such as a source of flight, a reliable silence effect, or a way to force saving throws on clustered enemies.
2. Clear the early city content before touching the main pressure points
Work through the first round of side quests, companion scenes, and district investigations before you move toward the boss arcs. In practical terms, that means handling anything that looks like local politics, disappearances, guild tension, or companion-specific aftermath. The city is packed with content that can be lost later, so the correct instinct is to over-clear, not rush.
The reason this step matters is that many Act 3 side quests are not isolated chores. They are linked to vendors, faction outcomes, and later cutscenes. For example, a seemingly small investigation can change who survives, who shows up at camp, or which shop remains available. If you are playing blind, the best heuristic is simple: complete anything in the city that is not directly tied to the Orin/Gortash endgame before you commit to those lines.
3. Prioritize companion quests with irreversible outcomes
Companion arcs should be handled before the city’s endgame gates tighten. Act 3 is where several personal stories reach their sharpest decision points, and those choices can affect endings, combat support, or available dialogue paths. Characters like Shadowheart, Lae'zel, Astarion, Gale, and Karlach all have moments in this act where one conversation determines the shape of the rest of the run.
The safest way to approach this is to finish companion content as soon as its trigger becomes available. Do not leave a major personal quest hanging while you wander the Lower City for generic loot. In a blind playthrough, that is where players most often lose the option they wanted. If a companion asks for a specific destination, treat that as high priority unless you already know the downstream consequences.
4. Handle the Gortash line with full preparation
When you are ready, move into the Gortash sequence with defensive buffs and a rested party. His route is not difficult because it is mechanically mysterious; it is difficult because the game layers hazards, reinforcements, and positional constraints into one extended run. You want your party organized around movement, focus-fire, and interruption tools.
Before engaging, make sure you have your strongest openers ready. Good examples are pre-cast protective buffs, summons that absorb enemy attention, and ranged pressure that can remove support units early. If your party relies on concentration spells, build around keeping those active. If you can delay enemy momentum in the first round, the rest of the encounter becomes much more controlled.
5. Resolve Orin’s arc with anti-ambush discipline
Orin’s sequence rewards preparation more than brute force. The encounter line leans into isolation, pressure on a single target, and tempo swings that punish careless positioning. If your party can break her setup before it stabilizes, the fight becomes much more manageable.
Use the environment to reduce her threat. Spread out enough to avoid feeding area damage, but stay close enough to respond if she targets a vulnerable character. Keep summons or disposable units ready to absorb attack patterns where possible. If a build has reliable burst on one target, save it for the moment her defenses are exposed rather than spending it too early on minions.
6. Clear the remaining high-value side content
After the major boss arcs are under control, circle back for the remaining city quests, optional encounters, and locked rewards. This is the stage where you mop up questlines that are easier to finish once the city’s major tensions are resolved. It is also where you should revisit vendors, since some stock becomes more useful after you know your final party plan.
Do not assume every side quest is safe to leave until the final stretch. Some of them are soft-timed by story progression rather than a literal timer, so the right move is to finish them before you trigger the final endgame chain. A strong Act 3 route always leaves a buffer for cleanup after the main boss routes but before the point of no return.
7. Push the finale only after your saves are clean
Only move into the final sequence once your important side content is done and your party is fully equipped. The endgame can rapidly compress the available decision space, and at that point you are no longer “exploring the act.” You are committing to resolution.
Before crossing that threshold, make one last check: companion quests resolved, key vendors visited, consumables stocked, and any wanted outcomes locked in. That final audit is what separates a smooth Act 3 from one where you realize too late that a city quest or relationship state has already vanished.
Hardest Encounters
The hardest Act 3 encounters are difficult because they combine burst damage, adds, terrain pressure, and timing windows rather than simply inflating enemy stats.
Gortash
Gortash is hard because he often forces you to manage multiple threats at once while keeping pressure on the correct target. The encounter punishes wandering forward without a plan, since support units and environmental danger can turn a routine fight into a resource drain. The concrete tactic is to remove weaker enemies early, keep your backline protected, and use movement tools to prevent your party from being split.
Examples of good answers include:
- A frontliner using Sentinel-style control to pin down advancing threats.
- A caster opening with battlefield denial like Wall of Fire or similar zone control.
- Ranged damage focusing on priority targets rather than chasing every enemy on the board.
Orin
Orin is hard because she creates a disruption fight, not a fair duel. She threatens isolated characters, punishes bad spacing, and can force a collapse if your party reacts too slowly. The concrete tactic is to deny her tempo: keep your formation tight enough to respond, but not so tight that one area effect wipes the group. Save burst and disable tools for her vulnerable windows.
Examples of useful tools include:
- Single-target burst like Smite, Sneak Attack, or high-roll spell damage.
- Displacement and escape tools such as Misty Step or Flight.
- Summons or temporary allies that absorb first contact and waste enemy actions.
Any multi-stage city confrontation
Multi-stage Act 3 fights are hard because they chain resource checks into one sequence. You are not only fighting the first wave; you are carrying your spell slots, health pool, and positioning into the next wave. The concrete tactic is to treat the first stage as setup, not a place to spend everything. Use efficient damage, not flashy overkill, unless you know it secures the entire board state.
A practical pattern is:
- Open with defensive buffs before initiative is rolled.
- Remove enemy control casters and mobility threats first.
- Save healing for stabilizing, not topping off, unless the game state is already safe.
Fights that punish dialogue choices
Some of the hardest scenes are hard because they begin with a conversation, not a combat prompt. That means you can accidentally start the fight in a worse position if you click through options too fast. The concrete tactic is to read the room before engaging and make sure your party is already buffed, positioned, and ready to act.
The common examples are faction standoffs, forced inspections, and boss introductions that can transition directly into combat. In those scenes, pre-positioning matters as much as raw damage. If you can enter from stealth, invisibility, or with an advantageous elevation angle, you can often cut the difficulty in half.
Rewards and Loot
Act 3 rewards you with top-end gear, final companion payoffs, major XP, and access to endgame-altering unlocks.
The biggest reward category is not a single sword or robe; it is the consolidation of high-value options. By Act 3, you are choosing between build-defining items, faction resolutions, and companion outcomes that can change the final fight. The act also pays out heavily in experience because so much of the city is optional content. Finishing district quests, boss lines, and companion arcs can push your party deeper into late-game power thresholds and make the finale significantly easier.
Useful rewards commonly come from three places:
- Boss routes: Unique weapons, armor, or quest-critical unlocks tied to the Gortash and Orin lines.
- City quests: Jewelry, consumables, scrolls, and faction-dependent gear from completed investigations.
- Companion arcs: Personal rewards, ending-state unlocks, and sometimes special dialogue or combat support.
The most important loot in Act 3 is often utility gear rather than raw damage sticks. A good example is equipment that improves saving throws, concentration checks, initiative, or movement. In the current meta, those stats often outperform a small damage increase because they prevent whole turns from being lost to control effects. A strong city build benefits from items that support mobility and action economy, such as boots, cloaks, rings, and amulets that prevent enemy tempo from snowballing.
| Reward Type | What It Gives | Why It Matters in Act 3 | Example Sources |
|---|---|---|---|
| Boss loot | Signature weapons, armor, quest unlocks | Powers up the final stretch and secures build identity | Gortash and Orin progression lines |
| City quest rewards | Gold, gear, consumables, XP | Fills gaps and funds late-game respec or shopping | District investigations and faction tasks |
| Companion rewards | Ending states, personal resolutions, bonus scenes | Alters finale outcomes and character payoffs | Shadowheart, Astarion, Lae'zel, Gale, Karlach |
You should also value vendor access as part of the reward structure. A vendor that survives into the late act can be more valuable than a one-off chest because it turns your Act 3 route into a gear optimization pass. If a questline preserves or unlocks a merchant, that is effectively a long-term reward, not a side note.
Missables
Act 3 has several permanent missables, and the most dangerous ones are not obvious treasure chests but quest states, NPC outcomes, and vendor windows.
The first class of missables is companion progression. If you push the main plot too far before resolving companion triggers, you can lose scenes or endings tied to characters like Shadowheart, Astarion, Lae'zel, Gale, and Karlach. The fix is straightforward: finish personal quests when they become available instead of shelving them for later.
The second class is district content. Some city quests are only available before specific story milestones. If you clear a main objective first, certain NPCs may disappear, change location, or die, and that can permanently close the associated rewards. The workaround is to treat unexplored side markers as priority content before any major boss commitment.
The third class is faction and vendor state. Once a confrontation resolves, some shops and factions stop being available. That means gold is only useful if you spend it before the city rearranges itself. If a merchant has unique stock, buy what you need before you trigger the next story break.
Specific missables to watch for include:
- Companion-specific cutscenes that depend on prior approvals or location triggers.
- Quest chains that require you to speak to an NPC before advancing the main story.
- Unique gear tied to a faction’s survival or a side character’s fate.
- Vendor inventories that vanish when a district’s political situation changes.
- Resolution branches that alter the final battle support you receive.
One practical rule solves most of this: whenever the game offers a clear “major objective” prompt, stop and clear the rest of the city first unless you are certain the remaining content is already safe. That is the cleanest way to keep a blind run from self-locking.
Common Mistakes
These are the mistakes that most often turn a clean Act 3 into a messy one.
- Pushing the main quest too early: Players rush Gortash or Orin because the journal points that way. The fix is to clear side quests, vendor routes, and companion scenes first.
- Ignoring companion triggers: People assume personal quests can wait until the end. The fix is to resolve each companion line as soon as the act presents a clear objective.
- Entering boss fights without buffs: Players rely on initiative alone and lose momentum immediately. The fix is to pre-cast defenses, reposition, and enter with concentration-ready spells.
- Overusing consumables in small fights: The city has lots of manageable encounters, so players burn scrolls and elixirs too early. The fix is to reserve premium resources for boss routes and multi-stage fights.
- Looting before checking quest consequences: Players grab gear and leave without speaking to key NPCs. The fix is to finish dialogue checks before moving to the next district.
- Splitting the party too far apart: Act 3 punishes isolated characters with ambushes and focus fire. The fix is to keep enough cohesion to respond to sudden threats while still respecting AoE spacing.
Pro Tips
These are advanced habits that make Act 3 much smoother.
Tip 1. Pre-buff before every major dialogue chain
If you are about to speak to a boss, faction leader, or trigger NPC, cast your long-duration buffs first. That includes defensive spells, summons, and mobility tools, because several Act 3 conversations can turn hostile without warning.
Tip 2. Keep one slot for emergency movement
When a fight turns into a positioning puzzle, a single Misty Step, Dimension Door, or similar escape tool can save a full turn cycle. The best time to hold that slot is in fights with elevation changes, reinforcements, or isolated priority targets.
Tip 3. Save one high-impact control spell for the second wave
In multi-stage encounters, the first wave often looks like the real threat, but the second wave is what breaks parties. Hold one control spell, stun, or area denial tool in reserve so you can reset the board when the next enemy group arrives.
Tip 4. Buy utility, not just damage
If you are deciding between a slightly better weapon and gear that improves initiative, concentration, or saving throws, utility often wins in Act 3. The city’s hardest scenes reward actions that keep your turns stable, not just bigger crit numbers.
Tip 5. Check quest order before long rests
A long rest can advance certain companion or city states. Before resting, make sure you have not left an urgent NPC interaction unresolved. This is especially important after you enter a new district or finish a boss-adjacent objective.
Tip 6. Use summons to absorb first contact
Summons are not only extra damage. In Act 3, they are often the best way to force enemy AI to waste a turn, reveal ambush positioning, or spend attacks on something disposable while your core party stays safe.
FAQ
What level should I be for Act 3?
You should enter Act 3 fully developed for the late game, with your core class features online and your party already equipped with strong gear.
Should I do side quests before Gortash and Orin?
Yes. The safest route is to clear side content and companion arcs first, because several quests and outcomes can disappear once you move the main story forward.
Is Act 3 harder than the earlier acts?
Yes. Act 3 is harder mainly because it stacks layered objectives, tighter fail states, and more punishing boss designs rather than because every enemy is individually stronger.
What is the most important gear type in Act 3?
Gear that improves survivability, initiative, movement, and concentration tends to matter more than minor damage gains in the city’s toughest encounters.
Can I still finish companion quests after the main bosses?
Sometimes, but not reliably. The safe assumption is that companion quests should be done before you commit to the final Act 3 sequence.
Related Guides
- Baldur's Gate 3 Beginner Guide
- Baldur's Gate 3 Best Builds
- Baldur's Gate 3 Companion Quest Guide
- Baldur's Gate 3 Act 1 Walkthrough
- Baldur's Gate 3 Act 2 Walkthrough
- Baldur's Gate 3 Endgame Choices Guide
Sources
- https://store.steampowered.com/app/1086940/
- https://en.wikipedia.org/wiki/Baldur's_Gate_(video_game)
See also
- baldurs gate 3 how to get owlbear cub Beginner Guide
- baldurs gate 3 how to get to the underdark: Beginner Guide
- Baldur's Gate 3 guide act 1 Walkthrough
- Baldur’s Gate 3 baldurs gate 3 how to save mayrina Beginner Guide
- Baldur’s Gate 3: how to baldurs gate 3 cross play for beginners
- baldurs gate 3 beginner class reddit: Beginner Guide for New Players
- baldur's gate 3 vs elden ring: which should you play?
- baldurs gate 3 how to recruit minthara: Beginner Guide for New Players
- baldurs gate 3 best class for beginners: A Beginner Guide to Starting Strong
- baldurs gate 3 how to free shadowheart: Beginner Guide
Screenshots



Reviewed by
BG3 Hub Editorial
Expertise: Editorial team behind BG3 Hub. Content is compiled from official patch notes, community wikis, and playthrough notes, then reviewed and updated on schedule.
Sources
Related Guides
%27/><stop offset=%271%27 stop-color=%27hsl(80,50%,18%)%27/></linearGradient></defs><rect width=%27460%27 height=%27215%27 fill=%27url(%23g)%27/><text x=%27230%27 y=%27115%27 text-anchor=%27middle%27 font-family=%27sans-serif%27 font-size=%2724%27 font-weight=%27700%27 fill=%27rgba(255,255,255,0.85)%27>App 1086940</text><text x=%27230%27 y=%27142%27 text-anchor=%27middle%27 font-family=%27sans-serif%27 font-size=%2711%27 fill=%27rgba(255,255,255,0.6)%27>no image yet</text></svg>)
🔥 Popular Guides
How to Cool Off Karlach in Baldur's Gate 3 — Infernal Engine Fix
Cool off Karlach in Baldur's Gate 3: fix her infernal engine overheating, romance approval gates, Act 1–3 steps, and what happens if you ignore it.

Best Shadowheart Build BG3 — Free Her, Trickery Cleric & Romance
Free Shadowheart on the Nautiloid, then run the best Trickery Cleric build. Pod rescue steps, approval tips, romance gates, and Act 1–3 skill picks.
BG3 Best Baldur's Gate 3 Characters Tier List
Rank the best Baldur's Gate 3 characters with S/A/B tiers, matchup callouts, methodology, and patch notes for smarter party picks.
Baldur's Gate 3 elden ring let me solo her build
Solo BG3 build guide for a high-survivability, first-turn-dominant playstyle with stats, gear, counters, and budget options.
📋 Patch Notes & Updates
🛠️ Popular Tools
Frequently Asked Questions
Quick answers from the guide · click a question to expand.
What level should I be for Act 3?
You should enter Act 3 fully developed for the late game, with your core class features online and your party already equipped with strong gear.
Should I do side quests before Gortash and Orin?
Yes. The safest route is to clear side content and companion arcs first, because several quests and outcomes can disappear once you move the main story forward.
Is Act 3 harder than the earlier acts?
Yes. Act 3 is harder mainly because it stacks layered objectives, tighter fail states, and more punishing boss designs rather than because every enemy is individually stronger.
What is the most important gear type in Act 3?
Gear that improves survivability, initiative, movement, and concentration tends to matter more than minor damage gains in the city’s toughest encounters.
Can I still finish companion quests after the main bosses?
Sometimes, but not reliably. The safe assumption is that companion quests should be done before you commit to the final Act 3 sequence.
Was this guide helpful?
Rate this guide so we can improve it.
Share your own tip
Found something not in the guide? Submit it below — our editors review every tip before publishing. No account required.