 Baldur's Gate 3
Baldur's Gate 3 Walkthrough Act 2
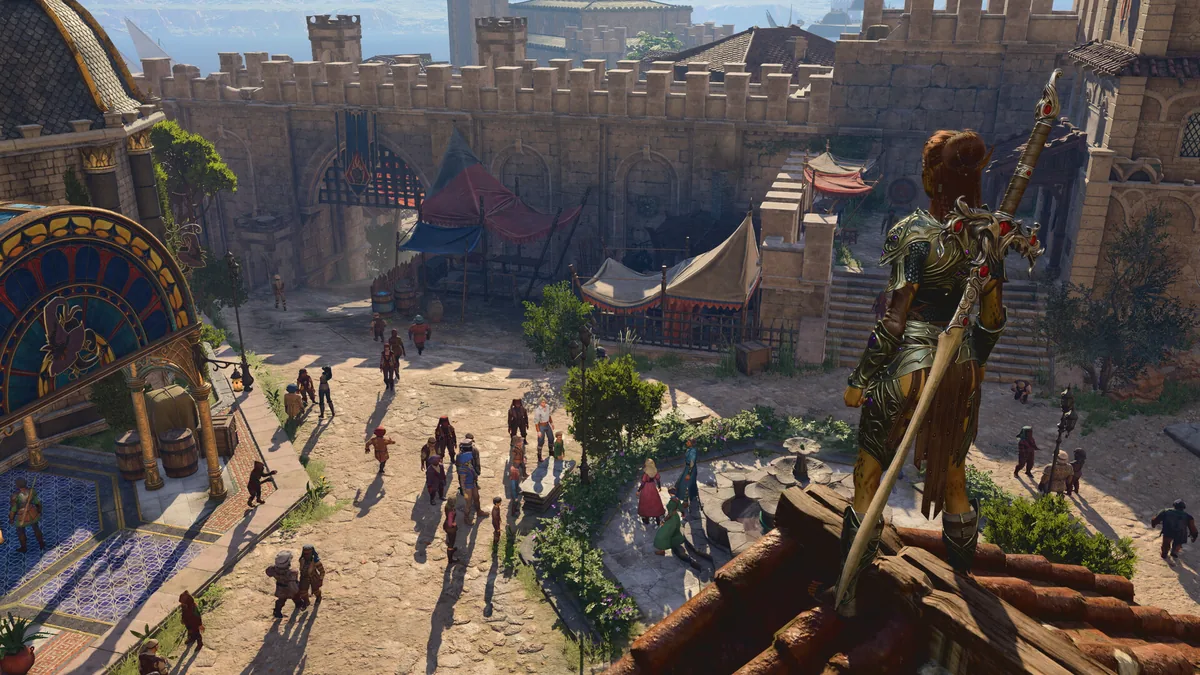
Quick Answer: The Baldur's Gate 3 walkthrough act 2 takes you through the Shadow-Cursed Lands, Moonrise Towers, the Gauntlet of Shar, and key companion quests, with a focus on managing light, timing side content, and preparing for major boss fights.
Prerequisites
Act 2 is much smoother if you enter it prepared, because the Shadow-Cursed Lands punish weak parties, poor resource management, and sloppy quest timing. The game does not demand one exact build, but it does expect you to handle attrition, control crowded fights, and keep one reliable source of protection against the shadow curse.
- Party level: Entering around level 7 is comfortable for most groups, while lower levels can still work if you have strong crowd control, healing, and positioning discipline.
- Equipment: Bring armor and weapons suited to your roles, plus items that help with mobility, darkness, and concentration checks. Examples include the Blood of Lathander, Misty Step sources, and sturdy ranged options for fighting in awkward terrain.
- Party composition: A balanced party works best. Commonly useful roles are one frontline anchor such as Lae'zel or Karlach, one support or healer such as Shadowheart, one utility caster like Gale, and one flexible damage dealer or scout such as Astarion or your custom character.
- Difficulty: Balanced and above reward careful scouting. Tactical and Honour-style runs place extra value on pre-buffing, surprise rounds, and avoiding multi-wave fights without a plan.
- Consumables: Stock up on healing potions, Elixirs, scrolls of escape, and any items that remove or prevent blindness, necrotic pressure, or difficult terrain penalties.
Act 2 is less about raw burst damage than act 1 and more about staying functional across a long series of linked encounters. You can brute-force some battles, but the act really opens up when your party can move through darkness without wasting turns. The two biggest examples are the Shadow-Cursed Lands themselves and the Gauntlet of Shar, both of which punish careless movement and bad timing. If you are unsure whether your team is ready, check whether you can handle fights where visibility is limited, enemies spawn in waves, and you cannot just stand in one place and trade hits.
It also helps to come in with at least one companion story thread ready to advance. Shadowheart gets major act 2 material in the Gauntlet of Shar, Wyll and Karlach can be nudged through important personal beats, and Astarion benefits from careful pacing if you plan to keep his quest moving. If you want deeper companion coverage later, that pairs well with a companion quest guide and a best party builds guide.
Step-by-Step Route
The cleanest route through the baldurs gate 3 walkthrough act 2 is to secure safe passage in the Shadow-Cursed Lands, establish your base at Last Light Inn, complete side content that matters, then push Moonrise Towers and the Gauntlet of Shar before committing to the point of no return. The act is built around momentum. Once you advance certain story beats, some quest states shift, so the order matters.
1. Enter the Shadow-Cursed Lands safely
Your first priority is simply surviving the journey into the region. The Shadow-Cursed Lands are not a normal map; they are a survival space where light and route selection matter. There are two broad ways in, and both can work depending on your earlier choices.
- If you arrive through the Mountain Pass route, you will be forced into a tougher transition but may have already handled some of the Githyanki and creche-related content.
- If you arrive via the Underdark, you can still reach the same region, but the approach changes the pacing of your act 2 setup.
- Once inside, do not wander blindly. Move from source to source of safety and keep a light plan ready before splitting the party.
The first practical goal is to reach a safe hub. That hub is Last Light Inn, which becomes the most important checkpoint in act 2. On the way there, keep at least one character able to maintain protection against the curse. The exact tool can vary, but the principle does not: one error in the dark should not end the run.
2. Secure Last Light Inn and talk to everyone important
Last Light Inn is the act 2 nerve center, and you should treat it as such. Speak to key NPCs, check the refugees, and start every relevant dialogue before rushing off into the wilderness. This is where several quest chains become available, and it is also where a major protective setup can be lost if you are careless.
The most important outcomes here are:
- establishing the inn as your safe zone,
- triggering companion and story progression,
- and protecting the Harpers from avoidable disaster.
The biggest tactical advice is simple: do not sprint away after the first conversation. Explore the inn thoroughly, because several useful quest hooks, vendors, and companion moments live here. If you are planning a full clear, Last Light is the place to lock in your route for the rest of the act.
3. Stabilize the curse and explore the surrounding wilderness
Once the inn is secured, start clearing the nearby zones in a controlled loop. The act is full of optional encounters that look small but feed directly into later rewards, especially gear, experience, and companion progression. This is a good time to handle:
- scattered survivors and lost travelers,
- cursed ambushes,
- hidden loot caches,
- and side paths that connect to Moonrise or Shar-related objectives.
The terrain often matters as much as the enemy. Many fights here are stronger than they first appear because enemies cluster, use darkness, or fight from awkward elevation. A practical approach is to fight from prepared positions, use summons to absorb reaction fire, and avoid charging every member of the party into the same chokepoint.
If your build has ranged pressure, this is where it pays off. Eldritch Blast, longbows, and area spells like Fireball or Spirit Guardians can swing fights where enemies arrive in waves. If you rely on melee, make sure you have movement tools ready so you are not wasting turns walking through shadowed terrain.
4. Handle the major act 2 side quests before the point of no return
Before you commit to the deepest Shadowheart content, clean up the side quest lines that are most likely to change or close. Act 2 is generous, but not infinite. Some quests are easiest before the tower climax, some are safest before the gauntlet climax, and some simply make later battles easier if you clear them early.
Priorities usually include:
- Reuniting or saving key NPCs tied to the refugee conflict,
- Moonrise-linked prison and infiltration content,
- Companion-specific objectives for Shadowheart, Wyll, Astarion, and Karlach,
- and any hidden boss or mini-boss fights you want to farm for loot.
This is also a strong time to complete any remaining merchant visits. Moonrise vendors in particular can offer useful gear and consumables that support the rest of the act. Shop before you lock yourself out of easy access.
5. Infiltrate Moonrise Towers
Moonrise Towers is one of the central anchors of act 2, and it rewards patience more than reckless aggression. You can often learn more by moving carefully through the tower than by charging into combat. Depending on your choices, you may be able to gather information, free prisoners, or set up later fights on your terms.
A smart infiltration flow looks like this:
- talk to the tower’s inhabitants,
- identify hostile and non-hostile spaces,
- search for prisoners and hidden rooms,
- and only then decide how confrontational you want to be.
The prisoners matter because some of them tie into the broader act progression and can unlock extra rewards or alternate outcomes. Even when a fight is inevitable, positioning yourself first makes the battle far easier. The tower has enough enemies and vertical space that careless open combat can snowball fast.
6. Complete the Gauntlet of Shar
The Gauntlet of Shar is the signature dungeon of act 2, and it is the piece most likely to punish a rushed player. It combines puzzles, stealth-like movement, environmental hazards, and one of the biggest companion decisions in the game. The dungeon is also where Shadowheart’s story becomes impossible to ignore.
The core path usually involves:
- solving the trials,
- navigating the platforming and shadow mechanics,
- collecting the required keys or gems,
- and reaching the deepest chambers.
The three main trials are memorable because they ask for different strengths. One is about combat efficiency, another about navigation and hazard awareness, and another about discipline under darkness. You can brute-force some of the challenge with strong characters, but the cleanest route is still to move carefully and read the dungeon’s structure.
If you are looking for a single act 2 rule to remember, it is this: do not assume every door or platform is safe just because it looks important. The gauntlet is built to punish assumptions.
7. Resolve Shadowheart’s major decision
This is the emotional and mechanical climax of act 2. Shadowheart’s story threads culminate here, and the outcome affects both the party dynamic and future story state. The game gives you room to decide, but the decision carries real consequences.
The important part is to arrive prepared:
- keep her alive and focused,
- have dialogue and approval context in mind,
- and do not treat the scene as a throwaway cutscene.
This moment is one of the strongest examples of how Baldur’s Gate 3 blends narrative with gameplay. You are not just choosing a line; you are locking in a major direction for a companion and for the rest of the campaign.
8. Finish the tower finale and move on
Once the gauntlet and major tower beats are done, the act shifts into its closing stretch. You will face some of the hardest combat in the region, and the game begins pushing you toward the next phase of the story. Before you cross that line, make sure you have:
- finished remaining act 2 quests,
- looted important areas,
- spoken to key companions,
- and bought anything you still need.
After that, the act no longer behaves like an open checklist. Treat the final push as a commit point.

You might also like
- Baldur's Gate 3 patch 8 release date: Patch Notes Explained
- baldurs gate 3 how to get lae'zel down: Beginner Guide for New Players
- Baldur's Gate 3 How to Open Gilded Chest: Beginner Guide
- baldurs gate 3 tips and tricks for beginners
- baldurs gate 3 how to get owlbear cub Beginner Guide
Hardest Encounters Explained
The hardest act 2 fights are hard because they combine terrain, waves, and pressure on your action economy, not because they simply have the largest health pools. That means the correct response is usually control and preparation, not just more damage. The three names players most often struggle with are the Ketheric Thorm sequence, the Yurgir encounter in the Gauntlet of Shar, and the Myrkul endgame fight after the tower climax.
| Encounter | Why it is hard | Reliable tactic |
|---|---|---|
| Yurgir | The arena adds positioning pressure, hidden threats, and a fight structure that can spiral if you chase enemies too eagerly. | Use stealth, high ground, and concentrated burst on isolated targets before the whole arena fully engages. |
| Ketheric Thorm | The fight evolves across phases and can punish parties that spend resources too early or fail to control the field. | Save key cooldowns, use summons to absorb pressure, and focus on survivability between phases. |
| Myrkul | The end fight is brutal because the boss environment is restrictive and the pressure on healing, control, and target priority is relentless. | Keep distance where possible, break up the party’s roles, and prioritize adds or support pieces before tunneling the boss. |
Yurgir is a classic example of a fight that looks optional but can still go wrong in a hurry. The best approach is to enter with stealth or control spells ready, then strip away his support before the fight fully gets out of hand. If you charge in and let the room dictate the pace, the action economy quickly turns against you. Spells like Hold Person, Sleep when applicable, and any strong opening burst can change the shape of the encounter immediately.
Ketheric Thorm is different. He is not only about raw damage; he is about surviving the structure of the sequence. You are dealing with a major act antagonist whose fight can shift in tempo, and that means you need to think about resource allocation across turns, not just in one spike. A lot of players fail here because they blow their best slots on the earlier half of the sequence and then enter the real danger underprepared. The fix is to go in with a plan for healing, summons, and reaction spells.
Myrkul is the encounter that punishes greed. It is tempting to focus entirely on the boss and hope your damage wins quickly, but the arena and support pressure usually make that unreliable. You need a disciplined target order and enough defensive tools to prevent collapse. If your party has summons, use them. If you have knockback, fear, or summon-baiting options, this is a prime place for them. The fight becomes much more manageable when you treat it as a control puzzle first and a damage race second.
Rewards and Loot
Act 2 rewards you with some of the most useful gear, story unlocks, and companion progress in the game, and many of the best returns are tied to route discipline. The loot is not just about raw stats; it also includes access, quest resolution, and future momentum.
| Reward type | Examples | Why it matters |
|---|---|---|
| Powerful weapons | Moonlight Glaive, Blood of Lathander if carried in from earlier content | These weapons can carry a character through the act and beyond because they provide reliable combat value, not niche bonuses. |
| Defensive gear | Shadow-appropriate armor, cloaks, and accessories from tower and inn content | These items help with survivability in fights where the environment is part of the threat. |
| Companion unlocks | Shadowheart’s major story resolution, plus related approval and dialogue changes | Companion outcomes here affect future scenes, combat readiness, and story branching. |
| Experience and progression | Large XP gains from main quest beats, boss fights, and hidden side objectives | Level progression in act 2 often comes from doing more than just the critical path. |
| Vendor access | Moonrise and Last Light merchants | Shops let you convert gold into the specific consumables and gear your party still lacks. |
The best gear in act 2 is often the gear that solves a problem rather than simply inflating damage. Blood of Lathander is the obvious example if you already secured it earlier, because it remains excellent in undead-heavy or shadow-heavy conditions. On the other hand, something like Moonlight Glaive or a strong tower reward can be just as valuable if it fits the character holding it and keeps your action economy clean.
Quest rewards are just as important as equipment rewards. Freeing prisoners, protecting the right NPCs, and completing companion scenes can open future options that are much more valuable than one more weapon roll. Act 2 is generous with major story XP, so players who explore carefully usually end the act in a much stronger position than players who rush.
Do not ignore consumable rewards either. Scrolls, elixirs, and special arrows become especially important here because several fights favor precise answers more than raw heroics. A well-timed scroll can do the work of an entire round.
Missables
Act 2 has several missables that can be permanently lost if you advance the wrong quest too early or skip a location entirely. The biggest danger is not one hidden chest; it is losing whole quest branches, NPC outcomes, or companion scenes by moving the main story forward before you finish the surrounding work.
- Last Light Inn outcomes: If you let the situation there collapse or move too far ahead, you can lose access to important NPC interactions, side quests, and safe-hub advantages.
- Moonrise prisoners: If you ignore the tower too long, prisoners and related quest outcomes can change or disappear, cutting off rewards and follow-up content.
- Companion quest beats: Shadowheart, Astarion, and others have act 2 scenes that can be missed if you rush the main path or skip dialogue after major milestones.
- Tower and gauntlet loot: Some unique items are tied to specific rooms, encounters, or decision points and are easy to miss if you only chase the objective marker.
- Side encounters in the cursed lands: Several smaller fights and rescues vanish once you commit to the final act 2 sequence.
Players usually miss these because they assume the act behaves like a linear dungeon. It does not. Act 2 is more like a map of interlocking timers. Once you understand that, the safest habit is to clear the region before triggering the deepest dungeon resolutions. The point of no return is especially important around the Gauntlet of Shar and the tower finale, so use a manual save before major story decisions and before entering clearly dramatic transition spaces.
A practical example: if you push Shadowheart’s gauntlet content too quickly, you may skip companion conversations or tower-side cleanup that would have been available earlier. Another example: if you blitz the tower finale before rescuing prisoners or finishing key dialogues, you can lock yourself out of rewards and alter later story states. A third example is ignoring vendor access, then realizing you missed the best chance to stock up before the hardest fights of the act.
Common Mistakes
Act 2 punishes habits that worked fine in act 1, and most of the mistakes are about tempo, not raw character power. Here are the ones that show up most often.
- Rushing into the Shadow-Cursed Lands without a light plan: Players expect the area to behave like a normal wilderness zone. The fix is to keep protection ready and move from safe point to safe point.
- Ignoring Last Light Inn before exploring: People rush toward objectives and miss dialogue, vendors, and quest triggers. The fix is to fully clear the hub first.
- Burning all spell slots in the first tough fight: Act 2 is a long haul with multiple major battles. The fix is to hold some resources in reserve for tower and gauntlet sequences.
- Treating Moonrise as a pure combat zone too early: Players often fight before gathering information or rescuing key NPCs. The fix is to infiltrate, inspect, and only then commit.
- Underestimating the Gauntlet of Shar: The dungeon looks like a side area, but it is a story gate. The fix is to prepare for puzzle movement, shadow hazards, and a companion-defining decision.
- Skipping vendor checks: Many players forget that act 2 shops can provide the exact scrolls or elixirs they need. The fix is to buy consumables before the finale.
- Advancing the story without manual saves: One bad trigger can lock out content. The fix is to save before major dialogue or realm-transition points.
The same pattern causes most failures: players think they are still in open-ended act 1 exploration mode. Act 2 is less forgiving. Once you understand which areas are stable and which are time-sensitive, the route becomes much cleaner.
Pro Tips
The strongest act 2 play is not flashy. It is disciplined, and it leans on timing, positioning, and pre-buffing in ways that matter more than raw damage rolls.
Tip 1. Keep one character dedicated to safe movement
A single party member with mobility tools like Misty Step, strong jump options, or reliable ranged utility can rescue runs when the shadow curse or terrain breaks your formation. Use that character to scout, trigger interactions, and relight the route before the others commit.
Tip 2. Turn summons into tactical insurance
Summons such as Animate Dead, Spiritual Weapon, and other disposable allies are excellent in act 2 because they soak pressure, bait reactions, and force enemies to split attention. They are especially strong in tower and boss-adjacent fights where the battlefield can become crowded fast.
Tip 3. Save crowd control for enemy bursts, not opener spam
Spells like Hold Person, Hypnotic Pattern, and Darkness work best when enemy momentum is already starting to form. Fire them when the encounter begins to spiral, not just because you have the slot. That is how you turn a messy turn order back in your favor.
Tip 4. Use the environment as a weapon
High ground, bottlenecks, doors, and ledges matter more in act 2 than in many earlier fights. A good example is forcing enemies into narrow access points, then hitting them with area damage or ranged focus fire. Another is using elevation so that your backline can act without eating unnecessary opportunity pressure.
Tip 5. Treat companion approval moments as combat prep
Dialogue choices in act 2 can shape approval, and approval can shape how useful companions feel in the long run. Shadowheart’s route is the obvious case, but Astarion, Wyll, and Karlach all benefit from a player who keeps their story threads moving instead of rushing past them.
Tip 6. Keep one save before every major story gate
The game gives you enough warning if you pay attention. Use that warning. Save before entering major chambers in the Gauntlet of Shar, before critical tower decisions, and before any scene that obviously feels like a climax. That habit protects both rewards and story outcomes.
FAQ
How long is Act 2 in Baldur's Gate 3?
It varies a lot based on how much side content you do, but Act 2 is substantial and can easily become one of the longest stretches of the game if you clear the cursed lands thoroughly.
Should I do Moonrise Towers or the Gauntlet of Shar first?
In practice, you should usually gather information, complete side content, and prepare carefully before fully committing to either climax, because both locations can affect the other and because the gauntlet in particular can lock story progression.
What level should I be before Act 2?
A comfortable entry point is around level 7, though strong builds and careful play can function lower. The key is not just level, but whether your party can survive darkness, control crowds, and sustain through multiple encounters.
Can I miss Shadowheart’s big decision?
Yes. If you rush the act or skip the relevant gauntlet content, you can lose the setup for her major story resolution. Talk to her often and do not treat the dungeon like optional filler.
Is Last Light Inn important?
Absolutely. It is one of the most important hubs in the act for quests, vendors, safety, and story progression. Losing it or ignoring it makes the rest of act 2 much harder to navigate.
Related Guides
- Baldur's Gate 3 Act 1 Walkthrough
- Baldur's Gate 3 Act 3 Walkthrough
- Best Baldur's Gate 3 Party Builds
- Shadowheart Companion Guide
- Moonrise Towers Guide
- Gauntlet of Shar Guide
- Best Weapons in Baldur's Gate 3
- How to Beat Ketheric Thorm
Sources
- https://store.steampowered.com/app/1086940/
- https://en.wikipedia.org/wiki/Baldur's_Gate_(video_game)
See also
- baldurs gate 3 how to get to the underdark: Beginner Guide
- Baldur's Gate 3 guide act 1 Walkthrough
- Baldur’s Gate 3: how to baldurs gate 3 cross play for beginners
- baldurs gate 3 beginner class reddit: Beginner Guide for New Players
- Baldur’s Gate 3 baldurs gate 3 how to save mayrina Beginner Guide
- baldur's gate 3 vs elden ring: which should you play?
- baldurs gate 3 how to recruit minthara: Beginner Guide for New Players
- baldurs gate 3 how to free shadowheart: Beginner Guide
- Baldur’s Gate 3 beginner tips reddit: A Complete Beginner Guide
- baldurs gate 3 best class for beginners: A Beginner Guide to Starting Strong
Screenshots



Reviewed by
BG3 Hub Editorial
Expertise: Editorial team behind BG3 Hub. Content is compiled from official patch notes, community wikis, and playthrough notes, then reviewed and updated on schedule.
Sources
Related Guides
%27/><stop offset=%271%27 stop-color=%27hsl(80,50%,18%)%27/></linearGradient></defs><rect width=%27460%27 height=%27215%27 fill=%27url(%23g)%27/><text x=%27230%27 y=%27115%27 text-anchor=%27middle%27 font-family=%27sans-serif%27 font-size=%2724%27 font-weight=%27700%27 fill=%27rgba(255,255,255,0.85)%27>App 1086940</text><text x=%27230%27 y=%27142%27 text-anchor=%27middle%27 font-family=%27sans-serif%27 font-size=%2711%27 fill=%27rgba(255,255,255,0.6)%27>no image yet</text></svg>)
🔥 Popular Guides
How to Cool Off Karlach in Baldur's Gate 3 — Infernal Engine Fix
Cool off Karlach in Baldur's Gate 3: fix her infernal engine overheating, romance approval gates, Act 1–3 steps, and what happens if you ignore it.

Best Shadowheart Build BG3 — Free Her, Trickery Cleric & Romance
Free Shadowheart on the Nautiloid, then run the best Trickery Cleric build. Pod rescue steps, approval tips, romance gates, and Act 1–3 skill picks.
BG3 Best Baldur's Gate 3 Characters Tier List
Rank the best Baldur's Gate 3 characters with S/A/B tiers, matchup callouts, methodology, and patch notes for smarter party picks.
Baldur's Gate 3 elden ring let me solo her build
Solo BG3 build guide for a high-survivability, first-turn-dominant playstyle with stats, gear, counters, and budget options.
📋 Patch Notes & Updates
🛠️ Popular Tools
Frequently Asked Questions
Quick answers from the guide · click a question to expand.
How long is Act 2 in Baldur's Gate 3?
It varies a lot based on how much side content you do, but Act 2 is substantial and can easily become one of the longest stretches of the game if you clear the cursed lands thoroughly.
Should I do Moonrise Towers or the Gauntlet of Shar first?
In practice, you should usually gather information, complete side content, and prepare carefully before fully committing to either climax, because both locations can affect the other and because the gauntlet in particular can lock story progression.
What level should I be before Act 2?
A comfortable entry point is around level 7, though strong builds and careful play can function lower. The key is not just level, but whether your party can survive darkness, control crowds, and sustain through multiple encounters.
Can I miss Shadowheart’s big decision?
Yes. If you rush the act or skip the relevant gauntlet content, you can lose the setup for her major story resolution. Talk to her often and do not treat the dungeon like optional filler.
Is Last Light Inn important?
Absolutely. It is one of the most important hubs in the act for quests, vendors, safety, and story progression. Losing it or ignoring it makes the rest of act 2 much harder to navigate.
Was this guide helpful?
Rate this guide so we can improve it.
Share your own tip
Found something not in the guide? Submit it below — our editors review every tip before publishing. No account required.